Cookery Maven Blog

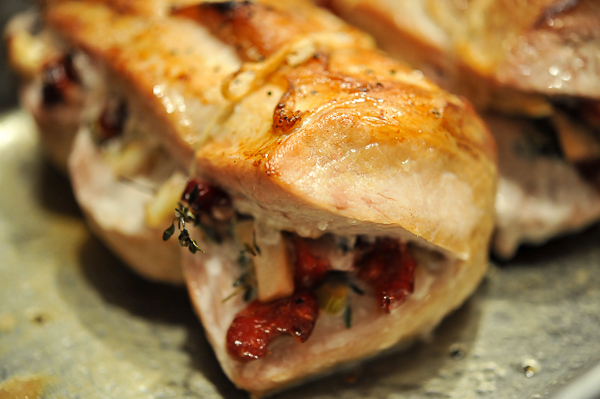
Pork Loin Stuffed With Fruit & Herbs

I'm starting to see a trend in my dinner choices— a stuffing trend. There's something about shorter days, falling leaves and fires in the hearth that makes me want to start chopping all sorts of good things, stuffing and tying up delicious packages of beef, squashes and pork. While I miss the fresh vegetables and herbs of summer, I am more of a fall/winter kind of cook— braises, roasted root vegetables and soups are my kind of thing.

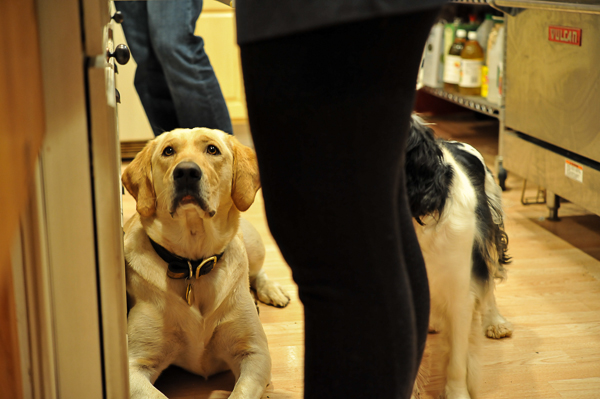
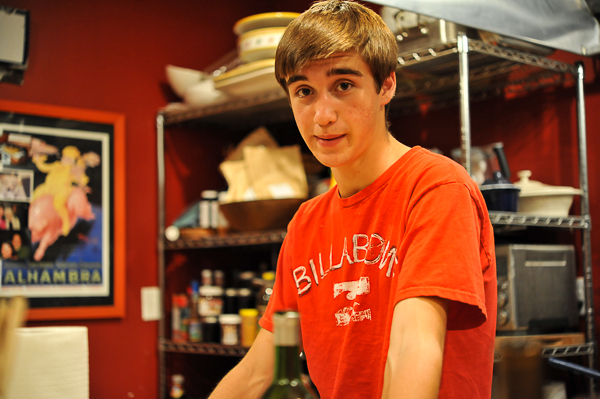
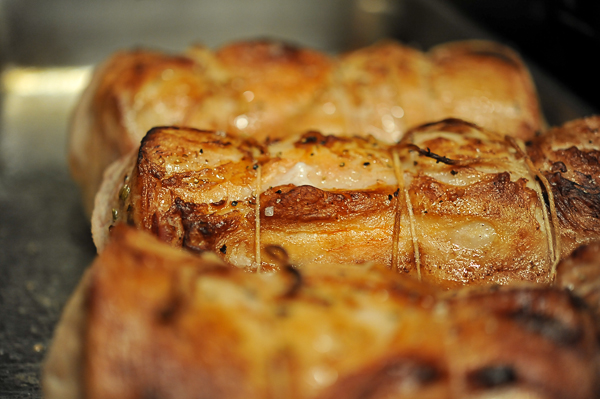
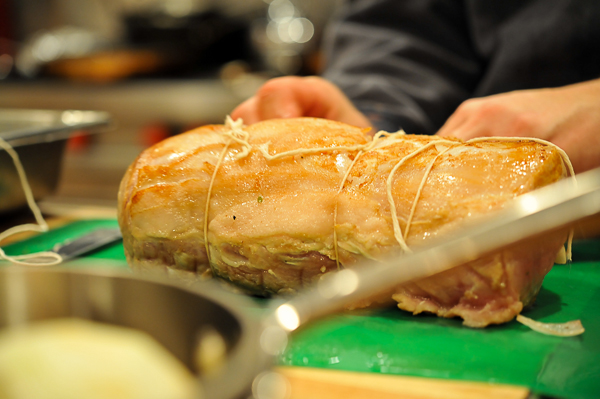
As I was busy tying my roast the wrong way (see the right way here), Julie took the camera and captured a few behind the scenes photos. I have a rule (not particularly well enforced) that kids, dogs and husbands need to stay on  the other side of the island, away from the stove and me. I tend to get distracted with talking, drinking wine or making dinner and don't need to add watching out so I don't burn, trip over or hit with a pan any beloved members of my family. As you can see, no one listened and I have to admit, I love having the boys (canine and human) in my space. As for tying the roast, I have terrible eye/hand coordination and hitch knots (or any kind of knot except the one I so artfully used on this roast) are way above my skill level.

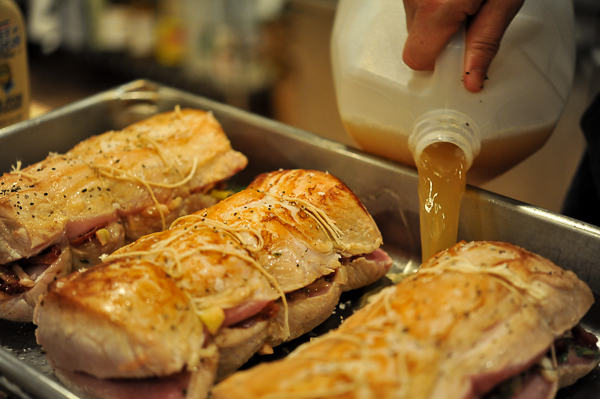
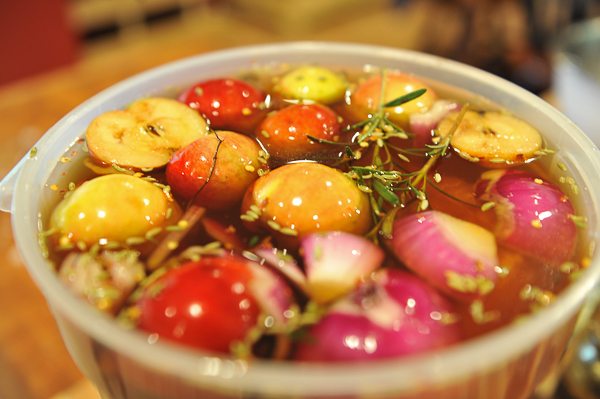
Center cut pork loin is a lean piece of meat and benefits greatly from a flavorful brine and some juice, broth or wine in the roasting pan while it's cooking. I used a brine with apples, maple syrup and apple cider because it complemented the stuffing beautifully. It was a good start to a fall and winter's worth of stuffed meals.

Pork Loin Stuffed With Fruit, Herbs & Onion

Brine 6 cups water 2 cups apple cider 2/3 cups kosher salt 1/2 cup maple syrup 3 apples, cut in half 2 onions, peeled and quartered 6 garlic cloves 3 branches of fresh rosemary 6 - 8 sprigs of fresh thyme 2 bay leaves 3 tbsp fennel seeds 2 tsp whole black peppercorns

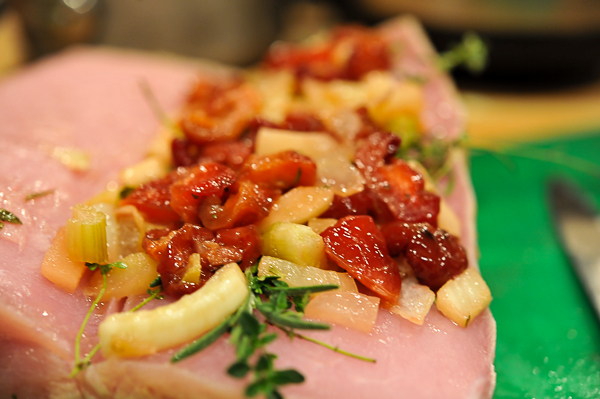
Pork Loin and Stuffing Two 3 -4 pound center cut pork loin, butterflied 1 cup apple cider 1/2 cup red wine 2 tbsp olive oil 2 tbsp butter 2 yellow onions, chopped 2 stalks of celery, chopped 3/4 cup dried plums, chopped 1 pear, peeled and chopped 1 apple, peeled and chopped (I used Honeycrisp) 2 branches of fresh rosemary 4 - 6 sprigs of fresh thyme salt and pepper to taste

Prepare Brine In a large stockpot, add the water and salt. Heat over high heat until the salt has completely melted and cool completely. Add the remaining ingredients to a large container, mix to combine and add the pork loins. Cover and refrigerate for no more than 12 hours.

Prepare Pork Loin and Stuffing Preheat oven to 325 degrees.

In a small saucepan over medium heat, add the wine and dried plums, turn off the heat and let sit for about 10 minutes. In a large sauté pan, melt butter over medium high heat, add onions and celery and sauté until softened and onions are golden (about 10 minutes). Add apples, pears, plums and wine. Saute for 5 minutes over medium heat and set aside.

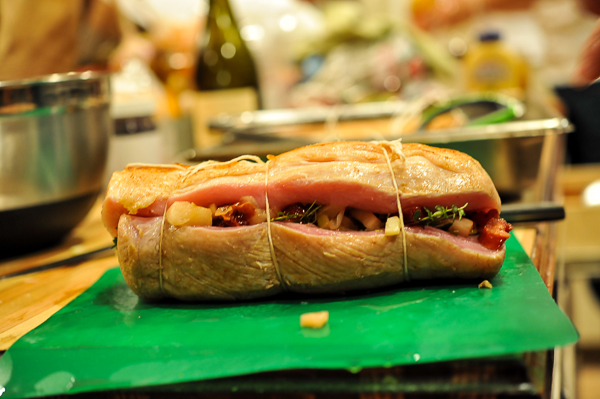
Heat a large sauté pan with the olive oil over medium high heat. Add the pork loin (seasoned with salt and pepper) and brown on all sides. Put the stuffing down the middle of the butterflied and browned pork loin and lay down one branch of rosemary and 2 - 3 sprigs of thyme over the stuffing. Tie the roast, taking care to keep all the stuffing inside (it;s okay of a little falls out). Place in a roasting pan, add the apple cider and place in oven. Baste the roast every 15 minutes with the pan juices 30 minutes after you place it in the oven. Roast for about an hour or until the roast reaches an internal temperature of 145 degrees. Remove from over, cover with foil and let rest for 10 minutes. Slice and serve immediately.
Chipotle & Blueberry Chutney

One of my favorite flavor combinations is a little sweet and a little heat. I am particularly fond of chipotle peppers en adobo—the smoky notes hit your palate first and finishes with a mellow heat. Back in the good old days of summer, when there were pounds and pounds of blueberries in the freezer, I thought blueberries and chipotles would make a sweet chutney with a little smoky heat. Since I was feeling like quite the capable little canner— I steamed full speed ahead with my blueberry chipotle chutney. It turned just as I hoped— layers of flavor with a slow burn on the finish.

Chipotle & Blueberry Chutney

5 cups fresh blueberries 2 medium apples, peeled and chopped 1 medium red onion, chopped 1 tbsp ginger, peeled and minced 1 tbsp garlic, minced 3 tbsp orange rind, minced 1 tbsp yellow or brown mustard seeds 1/2 cup apple cider vinegar 1/2 cup honey (more to taste depending on how sweet the blueberries are) 2 - 3 chipotle chiles in adobo, chopped 1/2 tsp kosher salt

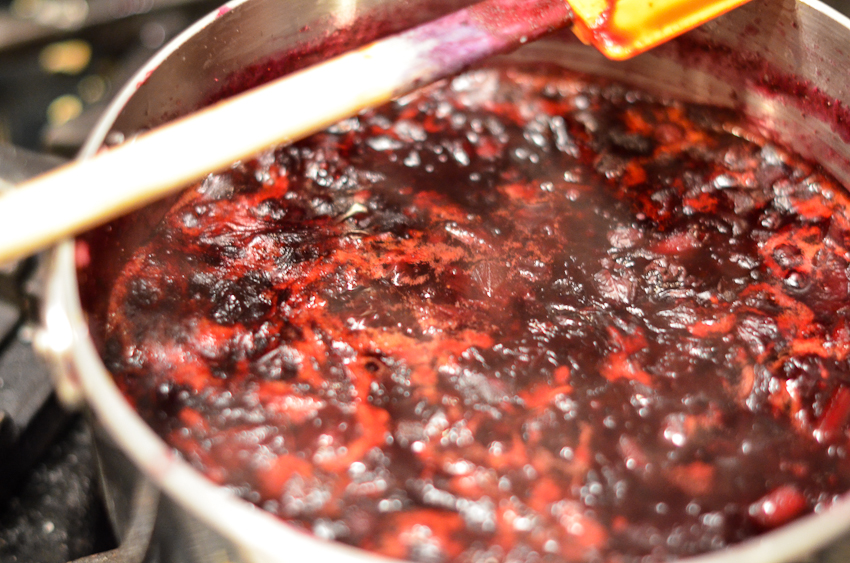
Add all ingredients to a large pot and bring to a boil. Reduce the heat to low and simmer, stirring occasionally, for 30 – 45 minutes, until mixture is thick. At this point, you can cool completely and it will keep in the refrigerator, covered, for up to a week.

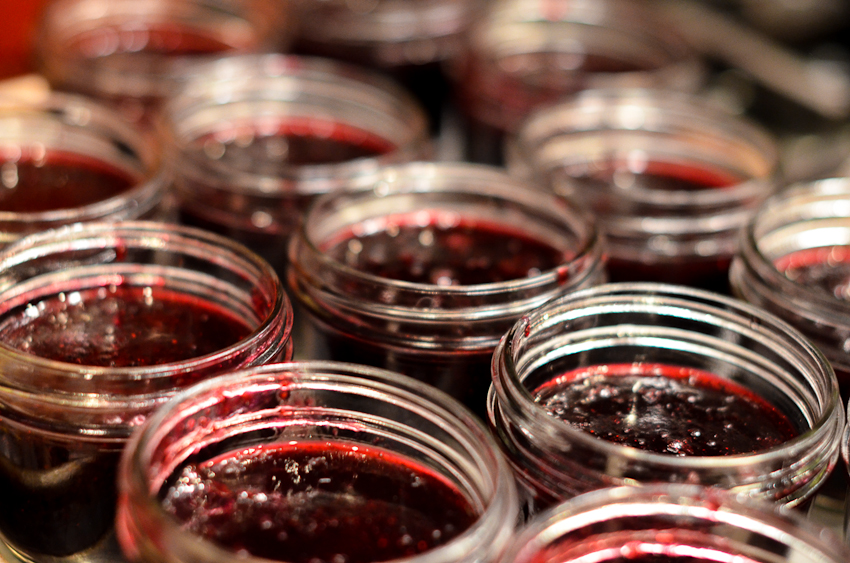
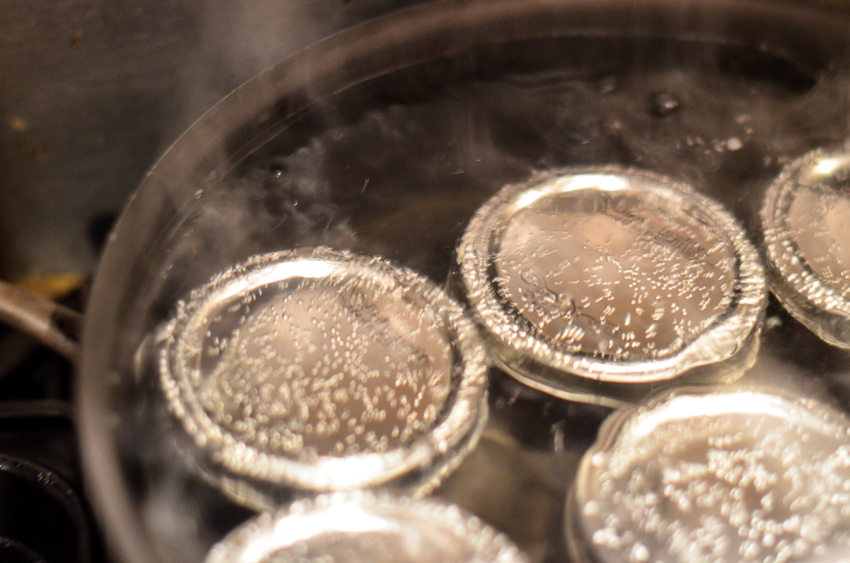
You can also ladle hot chutney into hot sterilized jars, leaving 1/4-inch head space. Wipe rims of the jars, cover with lids, and screw bands on until just barely tight. Place jars on rack in pot and cover completely with water. Cover pot and bring to a boil over high heat. Boil for 10 minutes. Turn off heat, uncover pot, and allow jars to rest in water for five minutes. Remove jars from pot and allow them to rest undisturbed on countertop for six hours or overnight.

Curried Squash Soup With Caramelized Pears, Apples & Onions

Remember that big, gorgeous hubbard squash I stuffed? Huge, previously stuffed, hubbards result in a lot of leftovers and I was a little unsure what to do with 20 cups of cooked squash. Soup seemed like a reasonable solution. I've eaten squash soup before and have always found it way too sweet for my tastes. I wanted a savory version with just a hint of sweetness. Curry immediately came to mind and I set out to make a curried squash soup with caramelized apples, pears and onions. This recipe makes a ton of soup (I had a ton of squash to deal with) but you can cut in half or freeze it for a quick and easy dinner down the road.

Curried Winter Squash Soup with Caramelized Apples, Pears & Onions

20 cups cooked winter squash 18 cups chicken or vegetable broth 3 apples, peeled and sliced 3 pears, peeled and sliced 4 onions, peeled and sliced 3 garlic cloves, minced 1/2 cup apple cider 3 cups coconut milk 5 tbsp butter 2 tbsp olive oil 1/4 cup curry powder (more to taste) salt and pepper to taste

Prepare Soup Heat 2 tbsp of butter in a large sauté pan over medium heat, add apples, pears and apple cider. Reduce heat to medium low and sauté until the apples and pears are soft and caramelized. Heat 3 tbsp of butter in another large sauté pan over medium heat and add 3 onions. Reduce heat to medium low and sauté until the onions are caramelized. Set the cooked apples, pears and onions aside.

In a medium sauté pan, add 2 tbsp of olive oil, the remaining onion, garlic and curry powder. Heat over medium heat until onions are softened and the curry powder is fragrant. Be very careful not to burn the curry powder, stir it frequently. Add the curried onions and garlic to the apple, pear and onion mixture.

Heat the cooked squash and chicken broth in a large stockpot. Once it's heated thoroughly, add the onions, apples and pears and simmer for 30 minutes. Very carefully add the soup in batches to a food processor or blender and process until smooth. Add the pureed soup to stockpot and add coconut milk. Season with salt, pepper and additional curry powder (if needed), heat thoroughly and serve.

I served my soup gratinéed style with Gruyère cheese and thinly sliced pieces of garlic buttered crostini.

Persimmon Bread Repurposed As Dog Treats

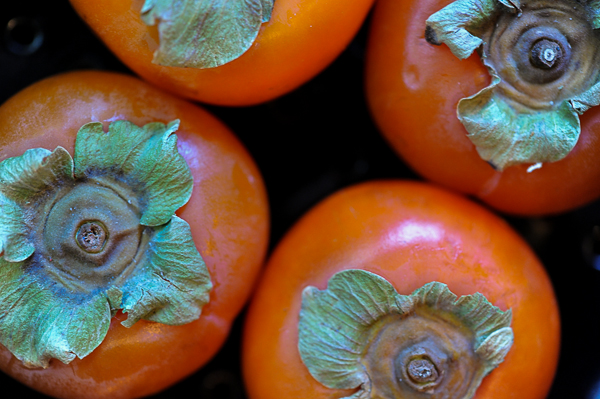
It was a good idea gone awry. I bought 4 persimmons at the grocery store because that deep orange color was a siren's song and I couldn't resist. I knew there were other orange fruits out there but there was something about that particular orange that grabbed me. I had one small problem— I had never cooked, cut into or eaten a persimmon. They sat on my counter for four days until I googled 'persimmon recipes' and found this James Beard recipe on David Lebovtiz's blog (recipe here). However, I made one game changing misstep— I forgot the baking soda.

I had hoped to impress two women with my persimmon bread— my Mom and Paula Deen. My Mom was coming up for the weekend and I thought a slice of a slighty exotic quick bread with her afternoon tea would be a lovely. As for Paula, I had planned to submit my blog as a contestant in her Deen Team blogger contest; as proof positive a woman from the northernmost (almost) tip of Wisconsin knew what to do with Southern fruit like a persimmon. Well, onto plan b, as in biscotti. Yet another game changing step— I forgot about the 'biscotti' in the oven and left to go to a six course dinner and wine tasting.

I got home at 10:30, walked into the kitchen and thought, 'gee, it smells so nice in here'. That lovely thought was quickly followed by, 'oh my god, I forgot the biscotti (aka quick bread gone awry) in the oven'. At that point, I started to reconsider my choice of blog post for Paula. Maybe I should showcase my low country shrimp boil, my love of butter, my nicoise salad in a jar on Long Island or the night I met Emmylou? Then I looked down at my feet, saw Seamus and thought, 'dog biscuits' and that was that. If Paula didn't like it, I knew four dogs who would be thrilled.

I owned a restaurant for four years and there is a common thread among people who cook for others. We know that food is so much more than sustenance— it's about nurturing, ritual, community and a pause in an otherwise noisy life. I moved to Bayfield five years ago to re-open Good Thyme Restaurant and I learned so much along the way. I learned living near one of the world's largest bodies of water is a blessing, community provides precious structure to my daily life, knowing where your food comes from is more important now than ever before and watching my kids set down roots in a place I hold dear means the world to me. As Gabrielle Hamilton said, in Bread, Bones & Butter, 'And that, just like that, is how a whole life can start'. My whole life takes place in a town of 490 people and the depth and breadth of every day's cadence is astounding. Hopefully, Paula will agree.

Will's Beefy Birthday Dinner

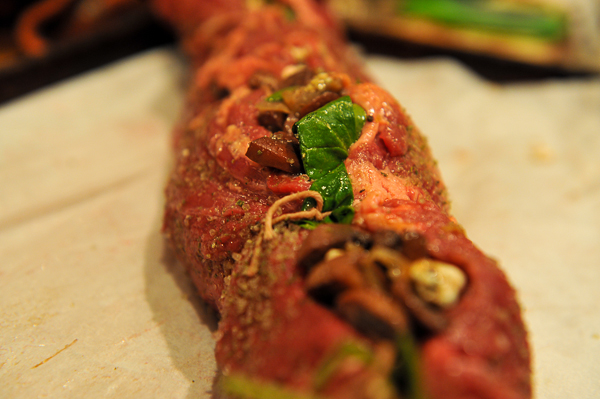
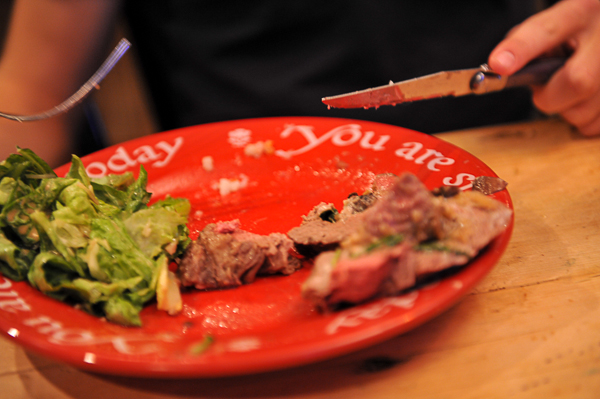
Will wanted stuffed tenderloin for his birthday dinner and I was happy to oblige. Stuffed tenderloin is easy to put together, can be made ahead of time and is out of this world delicious. It's more of an idea than a recipe— it changes based on what I have on hand and what sounds good. This birthday version had sautéed mushrooms, caramelized onions, gorgonzola, spinach and a sherry glaze. I butterflied the tenderloin, stuffed it, tied it and liberally seasoned it with my herb salt and pepper. Roast it in a 300 degree oven for about 1 1/2 hours or until it reaches an internal temperature of 130 degrees. Let it rest for about 10 to 15 minutes, untie the beefy bundle and slice away.

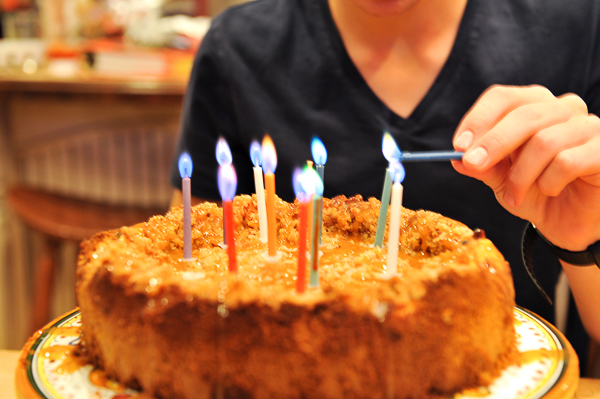
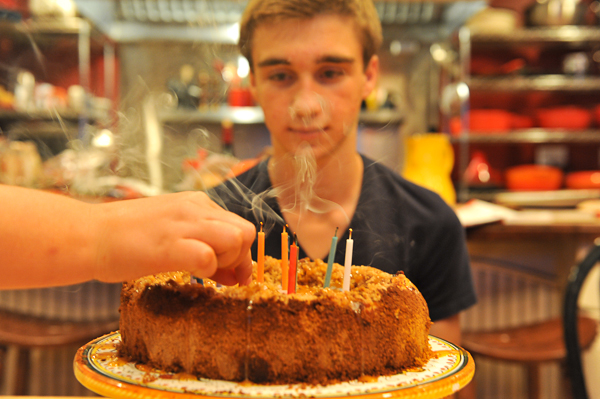
Will and I discussed his birthday cake choice, my borderline baking skills and the fact he wanted something with apples. I remembered an apple cheesecake I used to make years ago and I had just re-purchased the cookbook that had the recipe (Just A Matter Of Thyme by Roxie Kelley). It was the perfect birthday cake for Will— a little crunchy and a little sweet.

Where should I start my Will story? From the beginning when he was a blond-haired, smiling boy who loved Thomas the Tank Engine and Legos? When riding the trolley at Lake Harriet was the highlight of his summer? When he crowned himself Nana's favorite because he had colic? When he assumed the Dougherty dog wrangler role and became George's best pal? Will is a bright, inquisitive, tender-hearted and wry young man.

It was one of my greatest gifts when he discovered his love of photography— the time we spend on photo safaris, discussing technique or having Will patiently explain white balance or spot metering (again) are some of my most treasured moments with him. I love that he still takes the dogs out with me, processes life with a mixture of wonder and skepticism, discusses esoteric topics like String Theory with confidence, reads the New Yorker and watches nearly every Discovery show ever made. Watching him grow into the man he will become gives me joy beyond measure.

Apple Strudel Cheese Pie (From Just a Matter of Thyme by Roxie Kelly)

Crust 2 cups graham cracker crumbs 1/2 cup melted butter 1/3 cup sugar

Pie 16 ounces cream cheese, softened 1/2 cup sugar 2 eggs 1 tsp vanilla 4 - 5 tart apples, peeled and sliced (toss apples in 1 tsp cinnamon and 1/4 cup sugar)

Topping 5 tbsp brown sugar 2 tbsp flour 2 tbsp butter, melted and cooled 1/2 tsp cinnamon

Prepare Crust Combine the graham crackers, butter and sugar and press into a 9 inch spring form pan. Bake in a 400 degree oven for 10 minutes. Let cool completely before filling.

Prepare Topping Combine brown sugar, flour, butter and cinnamon in a medium bowl.

Prepare Pie Preheat the oven to 450 degrees. Blend the cream cheese, sugar, eggs and vanilla until smooth. Pour into the spring form pan. Top with the apple slices in a spiral pattern and then sprinkle with the topping. Bake at 450 degrees for 10 minutes and then reduce oven temperature to 350 degrees and continue baking for an additional 30 minutes or until set. Chill for at least 2 hours before serving. 

Indian Meatballs & Curried Cauliflower

2012 will be the year of the meatball for the Doughertys and it started off with a bang. I saw 2 packages of ground lamb at the IGA (not an everyday occurrence up here) and I knew it was time to make a batch of Indian meatballs. Since I had never made a meatball in my life, I had some research in front of me. There are a lot of opinions about the 'perfect' meatball out there—everything from the meat ratio, kind of cheese, techniques for mixing and forming, ricotta or breadcrumbs....the list is endless. I knew I wanted my meatballs to have enough substance to hold together when fried but also have a meltingly tender texture. I forged ahead and cobbled a recipe and technique together from the 400 (give or take 350) websites I visited.

I had eaten koftas (the proper term for Indian meatballs) in restaurants before and knew a curry/tikki masala would be the perfect sauce for my little spherical bites of love. I needed a vegetable and the head of cauliflower in the fridge would be a tasty partner for my meatball masterpiece— curried cauliflower is super easy to make and is one of my favorite sides for an Indian meal. Naan would have been the pièce de résistance but I will have to save that learning curve for another day.

Curried Indian Meatballs

Meatballs 1 pound of ground beef chuck 1 pound of ground pork 1 pound of ground lamb 3/4 cup french bread crumbs 3/4 cup Parmesan cheese, grated 6 tbsp tamarind pulp 3 cloves garlic, finely minced 1 inch piece of ginger, peeled and finely minced 3 tbsp dried oregano 1 1/2 tsp red pepper flakes 1 tbsp fenugreek 3 tsp kosher salt 3 eggs, beaten 1/3 cup cilantro, chopped 2 tbsp vegetable oil

Sauce 2 tbsp vegetable oil 1 onion, minced 2 tbsp garlic, chopped 1 jalapeño, finely minced 2 bay leaves 1 tbsp dried oregano 3 1/2 tbsp curry powder salt and pepper, to taste 2 tbsp tomato paste 42 ounces of canned chopped tomatoes in purée 1 cup red wine

Make The Meatballs Combine the ground meat, bread crumbs, tamarind pulp, oregano, fenugreek, red pepper flakes, ginger, garlic, eggs, cilantro and salt and mic thoroughly. Don't get too aggressive with the mixture, mix with you hands until just combined— this will ensure you have a pillowly, tender texture. Form the mixture into 2 inch meatballs and set aside. Heat the oil in a large non stick sauté pan over medium high heat. Fry the meatballs in all sides until browned and then reduce the heat to low and continue to cook until cooked thorough. Keep the meatballs warm.

Make The Sauce In the sauté pan you fried the meatballs, sauté the onion, garlic and jalapeño until softened. Add the bay leaves, oregano, curry powder, salt and pepper and sauté for about 30 seconds. Add the tomatoes, tomato paste and red wine and simmer for about 20 minutes. Stir in cilantro and add the meatballs to the sauce. Serve with jasmine rice. 

Curried Cauliflower & Sweet Potatoes

2 tbsp vegetable oil 1 onion, chopped 1 tbsp fresh ginger, grated 1 tbsp cumin seeds 1 tsp turmeric 1 tsp salt 1/2 cup currants 1 cup chopped tomatoes (I used canned tomatoes in purée) 1 cup coconut milk 2 sweet potatoes, peeled and cut into 1 inch chunks 1 head of cauliflower, cut into bite size pieces 1/3 cup cilantro, chopped

Place the oil in a large sauté pan and heat over medium high heat. Add the onion and ginger and cook until softened, about 5 minutes. Stir in the cumin seeds, turmeric and salt and cook for about 30 seconds. Add the sweet potatoes, tomatoes and currants and cook until tender, about 12 - 15 minutes. Add the cauliflower and stir to combine. Cover the pan and cook for 5 - 8 minutes. Garnish with cilantro and serve immediately. 

Hubbard Squash Love

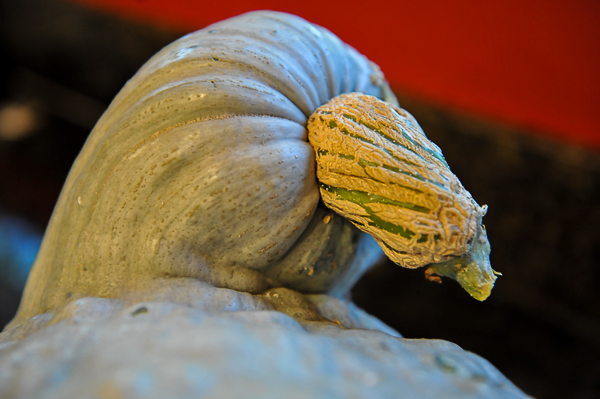
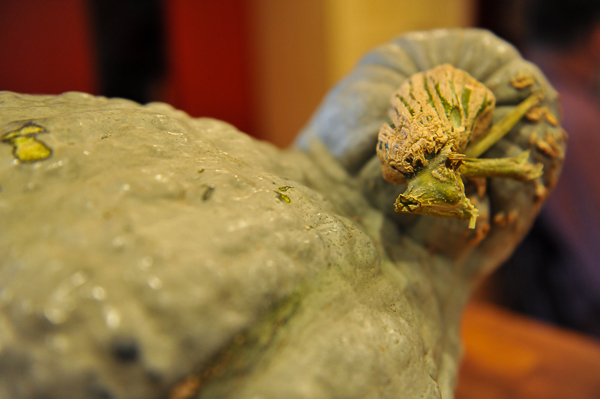
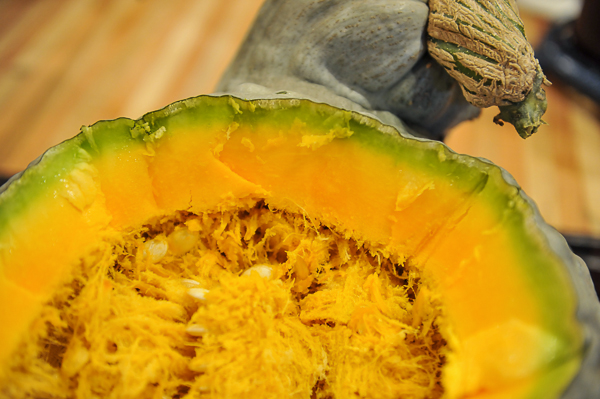
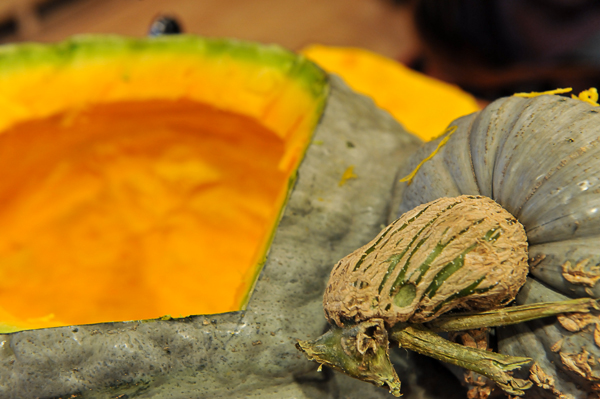
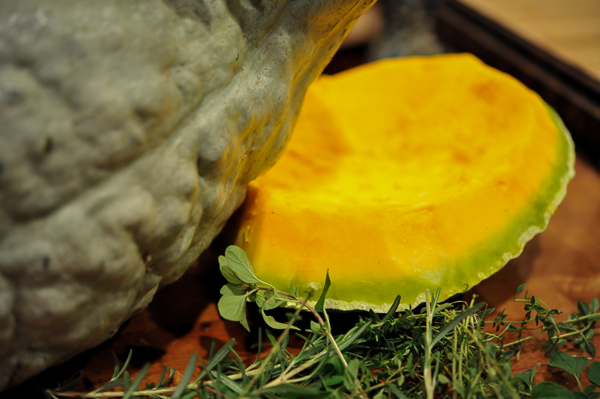
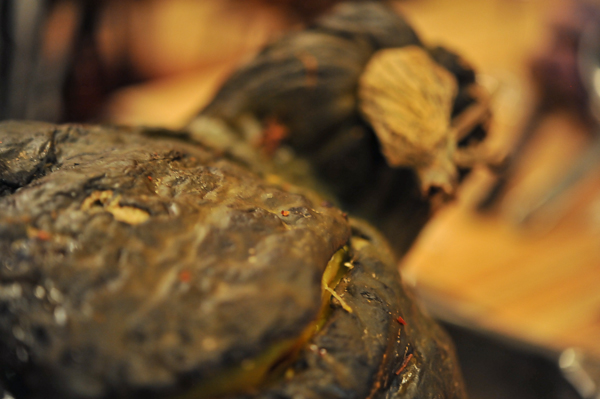
Is it possible to fall in love with a squash? I'm here to not only to say it's possible, it happened to me. I was at the farmers market and spied this beautiful Hubbard in the back of a pick up and felt my heart skip a beat. That 15 pound hulking, greyish blue squash was coming home with me and I was going to stuff it with everything good.

Dorie Greenspan's cookbook Around My French Table is in heavy rotation in my kitchen. It has everything from chicken b'stilla to Pierre Herme's olive sables to a pumpkin stuffed with everything good. Last winter, I was stuffing every squash or pumpkin I got my hands on but I never had a crack at a big, gnarly hubbard until I met this bad boy. It was as magnificent as I hoped. I went back the following Saturday and picked up this squash's little brother. I had an unfortunate incident with my stuffed squash at last year's Thanksgiving (I dropped it on the floor) and I plan on redeeming myself this year.

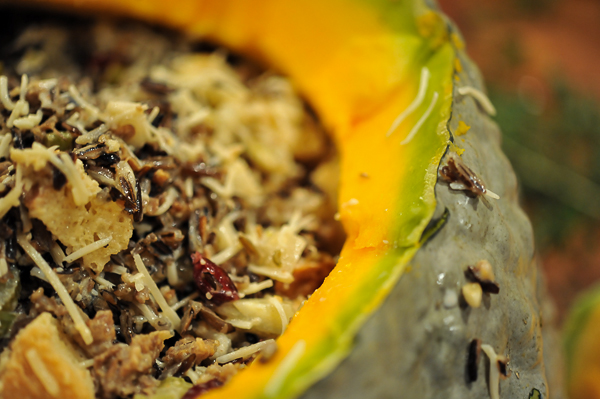
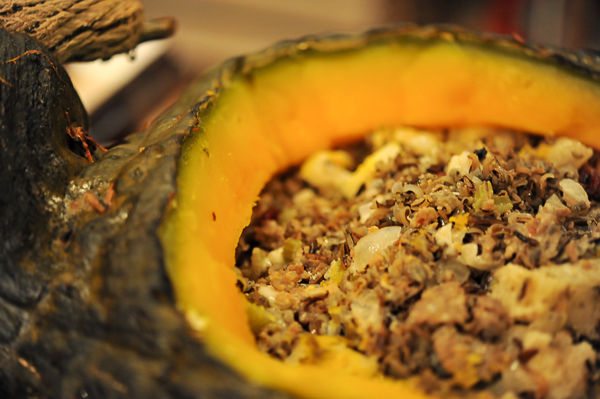
My version of everything good included italian sausage, caramelized onion, white wine, dried cranberries, wild rice and a variety of fresh herbs (rosemary, oregano and thyme). The only trick I've found with this recipe is managing the water content of the squash and the amount of cream and wine you add to the stuffing. If the squash has a higher water content, make your stuffing a little drier and vice versa.  This hubbard squash was pretty dry so I made sure the stuffing was nice and saturated with my cream and wine sauce.

Squash Stuffed With Everything I Think Is Good (adapted from Dorie Greenspan's Around My French Table)

1 pumpkin or squash, about 3 to 5 pounds 1/4 pound stale bread, cut into 1/2 inch chunks 1 cup wild rice, cooked 1/4 pound gruyère, shredded 1/4 pound parmesan, shredded 4 cloves of garlic, chopped 1/2 cup caramelized onion, chopped 1/2 cup celery, chopped 1 cup italian sausage, cooked and crumbled 1/4 cup dried cranberries 1/4 cup of fresh herbs, chopped 1/2 cup heavy cream 1/4 cup white wine salt and pepper freshly grated nutmeg

Preheat the oven to 350 degrees.

Using a very sturdy knife, carefully cut a nice sized cap off the top of the pumpkin.   Clear away any seeds and strings from the cap and hold it aside while you scoop out the seeds and filaments inside the pumpkin.

Combine the cream, white wine and garlic in a saucepan and simmer over medium low heat for about 10 minutes.

Toss the bread, cheese, wild rice, dried cranberries, celery, caramelized onions and herbs together in a bowl, then pack it into the pumpkin. The filling should go into the pumpkin and fill it well.  You might have a little too much filling or you might need to add to it -- it's hard to give exact amounts.  Season the cream/wine mixture with salt, pepper and several gratings of fresh nutmeg and pour the cream into the pumpkin.  Again, you might have too much or too little.  You don't want the ingredients to swim in cream, but you do want to get a feeling that they're moistened.

Put the cap back in place and bake the pumpkin for about 2 hours -- check after 90 minutes -- or until everything inside the pumpkin is bubbly and the flesh of the pumpkin is tender enough to be pierced easily with the tip of a knife.  Remove the cap during the last 20 minutes or so of baking so that the top could brown.

Poblano & Tomatillo Shredded Pork With Cheddar Grits

Ellen sent an email asking if I would like some poblanos from her garden. I immediately thought of chile rellenos  and answered with an enthusiastic yes, please. Don't ask me why chile rellenos were the first thing I thought of, I've never eaten or made them. But, what isn't to love about deep-fried cheese stuffed peppers? All I needed was a couple of hours to get them together.

Dinner has been anything but leisurely around here lately. I remember when the kids were little, 5 pm to 7 pm was nightmarish with crabby kids rioting while I was trying to prepare dinner. Fast forward 12 years and 5 to 7 is still the witching hour. No crabby kids this time, just various drop off/pick up assignments for four kids in three different sports. Dinner needs to be quick and ready when they get home or they may revert to their younger, riotous selves. So, I'm still a chile relleno virgin but the poblanos found another incarnation in the crock pot.

I became a relatively proficient crock pot cooker when we were renovating our kitchen in 2010. I didn't have a stove for 2 months but still had 5 kids who wanted to eat— necessity is also the mother of crock pot cookery. I learned a couple of things— always brown the meat, saute the aromatics (like onions, garlic, peppers) and don't add too much liquid (like wine, broth, tomatoes).  Boston butt pork roast is my favorite for braising— full of piggy flavor and incredibly tender. Since the poblanos were driving the bus for this meal, I grabbed the tomatillos from the fridge and set out to make a south of the border braise.

Poblano & Tomatillo Pork with Cheddar Grits

Pork Braise 4 - 5 pound boston butt pork shoulder 3 tbsp olive or canola oil 3 medium onions, chopped 4 garlic cloves, minced 2 pounds fresh tomatillos or two 11 ounce cans of tomatillos 6 poblanos, chopped with seeds 3 tbsp cumin 1 1/2 tbsp Tajin Classico Seasoning 2 tbsp chipotle powder 2 tbsp ancho chile powder 1/2 tsp salt 3/4 cup cilantro, chopped

Cheddar Grits 2 1/2 tbsp butter 1/2 onion, chopped 1 1/4 cup grits (I used Quaker Quick Grits) 2 cup whole milk 2 3/4 cup water 1 1/2 cup shredded sharp white cheddar Salt and pepper to taste

Pork Season the pork shoulder with salt and pepper and brown all sides in 1 tbsp of oil over medium high heat. Place in crock pot. Add additional 2 tbsp of oil to sauté pan, add onions, garlic and poblanos and sauté for 7 - 10 minutes or until soft and onions are golden. Add tomatillos, cumin, Tajin, chipotle powder, ancho powder and salt and saute for another two or three minutes. Very carefully, add the tomatillo/pepper/onion mixture to a blender or food processor and purée until smooth. Pour over the pork in the crock pot and cook on high for 6 hours. Before serving, shred the pork, add the cilantro and serve over cheddar grits.

Cheddar Grits Saute onion in 2 tbsp of butter over medium heat in a large saucepan until softened and golden. Add the water and milk and bring to a boil. Reduce heat to medium low and slowly add the grits, stirring to combine. Cover and cook 12 - 14 minutes or until thickened. Add the shredded cheese and continue cooking until the cheese is melted, about another 2 to 3 minutes. Taste for seasoning and serve immediately.

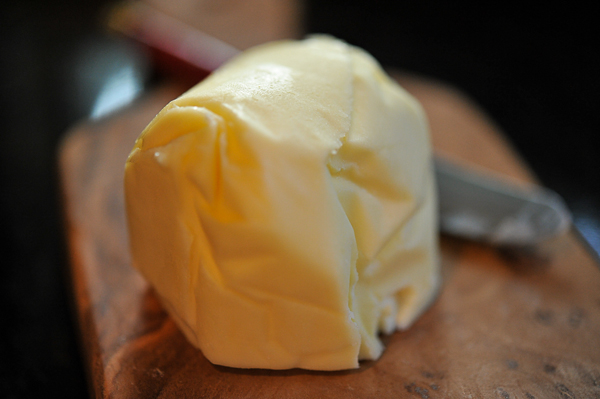
Everything Is Better With Butter, Right??

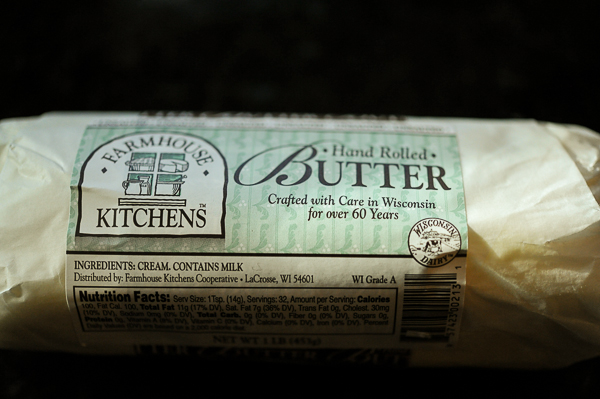
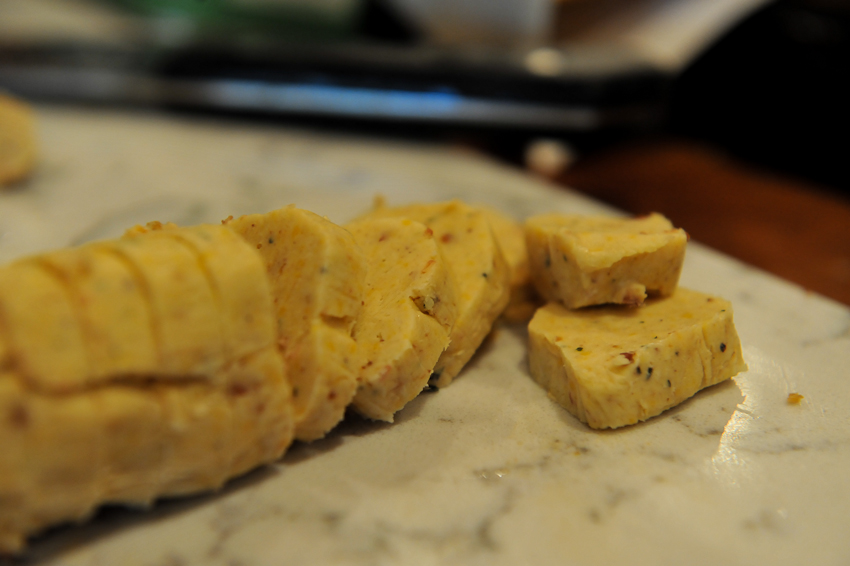
I had a moment when I was in Cable at the Ideal Market last Thursday and it involved a pound of pale yellow goodness. I have a deep and abiding love of good butter— especially La Baratte des Gourmets (French butter with sea salt flakes) and Delitia Burro di Parma (butter made with the left overs of Parmigiano Reggiano production). It's not that your average, run of the mill grocery store butter isn't good, it's just that high fat cultured butter is so much better.

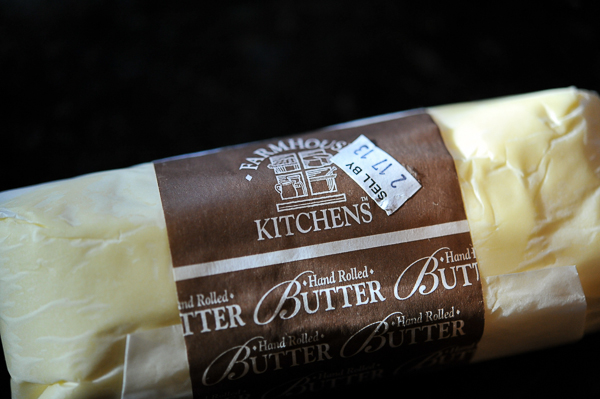
The girls and I drove to Cable to have dinner at the River Eatery with Will's cross-country team. As we were leaving, I peeked in the refrigerated case and there it was— handrolled butter from Farmhouse Kitchens in Lacrosse. It's light and creamy texture as well as a tangy, cultured flavor adds up to pure butter love. I bought 3 pounds and headed north with a smile on my face.

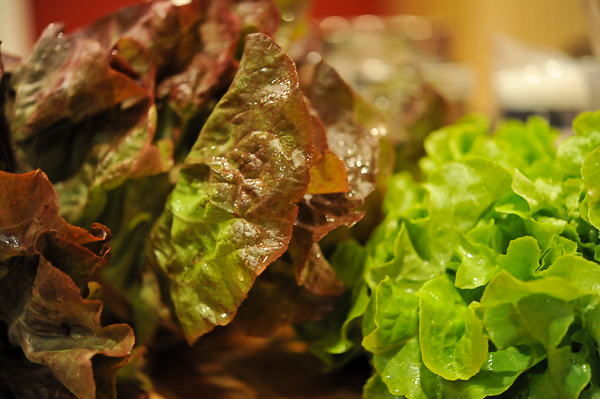
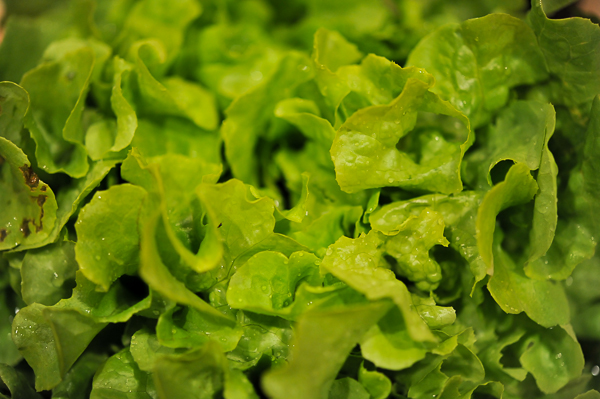
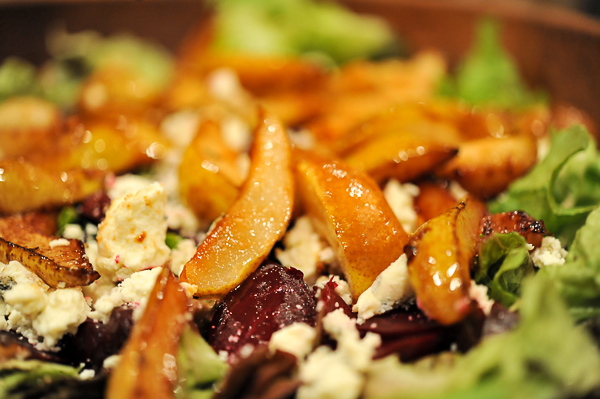
Roasted Beet & Caramelized Pear Salad

I need a few things to make my life run smoothly: ample toilet paper reserves, Maldon sea salt, good butter, clean dogs and a really good salad dressing in the fridge. Salad dressing is always an after thought for me. I will spend hours planning and preparing the meal but when it comes time to dress the salad, I've got nothing. While a good red wine vinegar and Dijon dressing is quick and easy, it's been five years and I needed a change.

I have two 'signature' perfumes— Tom Ford's White Patchouli for summer and Black Orchid for winter. Doesn't it make sense to have two 'signature' seasonal salad dressings?? Summer with her fresh vegetables and bright flavors is a whole different kind of critter than the caramelized fruit and roasted vegetable salads of old man winter. I pulled a bunch of cookbooks off the shelf and started my search for a Dougherty house dressing. I hit pay dirt with Cooking with Shelburne Farm— a beautiful cookbook from an Inn and working farm in Vermont. The maple ginger vinaigrette is perfect for all my winter salads and is always waiting in the refrigerator to dress any salad I can dream up.

Roasted Beet and Caramelized Pear Salad Maple-Ginger Vinaigrette Salad Dressing (From Cooking with Shelburne Farms)

Salad 2 heads of lettuce, washed and torn into bite size pieces 4 sliced pears, caramelized in 4 tbsp butter and 2 tbsp brown sugar 6 roasted beets, sliced 1/2 cup gorgonzola, crumbled

Salad Dressing 1 medium garlic clove 1 medium shallot 1 inch ginger root, peeled and coarsely chopped 2 tbsp Dijon mustard 2 tbsp soy sauce 2 tbsp pure maple syrup 3 tbsp balsamic vinegar 1/2 cup olive oil 1/2 cup canola oil kosher salt and freshly ground pepper to taste

Prepare Salad Dressing In a blender or food processor, combine the garlic, shallot, ginger, mustard, soy sauce, maple syrup and balsamic vinegar until well blended. With the motor running on low, pour the olive and canola oils gradually and blend until emulsified. Can be refrigerated for up to a week.

Prepare Salad Preheat oven to 400 degrees. Remove the greens from the top of the beets, wash, drizzle with olive oil and tightly cover your pan with foil. Roast until soft— about 30 minutes for small beets and up to an hour for large ones. Peel the skin off, slice and set aside.

Melt 4 tbsp of butter in a large saute pan over medium heat. Once the butter starts to foam, add sugar, stir until sugar is melted. Add sliced pears and saute for  5 - 7 minutes, flipping over one or twice to achieve uniform caramelization.

Add sliced beets, pears, gorgonzola to the bowl with the lettuce, add dressing, taste for salt and pepper and serve.

Alice's Goat Cheese Souffle

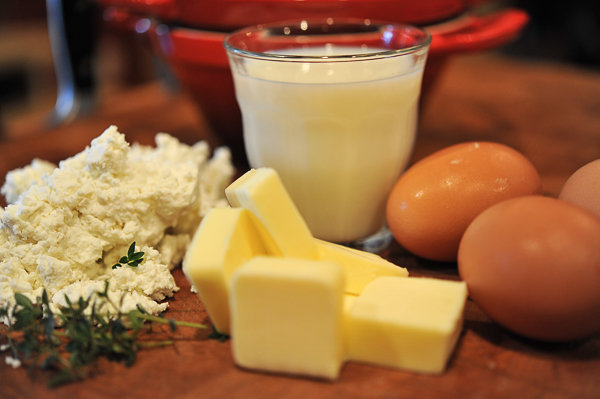
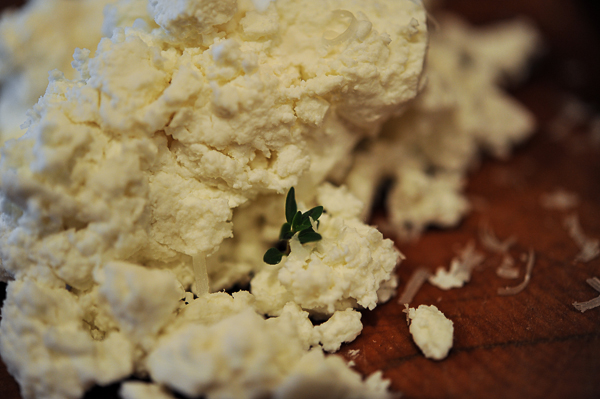
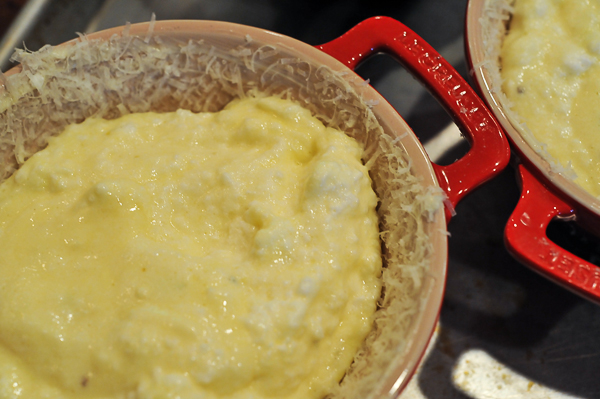
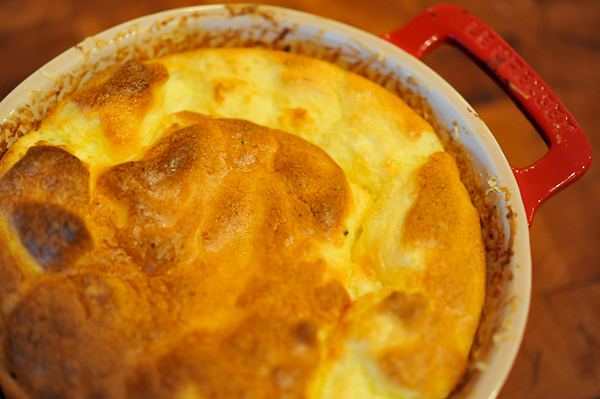
Every other Friday I stop by Pinehurst, look for the cooler by the side door and pick up a couple of containers of fresh Sassy Nanny goat cheese from Michael. It even has my name on the tasty little packages. Yet another reason I love living in Bayfield— bespoke cheese. When I went to visit Michael last March (link here), I was in awe of the sheer amount of work that goes into a pound of cheese. It's truly a labor of love (or some other kind of madness) and the cheese that is waiting for me in the cooler is some of the best goat cheese I've eaten. Michael's goat cheese and Jennifer's eggs— a perfect match and a perfect Sunday brunch.

Goat Cheese Souffle (From Alice Water's The Art Of Simple Food)

6 tbsp butter (5 tbsp for souffle & 1 tbsp to butter souffle dish) 3 tbsp flour 1 cup milk salt & freshly ground pepper pinch of cayenne 1 thyme sprig, leaves only 4 eggs, separated 4 ounces goat cheese 1/4 cup parmesan, grated

Preheat the oven to 375 degrees. Butter a 1 quart souffle dish and then coat the sides with the parmesan cheese.

Melt 5 tbsp of butter in a heavy saucepan over medium heat. Stir in flour and cook for 2 minutes. Whisk in, little by little, the milk making sure to whisk thoroughly between each addition. Season the bechamel with salt, pepper, cayenne and thyme and cook over low heat for 10 minutes. Remove from heat and cool slightly. Stir the yolks into the bechamel and then add the goat cheese, stir to combine.

Whip the egg whites into moist firm peaks. Stir one-third of the whites into the souffle base. Then gently fold the base into the rest of the egg whites, taking care not to deflate them. Pour the mixture into the buttered dish and bake for 35 - 40 minutes, or until puffed and golden, but still soft in the center and jiggly when shaken gently. Serve immediately.

When The Moon Hits Your Eye Like A Big Pasta Pie....

Pasta, in any shape or form, typically generates rave reviews from my in-house food critics. When I saw this recipe from Noble Pig, I suspected I was headed for a standing ovation at the dinner table. I wasn't the kind of Mom who made my kids eat what was served; I have a pathological fear of hungry, sad children (food is love, right??) There were many meals where Ted and I ate something fantastic and the kids ate buttered noodles or spicy chicken (chicken breasts sautéed with Montreal Steak seasoning). Fast forward ten years and we all eat something fantastic or at least more interesting than buttered noodles. This pasta pie was a nod to those days of short order cooking for my little ones and wondering if they would ever eat anything other than pasta and chicken.

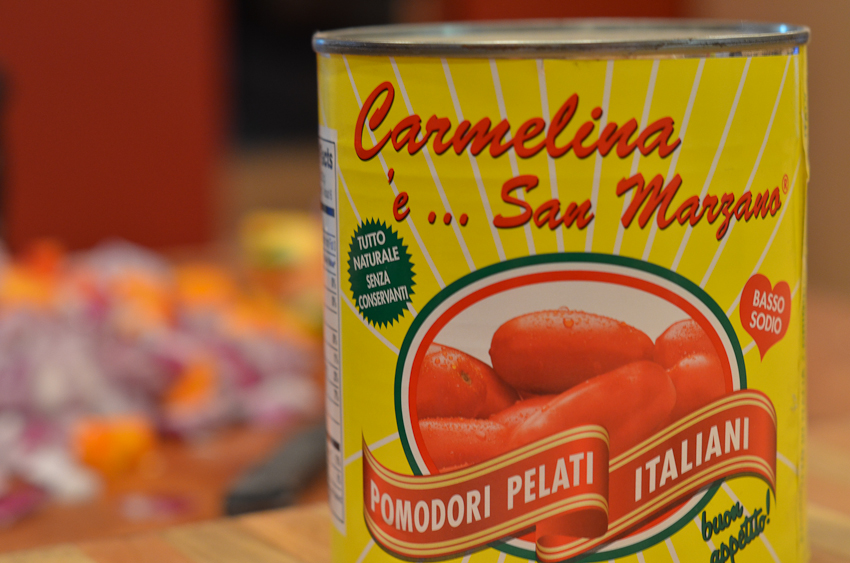
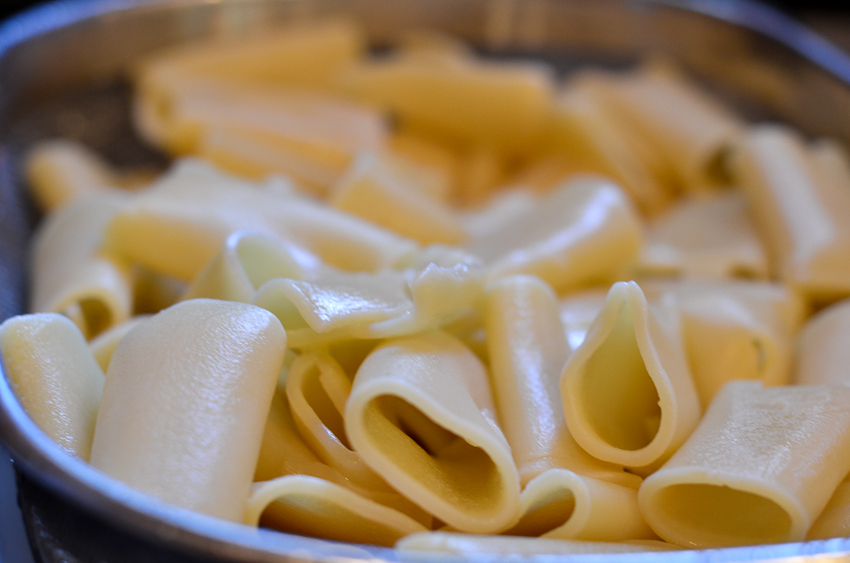
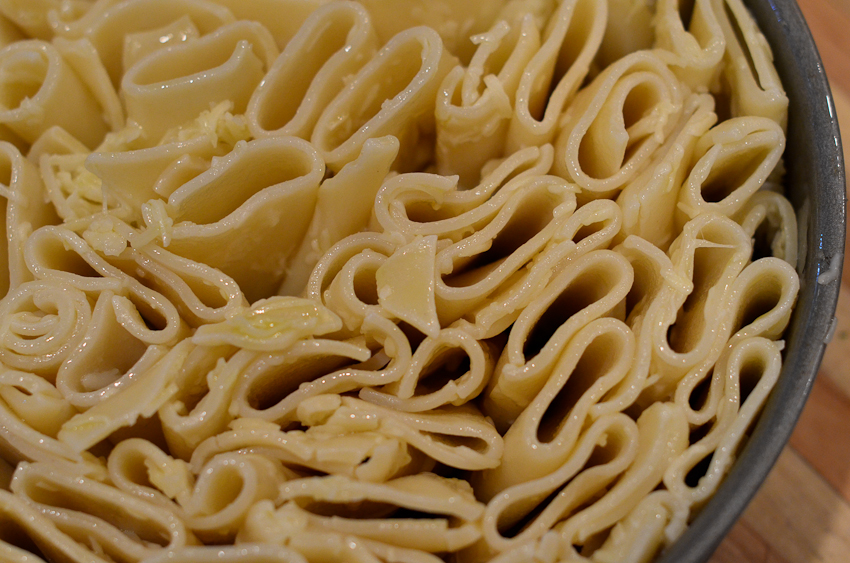
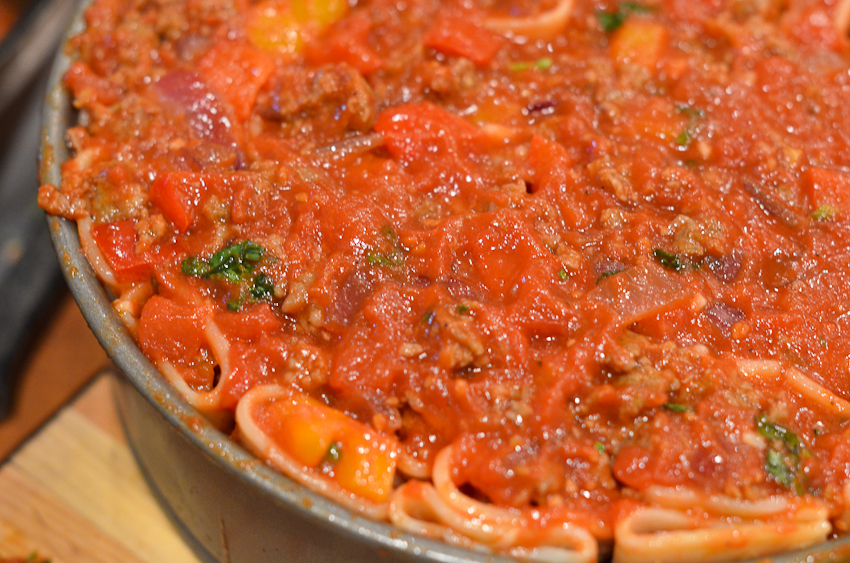
I bought a tubular pasta called paccheri and figured I could substitute it for the rigatoni. Not the best idea, paccheri is floppy and did not want to stand up and be stuffed without quite a bit of management on my part. Next time, I am using rigatoni. Carmelina tomatoes are the way to go for marinara—they have a beautiful thick purée and make the best sauce. I'm a firm believer in homemade marinara— it tastes better, is easy to throw together and it is less expensive.

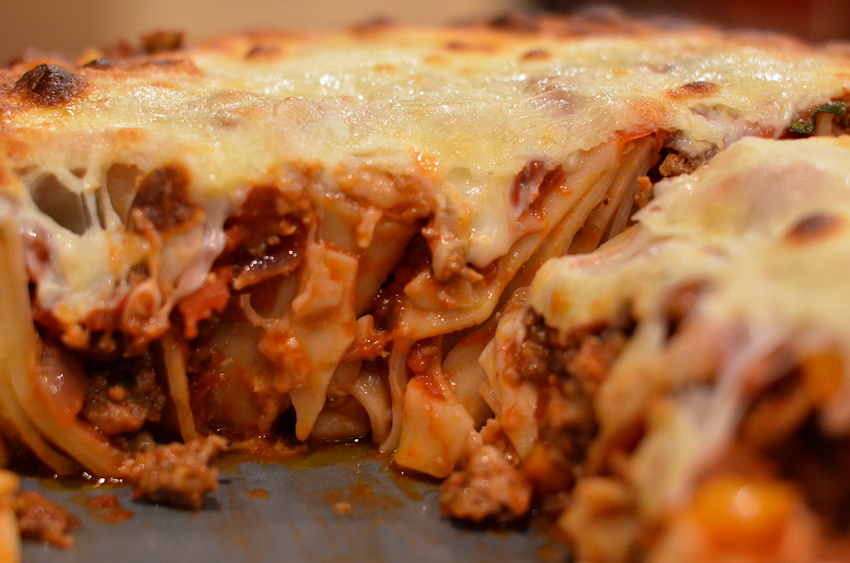
I had a few doubts after I assembled the pie, those floppy paccheri pasta noodles bore a striking resemblance to the Leaning Tower of Pisa. My fears weren't completely unfounded, it held its shape (kind of) but definitely was leaning and spilling out of the spring form after I unmolded it. It tasted great, is easy to put together, aside from the fussiness factor of assembling the noodles in the pan, and definitely will have a place in our dinner rotation.

Marinara Sauce

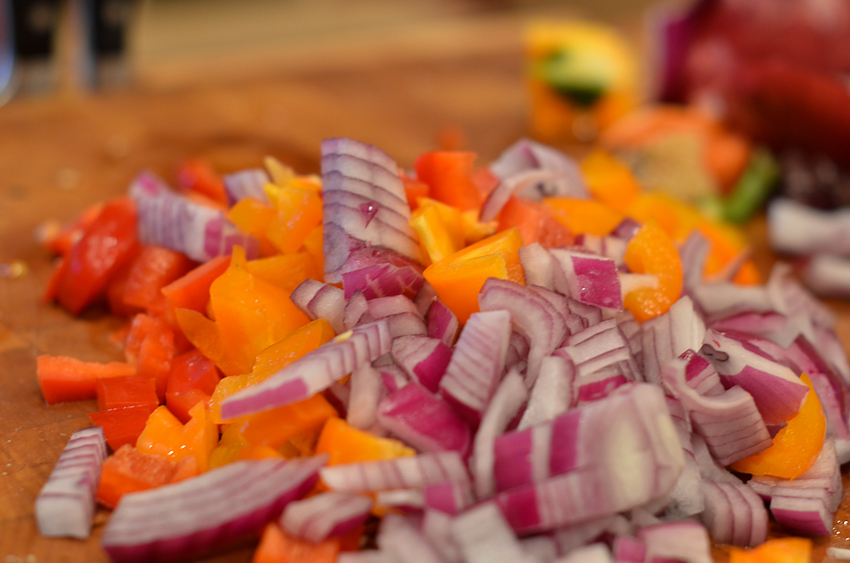
2 28 ounce cans of chopped tomatoes 1 red onion, chopped 2 red or yellow peppers, chopped 4 cloves of garlic, chopped 8 - 10 leaves of fresh basil, chopped 8 - 10 leaves of fresh oregano, chopped 1 tsp kosher salt 1/2 tsp coarse pepper 1 tsp sugar 3 tbsp olive oil

Heat oil in heavy large skillet over medium heat. Add onion; sauté until tender,  about 10 minutes. Add garlic; sauté 1 minute. Add peppers; sauté until peppers just begins to soften, about 5 minutes. Add tomatoes and their juices. Cover and simmer 15 minutes. Add sugar, basil and oregano. Cover and cook 15 minutes. Uncover and simmer until  slightly thickened, about 5 minutes. Season with salt and pepper.

Olive & Tomato Focaccia

The smell of a freshly baked loaf of bread makes me happy. In fact, the entire process of bread making gives me joy— the smell of yeast, the sound of the mixer kneading the bread and watching the texture change as it begins to rise. It's magical— a pile of wet, sticky flour morphs into a loaf of focaccia, boule or baguette. Who couldn't use a little magic in their lives?

I used the olive oil dough recipe from Jeff Hertzberg's and Zoe Francois' cookbook Artisan Bread in Five Minutes a Day for my focaccia. It's a solid recipe and never, ever fails me. If I want to have a couple of loaves of focaccia for dinner, I start the dough at noon and it's ready to hit the oven at 6 pm. I know you are probably thinking, dinner at 6 at Mary's, yeah right. It's true (most of the time), I make a very earnest effort to eat before 8 pm during the school week— figure it will help with my mother of the year application. I settled on Nancy Silverton's baking method for the focaccia, it produces an amazing crust— crispy and golden brown.

Olive & Sun-dried Tomato Olive Oil Dough (Adapted from Artisan Bread in Five Minutes a Day)

2 3/4 cups lukewarm water 1 1/2 tbsp granulated yeast (I use SAF red instant yeast) 1 1/2 tbsp kosher salt 1 tbsp raw sugar 3/4 cup extra virgin olive oil (1/4 cup for the dough & 1/2 cup for the pans) 1/2 cup kalamata or oil cured olives, chopped 1/2 cup sun-dried tomatoes in olive oil, chopped 6 3/4 cup bread flour (I use Honeyville Alta Artisan Unbleached Flour) Coarse sea salt and chopped fresh herbs (I used rosemary, thyme and oregano)

Mix the yeast, salt, sugar, olive oil with the water in a large bowl or the bowl of a stand mixer. Add the flour and mix until it comes together(about 3 minutes) using the dough hook (if using a stand mixer) or a spoon. Cover (not airtight) and allow to rest at room temperature until the dough doubles in volume (about 2 hours).

Dust the work surface lightly with flour and turn the dough out onto the floured surface. Add the chopped olives and sun-dried tomatoes to the dough— knead them in the dough as best you can.  Acting as if the round has four sides, fold the edges of the dough toward the center. Turn the dough over and return it, folded side down, to the bowl. Cover the bowl again and set it aside at room temperature until it has doubled in volume, 50 minutes to 1 hour. (The dough will be puffy and will feel alive, springy and resistant. It will not collapse under the touch of your fingertips.)

Preheat the oven to 400 degrees. Pour ¼ cup olive oil into each of the cake pans, and tilt the pans so the oil coats the bottom evenly. Dust the work surface again lightly with flour and carefully turn the dough out onto the floured surface, taking care not to deflate the dough in the process. Divide the dough into two equal segments. Place the dough segments in the prepared cake pans and very gently pull the edges just to obtain a roughly round shape. Cover the pans with a clean dishcloth and set aside at room temperature until relaxed and spread to cover about half of the surface of the pans, about 30 minutes.

Brush the top of the focaccia with olive oil, sprinkle with the sea salt, chopped fresh herbs and bake it on the center rake of the oven for 30 to 40 minutes until it is crisp and golden brown.

Move the pan to the bottom rack of the oven and bake 5 more minutes to make sure the bottom crust of the focaccia is nice and crispy. Remove the focaccia from the pan being careful not to burn yourself from oil remaining at the bottom of the pan. Set them on a cookie rack.

Blueberry Chutney

Chutney, chutney, chutney— that was the theme in my kitchen this summer. Chutney has more razzle dazzle than a simple jam or jelly and I am terribly fond of both razzle and dazzle. When Renee and I used to sell our Fig & Fromage tortas at Kowalksi's— coming up with chutney and cheese combinations was one of my favorite parts of the job— right up there with being the demo girl and obsessing about what ampersand and font to use for the labels. Chutney and cheese belong together, like Sonny and Cher, caramel and apples or George and tennis balls.

This chutney would be good with a sharp white cheddar, gorgonzola, an aged gouda or stuffed in a chicken breast with goat cheese. The good news is I have a lot of this chutney on the shelf and I'm going to have to get creative if we're going to use them before next year's blueberry crop. You'll know I've run out of ideas if you get a jar of chutney for your birthday, Christmas or National Taco Day.

Blueberry Chutney

6 cups blueberries 1/4 cup dried cherries 1/4 cup dried cranberries 1/2 cup dried currents 3/4 cup dry white wine 3/4 cup cider vinegar 1 cup honey 1/2 cup raw sugar 2 cups red onion, chopped 2 tbsp garlic, minced 1 tsp red chile flakes 1 1/2 tsp fresh thyme 2 pieces crystallized ginger, minced

Add all ingredients to a large pot and bring to a boil. Remove the cinnamon stick after 15 minutes. Reduce the heat to low and simmer, stirring occasionally, for 30 - 45 minutes, until mixture is thick. At this point, you can cool completely and it will keep in the refrigerator, covered, for up to a week.

You can also ladle hot chutney into hot sterilized jars, leaving 1/4-inch head space. Wipe rims of the jars, cover with lids, and screw bands on until just barely tight. Place jars on rack in pot and cover completely with water. Cover pot and bring to a boil over high heat. Boil for 10 minutes. Turn off heat, uncover pot, and allow jars to rest in water for five minutes. Remove jars from pot and allow them to rest undisturbed on countertop for six hours or overnight.

The Pheasant & The Pig: Pâté de Campagne

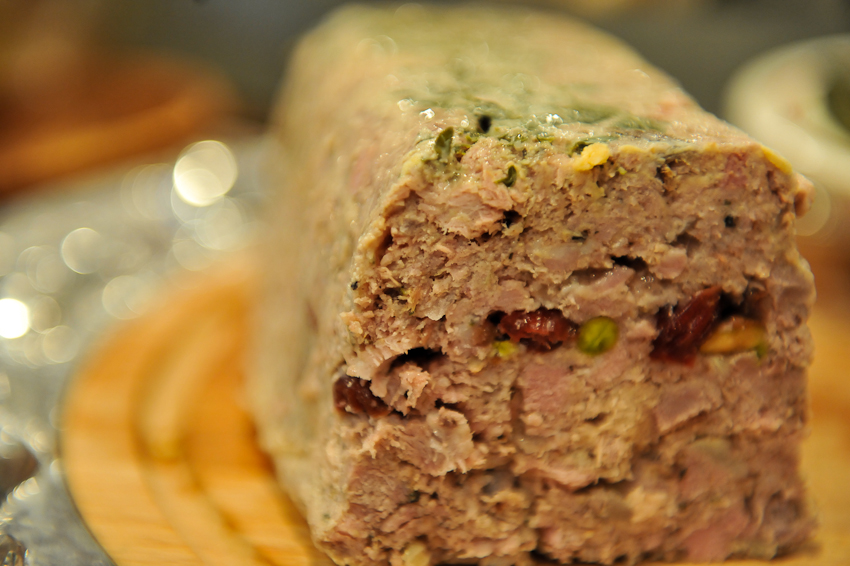
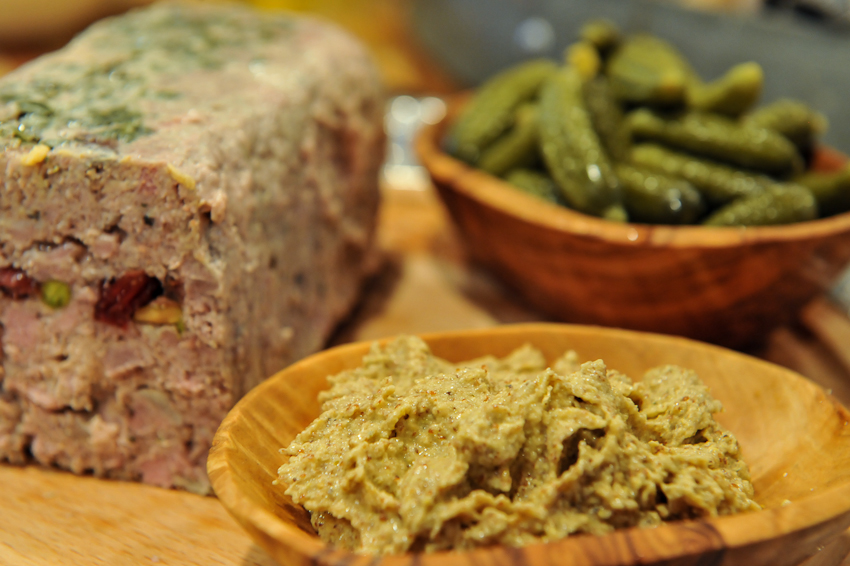
Did you know meatloaf has a fancy cousin from France— pâté de campagne? I'm a big fan and not just because of there is a circumflex and an acute accent in one word. The idea of combining chopped meat, spices, liquor, eggs and cream in a terrine always seemed like a good way to go. When we lived in Highland Park, one of our weekly rituals was a trip to Haskell's for slice of pâté and a bottle of wine from our friend Sheila.  Pâté seemed out of reach for a neophyte cook like myself and I never thought I could make my own meat masterpiece. Fast forward 20 years— I am no longer a neophyte (anywhere) and I make my own pâté.

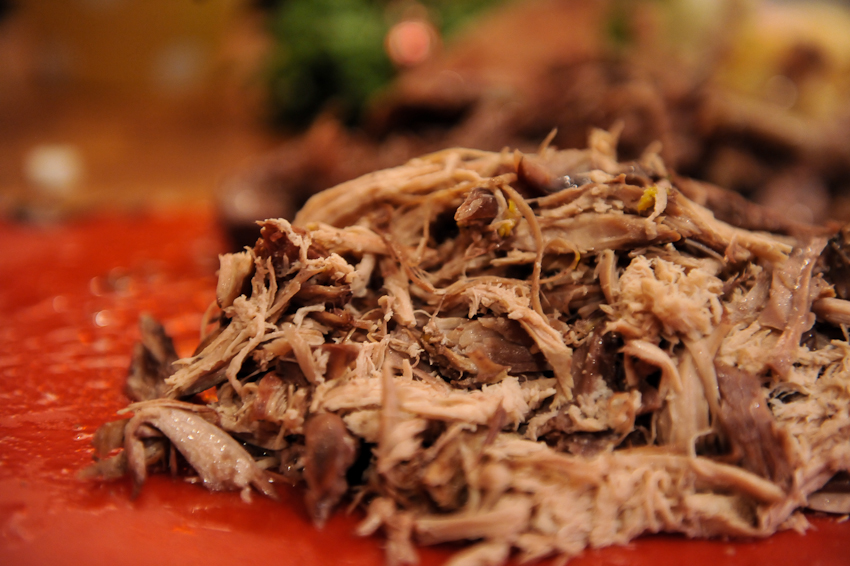
One of the recipes I found called for wild boar, kind of hard to find in Northern Wisconsin. I had no idea what would be a decent substitute for a gnarly wild pig but I did know where to get some wild pheasants. I also knew where to get a half bottle of zinfandel (on the counter) and a container of duck fat (in the fridge). I simmered the pheasant for 3 hours in duck fat, wine and olive oil— a perfect storm for tender pheasant and a brilliant addition to my pâté.

Pâté de Campagne (adapted from Taste Food Blog)

1 pheasant, simmered in 375 ml red wine, 12 oz rendered duck fat & 1/2 cup olive oil for 3 hours 1 pound pork shoulder, coarsley ground 1 pound ham, coarsely chopped 3 garlic cloves, minced 2 shallots, minced 2 tsp salt 2 tsp black pepper, coarsely ground 3 tsp fresh thyme 2 tsp fresh rosemary, minced 1 teaspoon allspice 1 tsp ground coriander ½ tsp ground cloves 3/4 pound bacon, coarsely chopped 2 tbsp unsalted butter plus extra for greasing terrine 1 medium yellow onion, minced 2 eggs, lightly beaten 1/3 cup heavy cream 1/3 cup Calvados 1/3 cup shelled pistachios 1/3 cup dried cranberries

Remove all meat from the pheasant after it has cooled. If you are grinding your own meat, cut the pork in 3/4 inch cubes. Place the pork and pheasant in a large bowl. Add garlic, shallots, salt, pepper, thyme, rosemary, allspice, coriander and cloves. Mix to thoroughly coat the meat. Cover and refrigerate 6 hours or overnight. Grind with a meat grinder before proceeding.

Preheat oven to 300 F. (180 C.) Remove meat from refrigerator. Add bacon and return to refrigerator while you prepare the onions. Melt 2 tablespoons butter in a skillet over medium heat. Add onion and sauté until translucent but not brown, 6 minutes. Cool to room temperature. Stir into the meat. Combine eggs, cream and calvados in a small bowl. Add to meat and mix well.

Butter a loaf pan or terrine. Alternatively, you can line the inside of your terrine with plastic wrap. Press one-third of the meat into the terrine. Sprinkle evenly with half of the pistachios and cranberries. Press another third of the meat into the terrine. Top with remaining pistachios and cranberries. Cover with remaining meat. Cover terrine or if your terrine does not have a cover, use aluminum foil. Prick 2-3 holes in the foil.

Place terrine in a baking pan. Pour boiling water into the baking pan until halfway up the sides of the terrine. Bake in oven until meat thermometer inserted in the center reads 155 F. about 2 hours. Remove from oven and remove terrine from the water bath. Place a terrine press over the pâté (or a cutting board with cans on top) and cool completely. Transfer to refrigerator and let sit 1-2 days before serving. To serve, un-mold pâté. Scrape off any congealed fat. Cut in slices, ½ inch thick.

Cheddar & Parmesan Savory Shortbread

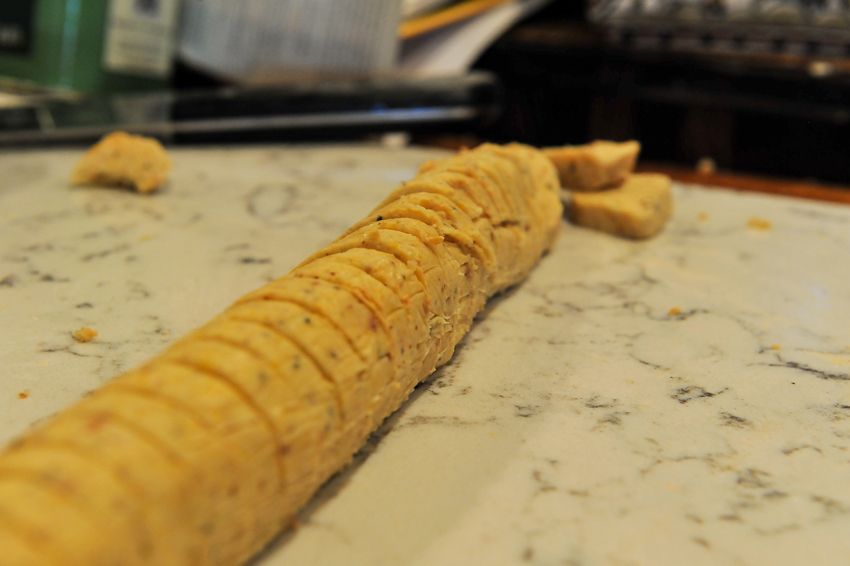
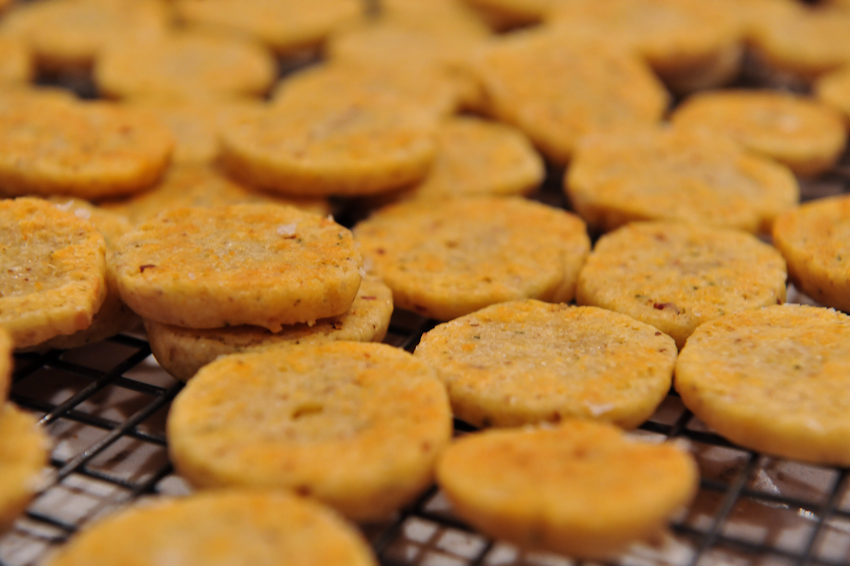
I can live without cookies, cake and chocolate but take cheese away and I just might expire on the spot. When I bought Laura Werlin's The All American Cheese and Wine Cookbook and found a recipe for cheese shortbread crackers, I knew I had just met my newest favorite recipe. This was a 'slice and bake' cookie I could get behind— butter, parmesan and cheddar with Maldon sea salt on top, what's not to love?

Cheddar Parmesan Shortbread Crackers (from Laura Werlin's The All American Cheese and Wine Cookbook)

4 ounces cheddar cheese, coarsely grated 2 ounces parmesan cheese, finely grated 3/4 cup flour 1/4 tsp dry mustard (I use Coleman's) 1/4 tsp kosher salt 1/8 tsp cayenne pepper 4 tbsp unsalted butter, softened and cut into small pieces 2 tbsp water, plus more if needed

In the bowl of a food processor, place all ingredients except the butter and water. Pulse 5 times. Add the butter and pulse again until the butter pieces are the size of BB's. Add the water, 1 tbsp at a time, and pulse just until the dough holds together. If the dough is still crumbly, add more water 1 teaspoon at a time until it reaches the right consistency.

Turn the dough out onto a large piece of waxed paper. Roll the dough into a log, 9 to 10 inches long, and square off the ends. Refrigerate, well wrapped, for at least 2 hours and up to 2 days. Or freeze it for up to 1 month.

Preheat the oven to 375 degrees.

To make the crackers, cut the log into 1/4 inch slices. Arrange the slices on a baking sheet 1 inch apart. Bake for 8 to 10 minutes, or until the crackers are a light golden color. Flip the crackers, sprinkle Maldon sea salt on top and bake for an additional 3 to 5 minutes, or until they are golden around the edges. Cool on a rack and serve at room temperature.

Makes about 3 dozen crackers.

Thai Chicken Salad In A Jar

My last meal in a Mason jar was Thai chicken salad but this time we ate it at home, in front of the fire. We had planned to go out to Rocky Island for a last hurrah of summer. We got as far as Basswood. The skies opened up and it poured (hard and steady) until the afternoon. We did stop at Basswood, went for a rain-soaked hike through the woods and beat a hasty retreat for home and dry clothes. I guess we should have had our hurrahs on Sunday when it was warm and sunny.

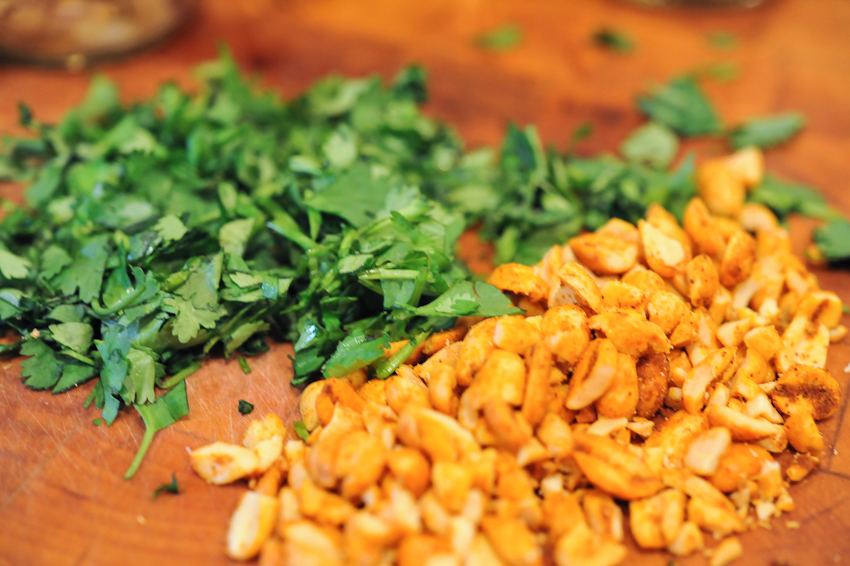
Thai chicken salad needs two things to shine: rice noodles and really, really good peanut sauce. I could, and sometimes do, eat peanut sauce by the spoonful and consider myself a peanut sauce connoisseur (if there is such a thing). It should have a good balance of sweet, sour and spicy flavors as well as a consistency similar to heavy whipping cream. You can put just about anything in this salad— I used roasted chicken, green onion, cucumbers, carrots, sliced purple cabbage, thick rice noodles and garnished with chopped cilantro and peanuts. Ultimately, it's a pasta salad and the variations are endless.

Thai Peanut Sauce

19 ounces full fat coconut milk
1 1/4 cups unsweetened and natural peanut butter
3 tbsp Thai red curry paste (Mae Ploy)
2 tbsp soy sauce (Healthy Boy Thin Soy Sauce)
2 tsp fish sauce (Squid)
2 tbsp chile garlic
4 tbsp sweet chili sauce (Mae Ploy)
Juice of one lime
2 tbsp apple cider vinegar
2 tbsp toasted sesame oil
2 tbsp chopped ginger
3 garlic cloves minced 1 cup water
Put everything into a medium heavy-bottomed pot and bring to a very gentle boil over medium heat, whisking constantly. Let the mixture simmer for 3-5 minutes over low heat; stirring occasionally.  Take the pot off the heat, let the sauce cool down to room temperature, serve immediately. The sauce can be served hot or cold and will keep for two weeks in the refrigerator.

Smoked Pheasant Takes A Bath In Duck Fat

One of the reasons Ted finally caved in and decided we needed our fourth dog, the illustrious George, was he wanted a hunting dog. Well, George decided he preferred a different path and Ted still hunts, just not with his own highly trained hunting dog. The good news is, even sans hunting dog, we always have pheasant in the freezer.

I didn't have any experience with game birds before Ted started bringing them home. I knew to check the bird for stray shot but had no idea the head (with the feathers, beak and eyes) was still attached. I took one look at the green head with red ringed eyes, shouted something not terribly lady-like and took a few moments to gather myself. I remember standing at the sink and thinking if Julia Child can behead a chicken (I had just finished reading Julie and Julia), I certainly should be able to take care of the pheasant sitting in my sink. I grabbed my kitchen shears, removed his head and put him in the oven. That was over 5 years ago, I'm a professional pheasant beheader now.

My worst meal of all time involved a couple pheasants I made to impress my brother, Tom. I thought a traditional Normandy braise with Calvados, apples and cream would be lovely (recipe here). The pheasant was as tough as shoe leather, and not nice shoe leather, more like gnarly work boot leather. The next day I did a little research and realized it was not the recipe, it was the cook. I overcooked those poor little pheasants and not even cream and bacon could bring them back.

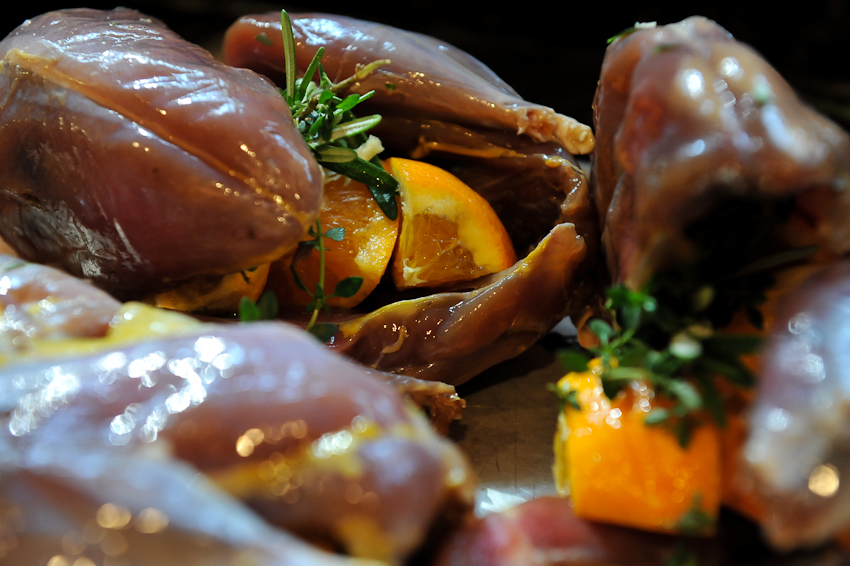
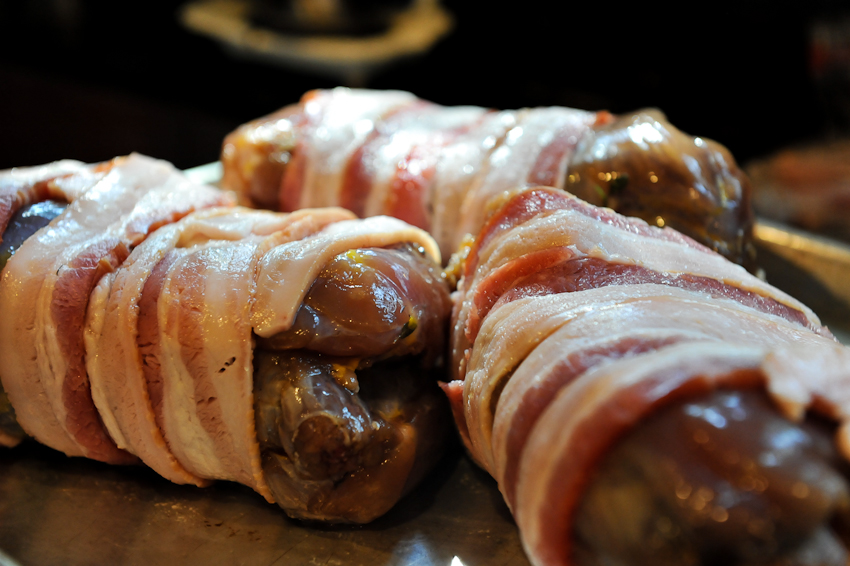
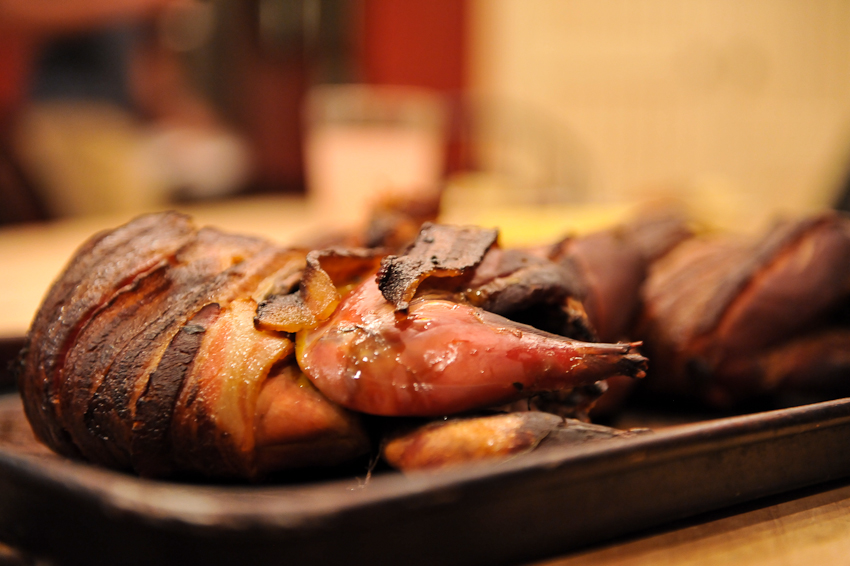
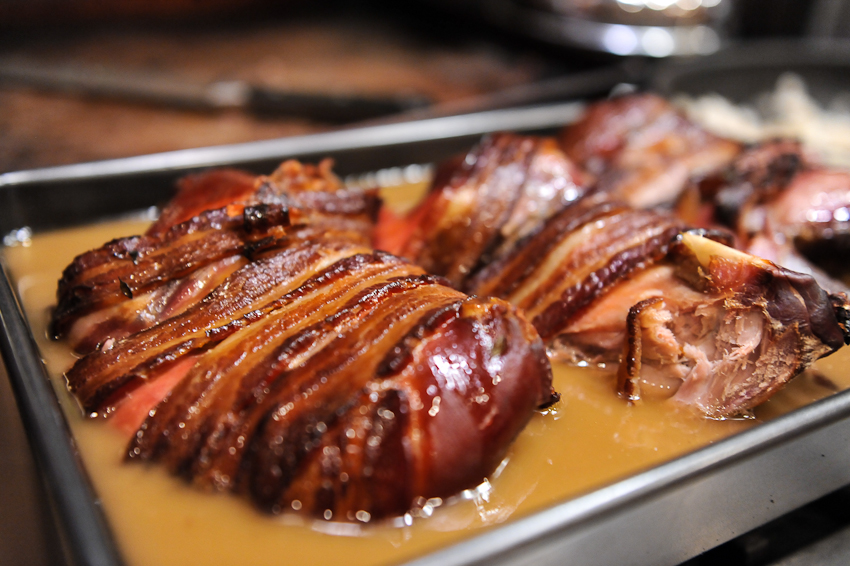
When I smoke pheasant, I make sure there is plenty of fat every step of the way. I start by brining the bird for 24 hours, wrap it in bacon (called barding) before it goes into the smoker and then it gets an overnight bath in a mixture of olive oil, red wine and duck fat. Lesson learned— pheasants are lean birds who are constantly on the run for their life, a little fat makes all the difference.

Smoked Pheasant

Brine

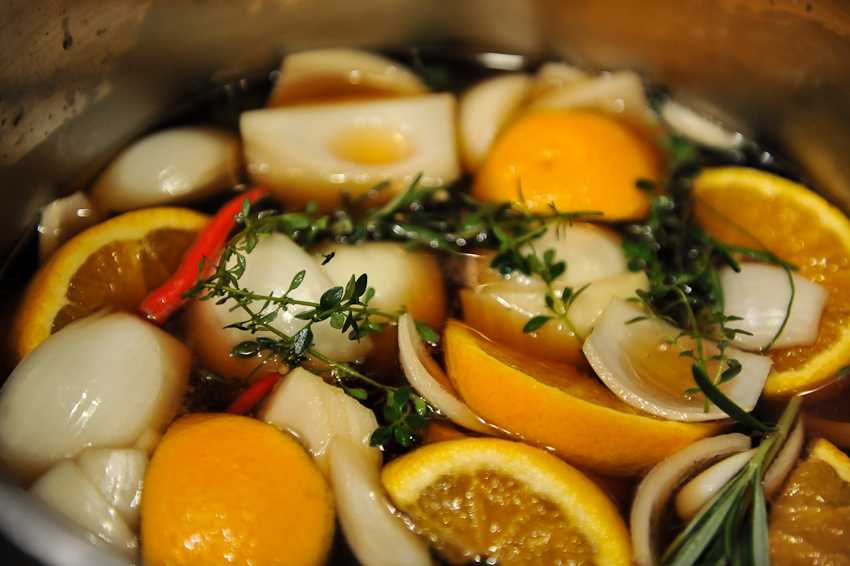
8 cups water 3/4 cup kosher salt 1 cup brown sugar 1/4 cup maple syrup 1 onion, chopped 1 orange, chopped 4 cloves garlic 2 Thai red chili peppers or 1 tbsp red pepper flakes 3 or 4 sprigs of fresh thyme 2 sprigs of fresh rosemary 2 pheasants

Add the salt to the water and bring to a boil. Add the rest of the ingredients (except the pheasant) and let cool until it is at room temperature. Add the pheasant, put it in the refrigerator and brine overnight or up to 24 hours.

Smoking The Pheasant

8 pieces of thick cut bacon 2 pheasants, brined, rinsed and patted dry Apple wood, soaked in water for 1 hour prior to smoking

Wrap 4 pieces of bacon around each pheasant, ensuring the majority of the bird is covered in bacon. Smoke at 200 degrees for 2 1/2 - 3 hours, until the breast meat reaches 165 degrees.

Duck Fat, Olive Oil & Red Wine Bath

12 ounces rendered duck fat 6 ounces olive oil 1 1/2 cup red wine

Combine all ingredients in a saucepan and heat thoroughly. Put the pheasant in a pan large enough to hold them in one layer. Pour the duck fat mixture over the pheasants, cover and refrigerate overnight.

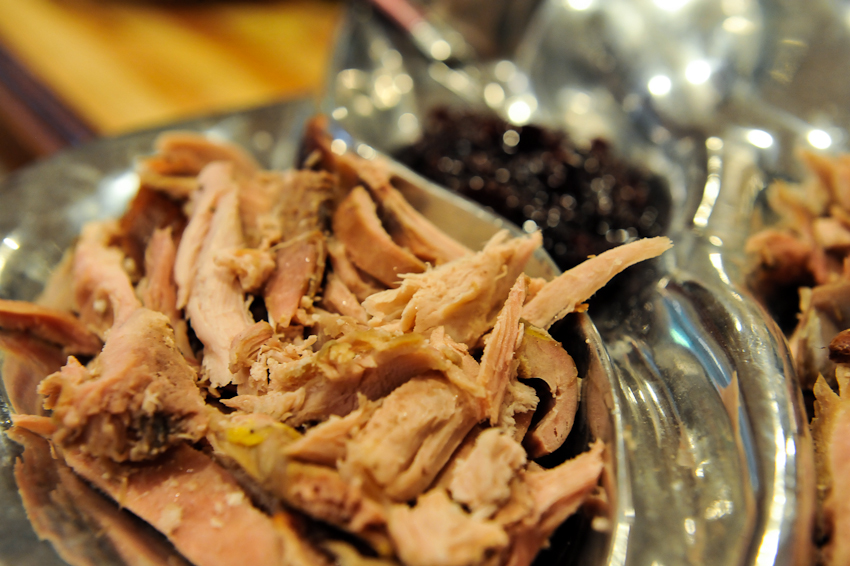
Remove the bacon and discard. Take all the meat off the birds and serve with a blueberry balsamic chutney (recipe here).

Balsamic Blueberry Chutney

Since the jam making went so well, I decided to expand my canning horizons and try chutney (no pectin needed). I bought white balsamic vinegar last year at Bill's Imports and thought blueberry balsamic chutney would be the perfect companion for pheasant, turkey or blue cheese.

Balsamic Blueberry Chutney

7 cups blueberries, rinsed 2 cups dried red currants 2 cups golden raisins 2 cups dried cranberries 2 cups white balsamic vinegar 1 red onion, chopped 1 yellow onion, chopped 2 1/2 cups raw sugar 1 tbsp red pepper flakes 2 cinnamon sticks 3/4 tsp ground cloves

Add all ingredients to a large pot and bring to a boil. Reduce the heat to low and simmer, stirring occasionally, for 30 - 45 minutes, until mixture is thick. At this point, you can cool completely and it will keep in the refrigerator, covered, for up to a week.

You can also ladle hot jam into hot sterilized jars, leaving 1/4-inch headspace. Wipe rims of the jars, cover with lids, and screw bands on until just barely tight. Place jars on rack in pot and cover completely with water. Cover pot and bring to a boil over high heat. Boil for 10 minutes. Turn off heat, uncover pot, and allow jars to rest in water for five minutes. Remove jars from pot and allow them to rest undisturbed on countertop for six hours or overnight.

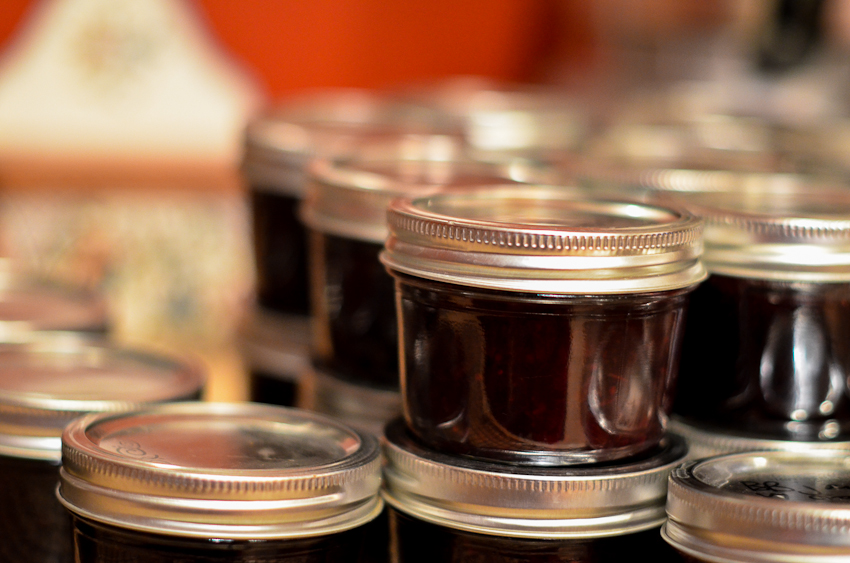
I lost count of how many half pint jars I canned but I think it was about 15. This recipe makes a lot of chutney!

Blue Vista Blueberries & Blueberry Orange Jam

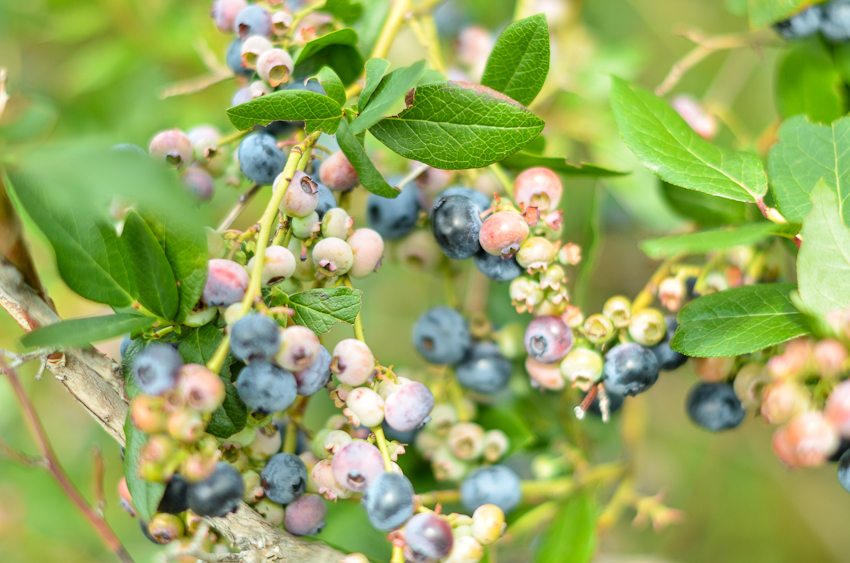
Judging from the bushes at Blue Vista Farm, it was a good year for blueberries. We picked over 40 pounds, brought them home and realized 40 pounds is A LOT of blueberries. We froze some, ate some and decided to make jam. Sounds easy, right? Boil some berries, add sugar and pectin and call me Mrs Smucker with jars of jam in a row. We had a few detours on the road to jam perfection. After a few phone calls, a chance meeting at the IGA with the local jam guru and internet searches, we did end up with pretty little jars of jam in a row.

My Mom has been making jams and jellies for years, one of the benefits of owning a raspberry farm. My kids refer to it as, "Nana's jelly' and since we moved away, we can't stock up whenever we run out. It was time we learned to make our own jam. Sadie went on the internet and researched a few recipes (she settled on this recipe from Paula Deen) and I found a recipe for blueberry jam with orange and ginger. We went down to the IGA, bought some pectin, jars and sugar and armed with our recipes, started to make our first batch of jam.

Road block number one soon presented itself. Sadie's recipe called for liquid pectin and my recipe called for low sugar pectin. I had no idea there were choices in pectin land and I bought the powdered Sure-Jell in the yellow box because that was what my Mom used. Sadie tried to find a conversion for liquid to powdered pectin on Google but didn't have much luck so we decided to 'wing it'. Which led to road block number two— there is no 'winging it' with jam making. We thought Deen's recipe had too much sugar and I decided to substitute half the sugar in my recipe with honey. Little did I know there is an important relationship between pectin and sugar— too little sugar or pectin results in a sauce for ice cream or pancakes, not jam for toast.

At this point, Sadie called Nana. The jam was super runny and we weren't sure if we should put it in the water bath and hope for the best or start over. Nana suggested adding more pectin and sugar, putting it in the jars and at the very least, blueberry sauce is good on ice cream. The next morning, we flipped the jars over, hoping for a solid mass of blueberry jam. No such luck, it was a little thicker but still runny. I decided to crack open all the jars, add more pectin and 'fix it'. Road block number three— it's tough to fix syrupy jam.

I went back to the IGA to buy more pectin. This time, I bought the liquid kind, thinking maybe it was the missing link. I ran into Nancy, the jam guru, and shared my tale of woe with her. Her first questions was, 'did you follow the directions?'. Remember the second road block, the 'winging it' one? I sheepishly admitted not only did we not follow the directions, we even made a few alterations. Her parting words were something like— honey, always follow the directions when making jam and I headed up the hill to try and get the jam to gel.

It worked, kind of. I opened all the jars, added more pectin until it looked more jelly like and gave it another bath in boiling water. Sadie's jam didn't completely gel and my jam eventually did set up (I think liquid pectin was the missing link). It all tastes good and looks beautiful. I love seeing all our jam lined up on the shelf. They are the result of a warm August afternoon picking blueberries at a friend's farm and an evening in the kitchen with the girls canning our first batch of jam. Another chapter in our family story, that's always a good thing.

Blueberry Orange Ginger Jam (Adapted from Serious Eats)

8 cups fresh blueberries 2 1/2 cups white sugar 2 cups honey 2 packages of Sure-Jell regular pectin Grated zest of one large orange 1/2 cup orange juice, freshly sueezed 1 tbsp ginger, grated 2 tbsp crystallized ginger, minced 1/2 tsp butter

If you are going to preserve jam, prepare jars and lids: place 8 half-pint jars on rack in large pot. Add enough water to cover jars, and bring to boil over high heat. Boil for 10 minutes, then turn off heat and allow jars to rest in the hot water. Meanwhile, put bands and lids in small saucepan and cover with water. Heat over medium heat until the water is simmering, then remove pan from heat and allow bands and lids to rest in hot water until ready to use.

Working in batches if necessary, pulse blueberries in blender until coarsely crushed. You should have about 6 cups.

Measure 2 1/4 cups of sugar and 2 cups of honey in one bowl. In another bowl, combine remaining 1/4 cup sugar and pectin.

Zest and juice orange. You should have 1/2 cup juice.

Combine blueberries, orange zest and juice, granted ginger, and crystallized ginger in large, heavy saucepan or stockpot. Stir in sugar-pectin mixture. Bring to a boil over high heat, stirring constantly.
Add remaining sugar all at once. Stir in butter and return to a full rolling boil. Boil for one minute. Remove jam from heat and skim off any foam from surface.
Ladle hot jam into hot sterilized jars, leaving 1/4-inch headspace. Wipe rims of the jars, cover with lids, and screw bands on until just barely tight. Place jars on rack in pot and cover completely with water. Cover pot and bring to a boil over high heat. Boil for 10 minutes. Turn off heat, uncover pot, and allow jars to rest in water for five minutes. Remove jars from pot and allow them to rest undisturbed on countertop for six hours or overnight.