Cookery Maven Blog

Scotch Eggs

There are moments in my life I'll always remember— meeting Ted on the 52B bus, seeing my babies for the first time, driving to Iowa in a snowstorm to pick up Guinness (our first Newfie), surprising Ted with an adorable yellow Lab puppy after a swim meet and my first Scotch egg at Brit's Pub on Nicollet Mall. It really was that big of deal, I even remember where we sat (at a two top next to the door). I've always liked hard-boiled eggs but when I found out there were people in the world who wrapped hard-boiled eggs in sausage and then deep-fried those sausage wrapped bundles of goodness, I knew I was at the right restaurant. I've been a fan ever since.

We ate at Brit's many, many times and we always started (and sometimes ended) with a plate of Scotch eggs. After Jack was born, it was a little tougher to find a few hours to sit at a table and enjoy a pint of Guinness and some sausage wrapped eggs. Necessity, being the Mother of invention, helped me on my path to Scotch eggs from my kitchen and to finding a good babysitter (sometimes, it's just more fun to eat at a restaurant— even if it's at a two top near the door). Since I figured eggs and sausage were enough of an artery clogging duo, I looked for an oven baked variation and they turned out perfectly. Admittedly, they look a little more anemic than their deep-fried kin but they taste as good and are a wee bit healthier. That's always a good thing.

One last thing, I like my Scotch eggs with a dipping sauce (nothing like a little mayonaisse with your eggs and sausage). I take about 1/2 cup of Hellman's mayo, 1 1/2 tbsp stoneground mustard, 1 1/2 tbsp Dijon mustard, salt and pepper, mix it up and serve it alongside the eggs. Talk about gilding the lily but the sauce really adds a little something special (or over the top, take your pick).

Oven Baked Scotch Eggs

7 large eggs (preferably free-range and organic)
3/4 cup flour
1/2 cup dried breadcrumbs (preferably fresh)
1/2 cup saltines, finely crumbled
1 lb pork sausage

Preparation
Preheat the oven to 400 degrees. Line a baking tray with parchment paper.

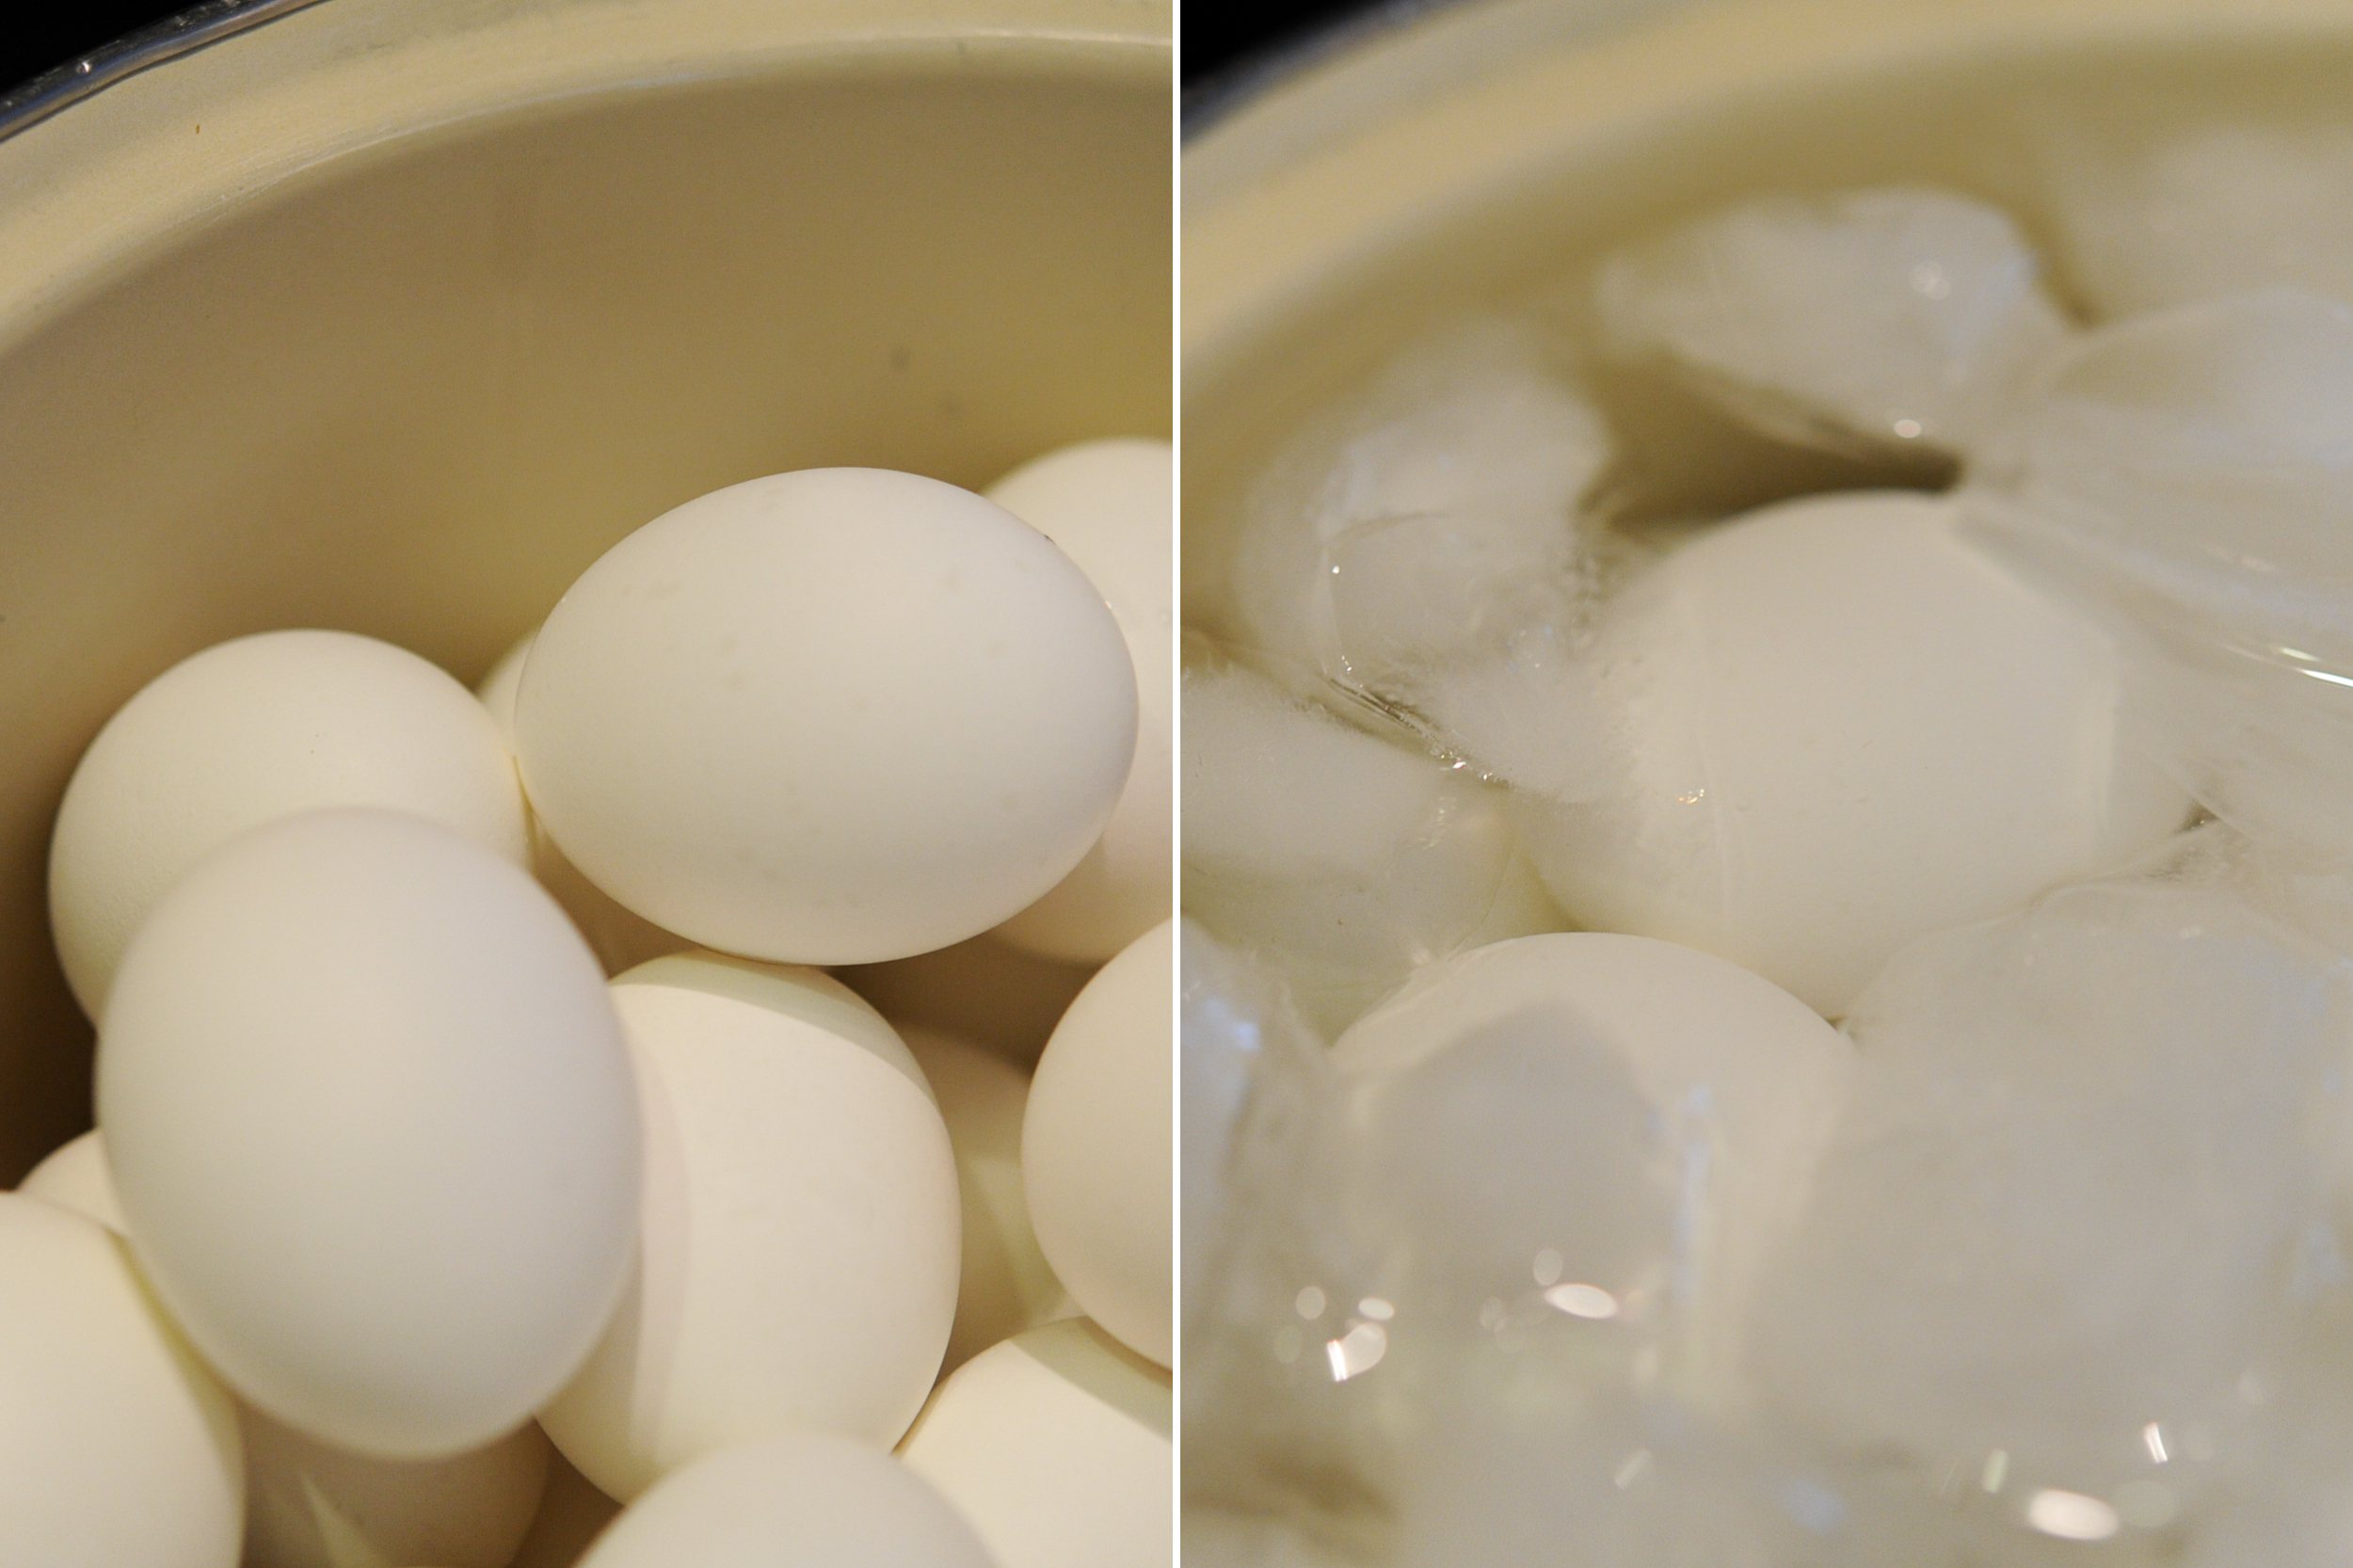
Place eggs in a saucepan large enough to hold them in a single layer and add cold water to cover eggs by one inch. Heat over high heat until the water starts to boil. Remove from the heat and cover the pan. Let the eggs stand in the hot water for about 12 minutes (for large eggs), drain and place in an ice bath to cool completely. Peel the eggs and set aside.

Meanwhile, place the flour and saltines in a shallow bowl or plate and season with some salt and pepper. Break the remaining egg into a second bowl and beat lightly. Place the breadcrumbs in a third bowl or plate and line up all the bowls in a row (flour, then egg, then breadcrumbs).

Scoop out a large ball of sausage meat and flatten it into an oval shape in your hand. If the sausage is sticky, try wetting your hand with cold water. Wrap the sausage meat around the egg, pinching it together at the seam, then smoothing the meat around the eggs, making sure there are no gaps where the egg is peeking through. Dredge the sausage-covered egg in the flour, tapping off any excess. At this stage, set aside the wrapped and floured egg on the lined baking sheet and repeat this process with the remaining eggs.

Once all the eggs have their sausage blanket and their dusting of flour, dip each one in the beaten egg, making sure it all gets coated, then roll it in the breadcrumbs/saltine mixture, making sure it’s fully covered in crumbs. Place the finished egg on the lined baking sheet, then repeat with the remaining eggs.

Place the eggs in the oven and cook for 25 to 30 minutes, until the breadcrumbs are crispy and the sausage is cooked through. Scotch eggs can be eaten warm, cold or at room temperature.

Pickled Eggs, It's An Irish Thing

The realities of life after 40 are numerous: reading is impossible without either 4 foot long arms (which I don't have) or glasses (which I do have), a newly acquired relationship between anything chocolate and heartburn, 3 inch heels are a fond memory and now I can add hearing loss to the list. Joanne called earlier this week and left a message, 'hey, call me back, I have a question about fecal bags'. I consider myself an expert in a number of areas— wine, free thinking dogs, the right kind of salt and dinner parties but I'm a fish out of water when it comes to fecal bags.

So, when Joanne stopped over this morning, I had to ask her what on earth she was talking about— was it code for something, did she call me by accident, was she trying to be funny? She looked at me like I was the crazy one and said, 'pickled eggs, I have a question about pickled eggs'. Well, thank God— I know what to do with pickled eggs (kind of). You'd think with names like Duffy, Meroney, Hubbard and Kennedy in my family tree, I 'd be familiar with pickled eggs— a consummate Irish pub snack but until this week, I was among the uninitiated. No longer, pickling eggs is yet another culinary adventure I can check off my bucket list.

Joanne is having an Irish Whiskey tasting at her shop, Bayfield Wine and Spirits, tomorrow from 3:30 until 5:00. If you're around, stop in for a taste of my idea of a proper pickled egg and a quaff of Irish whiskey on a Saturday afternoon in March. Good Irish whiskey and pickled eggs— what a brilliant way to celebrate (a wee bit early) St. Patrick, the man who drove all the snakes out of Ireland.

Pickled Eggs(Adapted From saltandfat.com)

2 dozen eggs, washed
10 ounces apple cider vinegar
10 ounces balsamic vinegar
20 ounces water
6 ounces sherry
1 onion, quartered and sliced
8 garlic cloves, halved
1 tbsp brown mustard seeds
1 tbsp yellow mustard seeds
4 tbsp brown sugar
1 1/2 tbsp mixed peppercorns
1 tbsp salt
4 branches of rosemary  
Bunch of fresh thyme

Preparation
Place eggs in a saucepan large enough to hold them in a single layer and add cold water to cover eggs by one inch. Heat over high heat until the water starts to boil. Remove from the heat and cover the pan. Let the eggs stand in the hot water for about 12 minutes (for large eggs), drain and place in an ice bath to cool completely.

In a large saucepan, heat the vinegars, sherry, water, salt and sugar to boiling and then reduce to a simmer. Divide the eggs, garlic, onions, herbs, mustard seeds and peppercorns among the canning jars, pour the brine into the jars, seal and place in the refrigerator. They are ready to eat a day after pickling if you like a lighter flavor or about a week if you like a stronger pickled flavor.

The Best Italian Meatball, So Far

I don't need to go any further, my search for the perfect Italian meatball is over. My meatball adventure isn't over yet— there are still ham, reuben and Moroccan meatballs to discover but the Italian part of my trip is over. Like any good traveler planning a trip, I spent an afternoon researching different meatball techniques and found this one on the Minnesota Monthly website. The triple ground beef and ricotta piqued my interest, it sounded like a smooth meatball was in my immediate future. I ground the beef, pork and lamb in my food processor and it worked like a charm, but if you have access to butcher, ask them to triple grind it for you and save yourself a few dishes to wash.

I have a meatball theory— if you are going to go to the trouble to mix and mold 15 meatballs, you should double or triple the recipe, mix and mold 65 meatballs and freeze them for a rainy day (or a day when you don't want to be handling ground meat). I freeze them, covered, on a sheet tray and put them in freezer bags after they are thoroughly frozen. This particular recipe is a little wetter than most meatball recipes and you will end up with meatloaf if you tried to put them in a freezer bag unfrozen. One last tip before you start your own Italian meatball journey— do not over-manage the meatball mix, gingerly form it into solid balls and then leave it alone. If you mold it, squeeze it or smash it too much, the meatballs will be a much tougher consistency. The goal is a little, pillowy soft meatball, not a doorstop.

Italian Meatballs (Adapted From Minnesota Monthly and Marco Canora)

2 1/2 cups whole milk ricotta
3 eggs, lightly beaten
1 cup whole milk
1 1/2 pounds ground pork
3/4 pound ground lamb
2 pounds ground beef, 80% lean
2 cups fresh bread crumbs
1/4 cup parsley, finely chopped
2 tbsp kosher salt
1 tbsp freshly ground pepper
1 tbsp fennel seeds
1 tbsp red pepper flakes
1/2 onion, minced
3 garlic cloves, minced
1 cup Parmesan, shredded
Vegetable oil for frying

Preparation
Wrap ricotta in cheesecloth a day before serving and place in a sieve set over a bowl.  Weight cheese, cover, and refrigerate overnight.

Mix the lamb, pork and beef in bowl. Working in batches, grind it in a food processor for about 45 seconds or until the texture looks smooth and you can't tell the difference between the different meats. Place all the ground meats back in the bowl (after you've ground them in your food processor).

In a small bowl, add the breadcrumbs and milk, stir to combine and let sit for 5 minutes, or until the milk is absorbed. Add the milk soaked breadcrumbs, ricotta, eggs, fennel seeds, red pepper flakes, parsley, onion, garlic, Parmesan, salt and pepper to the meat mixture. Roll the mixture into balls and set aside.

Heat the vegetable oil (enough to cover the bottom of the pan) in a skillet over medium-high heat. Working in batches, place meatballs in the pan and cook until browned all over and cooked thoroughly, about 8 – 10 minutes per batch. Serve with white rice and spoon a little sauce over each meatball. Serve immediately.

Asian Meatballs

Asian meatballs— another stop on the meatball extravaganza happening at the Dougherty's this winter. After I made the Indian meatballs (recipe here), I realized I could make a meatball for every kind of cuisine and since I literally crave Thai and Asian flavors, the Asian meatball was a logical next step in my journey. The brilliant thing about meatballs is their freezeability (not sure that's a word). I make a double or triple batch and freeze them for the nights when I don't feel like cooking but want something decent for dinner. These are more than decent, they're delicious.

Asian Meatballs with a Ginger Soy Sauce

Sauce Ingredients
1 cup brown sugar
1 cup water
1/2 cup regular soy sauce
1/2 cup mushroom soy sauce (substitute regular soy sauce if you don't have the mushroom soy)
1/2 cup hoisin
1/4 cup rice vinegar
1/4 cup sweetened black vinegar
1/4 cup chile garlic sauce
1/4 cup oyster sauce
1/4 cup ginger, peeled and chopped

Meatball Ingredients
1/3 pound ground turkey
1/3 pound ground pork
1/3 pound ground chicken
3/4 cup bread crumbs
1/4 cup milk
4 green onion, thinly sliced
1 cup cilantro, chopped
1 egg, lightly beaten
2 tbsp toasted sesame oil
2 tbsp oyster sauce
2 tbsp ginger, minced
2 garlic cloves, minced
Freshly ground pepper
Vegetable oil for frying

Sauce Preparation
Bring sugar and water to a boil in a medium saucepan over medium-high heat, stirring until the sugar dissolves completely. Reduce heat to medium-low and add both soy sauces, rice vinegar, black vinegar, chile garlic, hoisin, oyster sauce and ginger. Simmer, stirring occasionally, until reduced by half, 30 minutes or so. Set aside.

Meatball Preparation
In a small bowl, add the breadcrumbs and milk, stir to combine and let sit for 5 minutes, or until the milk is absorbed. Mix turkey, pork and chicken together until thoroughly combined. Add the milk soaked breadcrumbs, green onions, cilantro, egg, sesame oil, ginger, garlic, oyster sauce and pepper to the meat mixture. Roll the mixture into balls and set aside.

Heat the vegetable oil (enough to cover the bottom of the pan) in a skillet over medium-high heat. Working in batches, place meatballs in the pan and cook until browned all over and cooked thoroughly, about 8 - 10 minutes per batch. Serve with white rice and spoon a little sauce over each meatball. Serve immediately.

Jennifer's Eggs, Hollandaise & Crab Cakes

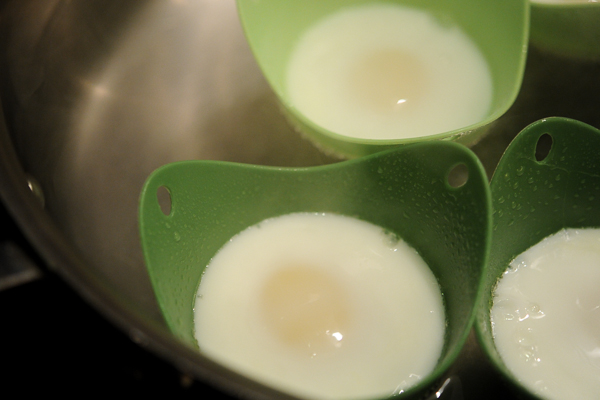
When Jennifer showed up in my kitchen with fresh eggs, not only was it a good day at the Dougherty's, it meant hollandaise which also meant crab cakes. I have to admit, we've become egg connoisseurs around here. The kids will ask if we have any 'fresh eggs' because they don't like the way grocery store eggs taste. I remember when they wouldn't eat eggs, let alone have high standards for said eggs— I've made a lot of progress in the past five years. One thing I haven't made much progress with, until now, is poached eggs. For some reason, it was an utter disaster every time I tried to make a proper poached egg. The yolks were rock hard, assuming they were still intact. Most of the time, the egg decided to give up and flop into a heap of white and yolk. I read if I swirled the water while dropping the egg into the water it would keep the whites together. No dice, it created watery scrambled eggs.

Imagine my joy when another friend, Chris, told me about the Poach Pods at Sweet Sailing. My poach-less egg days were over. These things work like a charm, every time without fail. As long as you oil the inside before you drop an egg into it and keep the water at a simmer, you can have perfectly poached eggs whenever your heart desires. I can't get over the things I've checked off my to-do list in the past year: mandarin pancakes, pie crust, naan, pork pot stickers and now, poached eggs. What's next? A timpano from The Big Night?? I think so, I'll let you know how it goes.

Crab Cakes

1/4 cup Hellman's mayonnaise
1/4 cup onion, minced
2 eggs, lightly beaten
1/2 tsp Worcestershire sauce
1/2 tsp dry mustard (I used Coleman's)
1 1/4 tsp Old Bay seasoning
1/4 tsp cayenne pepper
1 pound lump crabmeat, picked over and rinsed
1 1/2 cups fine bread crumbs
2 tbsp butter
1/4 cup vegetable oil

Preparation
In a large bowl, combine the mayonnaise, onion, eggs, Worcestershire sauce, dry mustard, Old Bay and cayenne. Fold in the crabmeat and 1 cup of the bread crumbs. If the mixture seems too wet to mold into cakes, add more bread crumbs in 1/4 cup increments— it should hold its shape after it's molded but not be too dry. Shape the mixture into 12 cakes about 1 inch thick. Coat the crab cakes with the remaining bread crumbs and transfer to a platter, lined with parchment if the cakes seem sticky.

In a large skillet, heat 1 tablespoon of butter in 2 tablespoons of the oil. Add the crab cakes to the pan, being careful not to crowd them, and cook over medium heat until golden and crisp (about 3 minutes per side). Drain the crab cakes on paper towels, place in a warm oven and cook the remaining crab cakes. Add 1 tablespoon and 2 tablespoons of oil for each new batch of crab cakes. Serve with poached eggs and hollandaise sauce (recipe here).

Naan- My New Favorite Thing

I've made peace with my rolling-pin and the world is my oyster. Okay, maybe not my oyster but definitely my pie crust, savory shortbread or naan. I planned a Moroccan meal, chicken b'stilla and all, but a crucial piece was missing— flat bread. If I still lived in St Paul, I would have hopped in my car, driven to Uptown and bought a couple of bags of fresh pita from Bill's Imports and secured the final component of my Moroccan feast. Four hours is too long to drive for pita so I looked up a recipe for naan, grabbed my rolling-pin and I made the final component for my Moroccan dinner. Necessity is the mother of invention, or in this case, bread making.

It was way, way easier than I thought. The dough can get sticky (with the egg and yogurt) so make sure you have extra flour on hand when you roll it out. Other than that, you can free form the naan into whatever shape strikes your fancy, throw it on the grill pan, cover it and within 5 minutes, you have the best piece of warm flat bread just waiting to be eaten. Good things happen when you overcome your fear of rolling pins, I'm living proof.

Indian Naan(Adapted from The New York Times & Bukhara Grill)

2 1/2 tsp dry yeast
2 tbsp sugar
1 1/4 cup warm water
5 cups all-purpose flour, more for dusting and rolling
2 tsp salt
1 tsp baking powder
3 tbsp whole milk
2 tbsp plain Greek yogurt
1 large egg, lightly beaten
2 tbsp vegetable oil, more for the bowl
3 tbsp butter, melted
2 cloves garlic, minced

Dough Preparation
Place the sugar, yeast, and 1/4 cup warm water (110 to 115 °F) in a small bowl and let sit 5 to 10 minutes until it becomes foamy. Put the flour, salt, and baking powder in a food processor fitted with a dough blade or a mixer bowl with the dough hook and blend. Pour the yeast mixture, milk, yogurt, egg, 2 tablespoons of vegetable oil, and 1 1/4 cup warm water into the bowl and knead until the dough forms a ball that is smooth and elastic (about 2-3 minutes in a processor or 5-8 minutes in a stand mixer). The dough should be soft without being sticky. If it’s sticky, add more flour. Put the dough in a lightly-oiled large bowl. Turn the dough around to coat oil on all sides and then cover the bowl with plastic wrap and let it sit in a warm, draft-free place for about an hour. Punch down the dough and cut it into 8 pieces. Roll them into balls and set on a floured baking sheet. Cover with damp kitchen towel and let rise until doubled in size (about another hour).

Cook The Naan: Melt the butter in a small saucepan, add the garlic and set aside. Roll the dough balls out on a floured work surface into a disk about 6 inches in diameter. Stretch one end to make an oblong teardrop shape. Repeat with remaining dough and cover with a damp cloth. Place your cast iron grill pan on the stove and heat over medium high heat. Lightly oil the grill pan. Place dough on grill pan and cover with the lid of a pan large enough to encompass the entire piece of naan. Grill until the bottom is browned and the top starts to puff and blister, 1 to 2 minutes. Flip the naan over and grill, covered, until it's lightly browned, another 1 to 2 minutes. Brush the top with the garlic butter. Serve immediately or cool completely, cover and use within a couple of days.

Pho- Seriously Good Soup

Pho, a little word for a big, flavor bomb of a soup filled with noodles, beef, dried spices, fresh herbs and a healthy dose of hoisin and Sriracha sauce. I've never actually eaten Pho in a Vietnamese restaurant but I've heard epic tales from Ted, a self-professed Pho aficionado. He and his friend, Rick, used to travel the length and breadth of the Twin Cities, in search of the best bowl of Pho they could get their hands on. I'm not sure what all the criteria (or their credentials) were but I do know a restaurant with bullet holes in the wall was awarded extra points. So, when I set out to make a batch, I knew I had an in-house expert to guide me to my own personal best bowl of Pho.

The broth takes a little while to come together (don't skip the par-boil for the bones, it'll make for a much clearer broth) but after I micro-managed the broth and skimmed away most of the impurities (about 30 minutes of standing at the stove and skimming), it was a breeze. Since I stock up at the Asian grocery store when I'm back in Minneapolis, I had a bag of fresh noodles in the refrigerator but dried noodles will work just as well. After a couple attempts at Pho greatness, Ted gave me the thumbs up and said I 'nailed it'. Pretty high praise from a guy who devoted a couple of years on University Avenue and Cedar Riverside looking for the perfect bowl of soup.

Vietnamese Pho Noodle Soup

The Broth
2 onions, halved
4" nub of ginger, halved lengthwise
5-6 lbs of good beef bones, preferably leg and knuckle
6 quarts of water
1 cinnamon stick
1 tbsp coriander seeds
1 tbsp fennel seeds
4 whole star anise
1 cardamom pod
6 whole cloves
1 1/2 tbsp kosher salt
1/4 cup fish sauce
1 inch chunk of yellow rock sugar (10 ounces regular sugar)

The Good Stuff for the Bowls
2 lbs rice noodles (I used fresh)
1/2 lb flank steak, sliced as thin as possible
1/2 cup mint, chopped
1/2 cup cilantro, chopped
1/2 cup basil, chopped
1/2 cup green onions, thinly sliced
2 limes, cut into wedges
2-3 chili peppers, sliced
2 cups bean sprouts Hoisin sauce ( I like Lee Kum Kee)
Sriracha hot sauce

Broth Preparation
Turn your broiler on high and move rack to the highest spot. Place ginger and onions on baking sheet. Brush just a bit of cooking oil on the cut side of each. Broil on high until ginger and onions begin to char. Turn over and continue to char. This should take a total of 10-15 minutes.

While the ginger and onion are in the oven, fill large pot (12-qt capacity) with cool water. Boil water, and then add the bones, keeping the heat on high. Boil vigorously for 10 minutes. Drain, rinse the bones and rinse out the pot. Refill pot with bones and 6 qts of cool water. Bring to boil over high heat and lower to simmer. Using a ladle or a fine mesh strainer, remove any scum that rises to the top. ***This is an important step, don't skip it.

Add the cinnamon stick, coriander, fennel, star anise, cardamom pod and cloves to a mesh bag and tie close (I bought a reusable tea bag at the Co-op) charred ginger and onion, sugar, fish sauce, salt and simmer uncovered for 3 - 4 hours. Strain broth and return the broth to the pot. Taste broth and adjust seasoning - this is a crucial step. If the broth's flavor doesn't quite shine yet, add 2 teaspoons more of fish sauce, large pinch of salt and a small nugget of rock sugar (or 1 teaspoon of regular sugar).  If the spices are too strong, add plain beef broth ( homemade or canned) to dilute the soup. Keep doing this until the broth tastes perfect.

Noodle and Meat Preparation
Slice your flank steak as thin as possible - try freezing for 15 minutes prior to slicing to make it easier. Arrange all other ingredients on a platter for the table. Your guests will "assemble" their own bowls. Follow the directions on your package of noodles— each brand is different. After the noodles are cooked, rinse thoroughly in cold water (this will keep them from sticking).

Adding the Good Stuff to the Bowls
Bring your broth back to a boil. Fill each bowl with rice noodles and raw meat slices. As soon as the broth comes back to a boil, ladle into each bowl. the hot broth will cook your raw beef slices. Serve immediately. Guests can garnish their own bowls as they wish.

Mussels Bathed In Thai Red Curry

I was a frequent Thai food take-out customer when we lived in St. Paul— Ruam Mit Thai  had some of the best Thai I've ever eaten. However, Ruam Mit doesn't have a Bayfield satellite and I needed to develop some Thai cooking skills. Our friend, Rich, was our very first dinner guest when we bought our house in Bayfield six years ago and he brought all the ingredients and made the dinner. As frequent visitors to my kitchen will attest, I'm a little territorial about my space near the stove but Rich is welcome anytime. He taught me how to make Thai food and I'll love him forever for sharing his recipe for Thai red curry with me. I still have the original recipe he copied for me before he left to go back to Minneapolis— as you can see from the picture, it's seen a lot of action in my kitchen.

I met Rich's wife, Tammy, on the dock when I was 8 months pregnant with Charlie. I looked across the marina and saw an equally pregnant woman walking down C dock and knew I needed to introduce myself— hugely pregnant women in a marina are about as rare as Piping Plovers on Long Island. I'm so glad I waddled over to meet her— it turned out Rich grew up three or four houses away from Ted, our kids went to the same pediatrician and our babies were due within 2 weeks of each other. Over the years, we spent many weekends out in the islands and even made the trek across the Lake to Grand Marias a couple of times. We always ate well on our adventures and dinner at Naviya's Thai Kitchen was an integral part of the meal planning process. So when Rich showed up at my door in Bayfield with the fixings for a grand Thai dinner, I was thrilled. Thai food, Grand Marais and the Jamieson's— beautiful and delicious memories.

Thai Red Curry Mussels (Adapted from Madhur Jaffrey's Far Eastern Cookery)

1 3/4 cups coconut milk
1 sweet potato, peeled and diced into 1 inch cubes
2 pounds mussels, debearded and scrubbed
1 stalk lemongrass, crushed
3 tbsp shallot, minced
2 tbsp galangal, chopped
1 tbsp garlic, minced
1/2 tsp salt
4 tbsp vegetable oil
4 tbsp red curry paste ( I use Mae Ploy)
1 1/2 tbsp fish sauce
1 tsp brown sugar
4 fresh kaffir lime leaves ( I buy a bunch of them at the Asian market in Minneapolis and freeze them)
10 fresh sweet basil leaves, julienned
1/4 cup cilantro, chopped

Preparation
Skim off 4 tablespoons of the thick cream of the coconut milk and set it aside. Stir the rest of the coconut milk to mix. Place the diced sweet potatoes, lemongrass, shallot, galangal, kaffir lime leaves, garlic and coconut milk in a saucepan, heat over medium heat and braise until the sweet potato is softened (about 10 - 15 minutes). Remove from heat and set aside.

Put the oil and reserved coconut cream in a heavy wok or wide heavy pan. Bring it to a boil. Add the curry paste and stir and fry over medium high heat until the oil separates and the paste is lightly browned. Lower the heat and add the fish sauce and sugar. Stir to mix. Add the sweet potato/coconut milk mixture and bring to a simmer. Add the mussels, cover and steam until the mussels open (discard any mussels that do not open). Stir in the basil and cilantro and serve immediately over steamed jasmine rice.

Who Needs A Little Huli Huli??

It's finally warming up. We've been in the deep freeze for the last couple weeks and 25 degrees above zero is my version of a heat wave in February. And that means grilling some huli huli chicken and pineapple for dinner. Lighting the grill with snowflakes drifting downward seems kind of counterintuitive but it's a nice reminder of all the summer nights to come. Who couldn't use a little luau and huli huli in the middle of winter?

Huli Huli Chicken (Adapted from The Best Of America's Test Kitchen 2010)

Brine & Chicken
3 quarts water
1 cup orange juice
1 cup pineapple juice
1 1/3 cup soy sauce
3/4 cup kosher salt
2 cups brown sugar
6 cloves garlic, peeled and smashed
2 medium yellow onions, peeled and quartered
2 tbsp red pepper flakes 2 whole chickens, quartered

Glaze
2 1/4 cups pineapple juice
1/4 cup packed brown sugar
1/4 cup soy sauce
1/4 cup ketchup
1/4 cup rice vinegar
4 garlic cloves, minced
2 tbsp fresh ginger, minced
2 tsp Asian chili-garlic sauce

Brine Preparation
In a large stockpot, add the water, sugar and salt. Heat until the sugar and salt is melted and then cool completely. Once the water/sugar/salt mixture is cool, add the remaining ingredients, including the chicken, to a very large container, place in refrigerator for at least 4 hours and up to 8 hours.

Glaze Preparation
Combine the pineapple juice, sugar, soy sauce, ketchup, vinegar, garlic, ginger and chili-garlic sauce in an empty saucepan and bring to a boil. Reduce the heat to medium and simmer until thick and syrupy (you should have about 1 cup) 20 to 25 minutes. The sauce can be refrigerated in an airtight container for up to 3 days.

Grilling The Chicken
Prepare a charcoal grill and heat until hot. Remove the chicken from the brine and pat dry. Arrange the chicken, skin-side up, on the grill and grill, covered, until the chicken is well browned and the thickest part of the thigh registers 120 degrees, 25 to 30 minutes. Flip the chicken skin-side down and continue to grill, covered, until the skin is well browned and crisp, about another 20 minutes. Transfer the chicken to a platter, brush with half the glaze, and let rest for 5 minutes. Serve, passing the remaining glaze at the table.

A Greek Hotdish- It's What For Dinner

This recipe goes way back in the Dougherty dinner history book, back to 2078 St Clair Ave with a temperamental electric oven and the neighbor who liked to eat dinner in his underwear (we had a front row seat because our houses were about 3 feet apart). Those were the days before I had much cooking experience and a package of phyllo was enough to give me hives. I remember reading the directions and almost jumping ship when I read, 'keep the phyllo covered with a damp towel to keep it from drying out'. I quickly figured out there is a distinct and important difference between 'damp' and 'wet'— a dripping towel and phyllo sheets resulted in a sticky mess. Since I already had the feta and spinach, I wasn't about to let my lack of attention to details ruin my Greek hot dish. I loaded Sadie and Will in the stroller, hiked down to Widmer's, bought more phyllo and with my 'damp' towel, started assembling my masterpiece.

I honestly don't remember how it turned out, that oven was troublesome and had more hotspots than a Labrador with food allergies, and I can't imagine what it would have done to phyllo. Of course, back in those days with three kids under 6, it's no wonder my memory is a little foggy. I'm sure it was a hit because it made the regular dinner rotation. I had some phyllo in danger of major freezer burn and some Sassy Nanny Feta in the fridge— it was time for a trip down memory lane with a Greek hot dish (without the neighbor in his undies).

Beef, Spinach & Feta Casserole

Beef Filling
1 tbsp. canola oil
1/2yellow onion, finely chopped
1/2 red bell pepper, cored, seeded, and finely chopped
3 stalks of celery, chopped
2 garlic cloves, minced
1 pound ground beef
One 28 can of chopped tomatoes, in purée
2 tbsp fresh oregano, chopped
Kosher salt and freshly ground black pepper, to taste

Spinach & Feta Filling
Two 10 ounce packages of frozen spinach, thawed
1 package of cream cheese, softened
1 cup feta, crumbled
1/2 cup Parmesan, shredded
1/4 cup dill, chopped
1/4 cup green onions, sliced
3 eggs, lightly beaten
Kosher salt and pepper to taste
1/4 cup butter, melted
12 sheets phyllo dough

Beef Preparation
Heat oil in 12″ skillet over medium-high heat. Add onion, pepper, celery and garlic, cook until soft, about 6 minutes. Add beef and cook until browned, stirring so that the meat breaks up into small pieces, about 8 minutes. Add tomatoes. oregano, salt and pepper and cook, stirring occasionally, until reduced and thick, about 10 minutes. Set aside.

Spinach & Feta Preparation And Casserole Assembly
Squeeze as much moisture from the thawed spinach. Mix the spinach, cream cheese, feta, Parmesan, dill, green onions, eggs, salt and pepper in a large bowl. Brush the bottom of a 13 x 9 inch baking pan with olive oil or cooking spray. Add the beef mixture to the pan and then place the spinach mixture on top. Spread the spinach mixture as evenly as possible over the beef mixture.

Keep the phyllo covered with a damp towel. Brush the top of a sheet of phyllo dough with butter and place it in the pan. (You may have to cut the phyllo dough to fit the pan.) Repeat until you have 6 layers. Take the remaining 6 pieces of phyllo, butter them and then fold them up 'accordion style' and place them next to each other on top the phyllo.

Bake in a preheated 350 degree oven until golden brown on top, about 30-50 minutes. Let it sit for about 10 minutes and then serve immediately.

Pancetta Pasta Carbonara

Pancetta, peas and a cream sauce— what's not to like? If that's all I ate for a week, my thighs and arteries might have a list of things not to like but a once a month visit to creamy, salty pasta land won't completely derail my healthy plans for 2013. We have Sunday Funday around here (it helps to have one day a week with a little dietary reckless abandon) and pancetta is the life of the party, as far as I'm concerned. Since I've always had a fondness for peas, I settled on pasta carbonara as our Sunday Funday dinner. It lived up to the hype and was worth the wait— it was a Funday, indeed.

Pasta Carbonara With Pancetta (From The Pioneer Woman website)

12 ounces pasta, any variety
8 ounces pancetta, diced small
1/2 whole red onion, diced small
2 cloves garlic, minced
3 whole eggs
3/4 cups Parmesan, finely grated
3/4 cups heavy cream
Sea salt & plenty of black pepper
1/2 cup peas

Preparation Instructions

Cook pasta according to package directions.

While the pasta is cooking, fry the pancetta until just barely crisp. Remove from the pan and drain on paper towels. Pour off all of the bacon grease, but don't clean the pan. Return the pan to the stove over medium-low heat and throw in the onions and garlic. Cook until golden brown. Set aside.

In a bowl, mix together eggs, Parmesan, cream, and salt and pepper until smooth.

When the pasta is done, reserve a cup or two of the pasta water. Drain the pasta and place it in a bowl. While the pasta is still really hot, slowly drizzle in the egg mixture, stirring the pasta the whole time. The sauce will become thick and should coat the pasta. Splash in a little hot pasta water if needed for consistency.

Halfway through, add the peas, bacon, and sautéed onions and garlic. Finish adding the sauce, stirring until it's all combined.

Add lots of extra Parmesan and serve immediately.

Salsa di Parmigiano & Lamb Blade Chops

I used to buy a Salsa di Parmigiano dip at Kowalski's and ate it by the bucketful with slices of fresh baguette. I completely forgot about it after we moved up here (I wonder what other good food I've forgotten about) but had a lovely reminder in my email in-box a couple of weeks ago. Lemons & Anchovies, a blogger I follow, had a post about it and I was reaquainted with my old cheesy pal from Woodbury. I made a double batch and have eaten it by the spoonful ever since. It's good with bread, roasted chicken, lamb, potatoes, green beans— it's my grown up version of ketchup. One more reason to make a batch— it's been in my refrigerator for a month and still tastes fresh. This is a seriously rock solid and delicious dip, you'll be happy to have it in your fridge.

The day after I made the Salsa di Parmigiano, we needed to eat dinner and I was at an utter loss for a decent and easy idea. So, after 10 minutes spent pacing up and down the meat aisle at the IGA hoping for a stroke of genius (or at least, above average), I saw 2 packages of lamb blade chops. That was close enough to genius as far as I was concerned and I headed home to make something above average for dinner. I marinated them in red onion, rosemary, red wine vinegar, garlic and olive oil for about an hour or so, grilled them on the stove top in my grill pan (another seriously good idea) and put a generous dollop of Salsa di Parmigiano on the chops. It was definitely an above average dinner.

Salsa di ParmigianoAdapted From Michael Chiarello

1/2 pound Parmesan
1/2 pound Asiago cheese
1/4 cup red onion, chopped
3 cloves garlic
2 tablespoons fresh rosemary, chopped
2 teaspoons red pepper flakes
1 to 1 1/2 cups extra-virgin olive oil
1 teaspoon freshly ground black pepper
Sea salt to taste

Preparation
Remove any rind from the cheeses and chop the cheeses into rough 1-inch chunks. Pulse the cheeses, red onion and garlic in a food processor until reduced to a fine, pea-sized gravel. Transfer this mixture to a bowl and stir in the rosemary.

Add the red pepper flakes, 1 cup of the olive oil and black pepper. Stir.  If mixture seems dry, add more olive oil by the 1/4 cup. Taste and add salt if you think it needs it ( I added 1 tbsp of Maldon sea salt). Cover and let stand at room temperature for at least 4 hours before using.

Another Beefy Adventure With Marrow

Beef marrow in January, kind of counter intuitive, right? Not for me. Turning the page on the calendar into a new year has never meant turning my back on the foods I've met and enjoyed over the past year. This year, that list included farro, green smoothies, artisan butter from Eau Claire and bone marrow. Variety is not only the spice of life, it's the key to dietary happiness for this girl. I just need to make sure there are more green smoothies than butter and beef— sounds thoroughly reasonable to me. I wonder how many kale and collard smoothies I need to drink to balance out stuffed bone marrow? I guess it's a good thing I like green smoothies.

Back to tale of the marrow and mushrooms. I've stuffed pumpkins, chickens, clams— why not add bone marrow to the list? I settled on mushrooms, garlic and red onions as a good place to start for my first foray into bone stuffing. It was everything I hoped for— savory compound beefy butter in a bone. The family is still not completely on the marrow train, they aren't on the green smoothie train either, but they are coming around (slowly). A plate of bones won't hit the Dougherty dinner table more than every couple of months but when it does, it's a dinner I can't wait to tuck into.

Beef Marrow & Mushrooms

4 beef bones, 3 0r 4 inches long
2 tbsp olive oil
2 garlic cloves, chopped
1/4 cup red onion, chopped
1 cup cremini mushrooms, chopped
1/8 cup Parmesan cheese, grated
Maldon salt and coarsely ground pepper

Preparation
Rinse and dry the bones. Heat the olive oil in a sauté pan over medium heat and add the onions and mushrooms, sauté for about 8 - 10 minutes or until the vegetables are softened. Add the garlic and sauté for another 2 minutes. Remove the vegetables from sauté pan and cool completely in the refrigerator. Scrape or push out as much of the marrow as possible and chop it up into bite size pieces. Add the cooled vegetables, shredded parmesan and thoroughly combine. Stuff the bones with the marrow/vegetable mixture, season with salt and pepper and place in the refrigerator for at least an hour. You want the filling to be as cold as possible before you place it in the oven (to avoid having it cook too quickly and completely render).

Preheat the oven to 350 degrees. Place the bones in a roasting pan and roast for about 15 minutes. Begin checking the bones at 10 minutes and pull them out when the marrow starts to bubble and the tops are getting brown. If they cook them too long, you'll end up with a pan full of empty bones swimming in a pool of rendered beef fat.  Serve immediately with lemon slices, parsley salad or a few salted capers on slices of toasted baguette.

Asparagus & Anchovies

Anchovies and asparagus, who knew? They are a match made in little fishy heaven and the combination takes plain old asparagus to a new level of fancy schmancy. Since I'm wholeheartedly embracing vegetables, it's good to have a flavorful butter sauce to ease the transition from eating meat and poultry with wild abandon to practicing a little restraint and filling my plate with vegetables. I've decided I'm a devout omnivore and that includes things like pâté, Fromage d'Affinois and roasted duck with a reduced port sauce— just not every day. In fact, I made my very first foray into black bean burger land tonight and while my recipe needs a little work before I pass it on to you, it wasn't that bad. Maybe I need to add a few anchovies (and butter).

Alongside the 45 types of mustards, pickles and Thai fish sauce in the fridge, there's always a little jar of anchovies in olive oil— they're my secret ingredient in stews, salad dressings and sauces. I'm telling you, for such a little fish, they pack a big punch and when they mingle with white wine, capers and butter— it's a good thing.

Asparagus With Anchovy Butter

1 bunch fresh asparagus, washed and ends trimmed
4 tbsp butter
3/4 cup dry white wine
4 anchovies in olive oil, chopped
1 garlic clove, minced 2 tbsp shallots, minced
2 tbsp Italian parsley, chopped
1 tbsp capers
2 tbsp pine nuts, toasted
4 tbsp Parmesan cheese
Maldon sea salt and pepper

Trim asparagus stalks to the same length, cook 3-4 minutes in salted boiling water until cooked but still crispy. Drain on a towel.

Add the white wine, shallots, garlic and parsley to a medium sauce pan, simmer until the wine is reduced by half. Whisk in the butter until melted, add the anchovies and capers, stir to combine. Taste for seasoning and add salt and pepper, if necessary. Place the asparagus on a platter, pour the butter sauce over the asparagus and garnish with Parmesan and pine nuts. Serve immediately.

Pork Pot Stickers- A Good Way To Start 2013

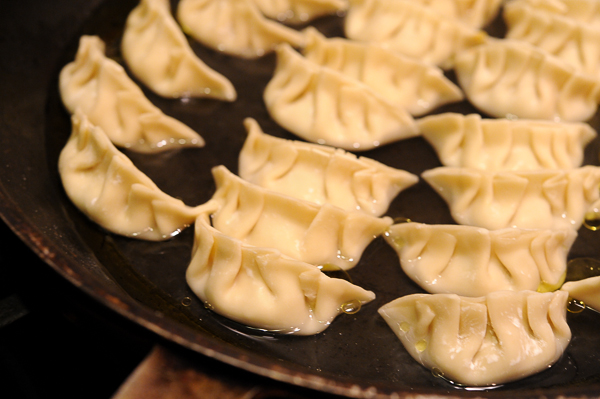
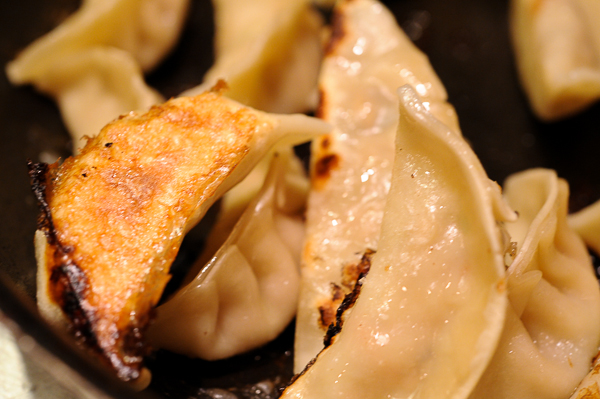
What's not to like about a pleated package of pork with a crunchy, almost burned bottom? Add a salty dipping sauce and I'm a happy camper. When we were knee deep in our development of a Bayfield outpost of Chinese take-out, I had pot stickers on my list of 'things to figure out'. My eye hand coordination is shaky at best and utterly pathetic at worst. Maybe it's because I only played Pong as a kid or because I need to admit I'm over forty and get glasses but making those little pleats proved to be problematic, at first. After I watched a couple You Tube videos, it finally sunk in and now it's like riding a bike— I'll never forget it.

You can put whatever you want in the filling, we chose pork because it's traditional and we are a porky kind of family. You want to make sure the filling (pork or not) is highly seasoned and lucky for us, Chinese food has a wide array of choices: garlic, soy sauce, ginger, oyster sauce and toasted sesame oil. Don't skip seasoning the cabbage with salt and then wringing out as much of the moisture as possible— cabbage gives off a lot of moisture when it's cooked and will make your pot stickers soggy. One last tip, don't over fill the wrappers, it'll make it really, really hard to get your pleats to stick. I made a double batch and then froze them for another day when I have a hankering for a little Chinese take-in.

Pork Pot Stickers(Adapted from Ming Tsai & Epicurious.com)

2 cups finely shredded green cabbage
3/4 teaspoon kosher salt, plus 1/8 teaspoon for seasoning
1/3 pound ground pork (not too lean)
1/2 cup shiitake mushrooms, finely chopped
1 tbsp fresh ginger, minced
2 tbsp coarsely shredded carrot
3 tbsp shallots, minced
2 scallions, thinly sliced
2 cloves garlic, minced (about 2 teaspoons)
1 tbsp oyster sauce
1 tbsp soy sauce
2 teaspoons Asian (toasted) sesame oil
1/2 egg, lightly beaten
1/8 teaspoon freshly ground black pepper
30 gyoza (pot sticker) wrappers, from 1 (14-ounce) package*
1/4 cup canola oil

In large bowl, toss together cabbage and 3/4 teaspoon salt and set aside for 30 minutes. Transfer to clean dish towel or cheesecloth, gather ends together, and twist to squeeze out as much water as possible. Wipe bowl clean, then return cabbage to it. Add pork, mushrooms, ginger, carrots, shallots, scallions and garlic and stir to combine.

In small bowl, whisk together soy sauce, oyster sauce, sesame oil, and egg, then stir into cabbage-pork mixture. Stir in pepper and remaining 1/8 teaspoon salt.

On dry surface, lay out 1 gyoza wrapper, keeping remaining wrappers covered with dampened cloth or paper towel. Spoon 1 1/2 teaspoons filling into center, then moisten halfway around edge with wet finger. Fold moisture-free half of wrapper over moistened half to form open half-moon shape. To seal, using thumb and forefinger of one hand, form 6 tiny pleats along unmoistened edge of wrapper, pressing pleats against moistened border to enclose filling. Moistened border will stay smooth and will automatically curve in semicircle. Stand dumpling, seam-side up, on baking sheet and gently press to flatten bottom. Cover loosely with dampened cloth or paper towel. Form remaining dumplings in same manner.

In 10-inch, lidded, non-stick skillet over moderately high heat, heat oil until hot but not smoking, then remove from heat and arrange pot stickers in tight circular pattern standing up in oil (they should touch one another). Cook, uncovered, until bottoms are pale golden, 2 to 3 minutes. Add 1/2 cup water, tilting skillet to distribute, then cover tightly with lid and cook until liquid has evaporated and bottoms of dumplings are crisp and golden, 7 to 10 minutes. Add 2 tablespoons more water if skillet looks dry before bottoms are browned. Remove lid and cook, shaking skillet to loosen pot stickers, until steam dissipates, 1 to 2 minutes. Invert large plate with rim over skillet. Using pot holders, hold plate and skillet together and invert skillet. Remove skillet and serve pot stickers warm.

Pancetta & Asian Pear Tartlets

Are you casting about for an idea of a suitable appetizer to mark the end of 2012? Look no further, these little tartlets are full of flavor, beautiful to behold and easy to pull together. You can substitute pears or apples for the Asian pears I used— the key is just a little sweet fruit to play off the gorgonzola and pancetta. I drizzled honey on the top of the tartlets and while I couldn't necessarily pinpoint the honey flavor, it added a cohesive, glazed texture to the melted gorgonzola.

We are headed out to Ashwabay for the afternoon— Ted and the kids are skiing and George and I are walking out to the Nourse sugarbush. Tonight, I'm repurposing my Christmas prime rib as stroganoff, making a batch of fried chicken for the kids and I think there will be a few glasses of Rack & Riddle Blanc de Noirs sparkling wine in my immediate future. What a gift to spend the last day, of what has been a transformative year, with the people and dogs I adore beyond words. I hope your day and evening are full of whomever and whatever you hold dear.

Pancetta & Pear Tartlets

1 package of puff pastry, thawed
1/4 pound of pancetta, diced
1/2 red onion, thinly sliced
1 Asian pear, thinly sliced
1/2 cup parmesan cheese, shredded
1/2 cup gorgonzola, crumbled
2 tbsp butter, room temperature
Honey
Maldon salt and cracked pepper, to taste

Preparation
Preheat oven to 400 degrees and butter the tartlet pans. Unfold a sheet of puff pastry on a lightly floured surface and roll out until it's about 1/4 inch thick. Cut the pastry into individual rounds large enough to fit into your tartlet pans (mine are about 4 1/2 inches in diameter) and place in the buttered pans.

Divide and sprinkle the parmesan between the tartlet pans. Divide and place the sliced pears, onions, pancetta and gorgonzola in each pan and then drizzle with honey and season with salt and pepper. Cook for about 15 minutes or until golden brown and puffed. Remove from the pans and either serve immediately while warm or at room temperature. Makes five 4 1/2 inch tartlets.

Cherrystone Clams & Chorizo

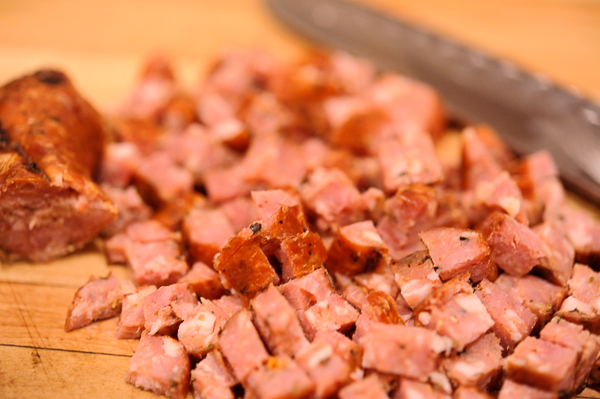
It was a fruitful trip to Duluth—fresh Cherrystone clams from the grocery store and chorizo from Northern Waters Smokehaus. About once a month I head to Duluth to stock up on things I can't get around here: anything and everything from the Smokehaus, good butter from Mount Royal, shampoo and cocktail napkins from T J Maxx and my favorite soap from Waters of Superior. On this particular excursion to the big city, I was on a mission to find crab legs and stumbled upon these beautiful and sturdy looking clams in the seafood department. They went right into my cart and by the time I hit the checkout, I realized— short of chowder, what on earth was I going to do with 6 pounds of clams?

As luck would have it (since this was an excursion), I had 1 1/2 hours to think about it on my way back to Bayfield. At about the Brule River, I thought stuffing the clams seemed like the right direction to take— it most likely would benefit from butter and wine, it was easy and I have a family who will eat most anything (even clams) if there is some sort of sausage involved. I have to admit, I wasn't sure how it was all going to play out but I suspected it was going to be worth eating. Turns out, not only was it worth eating, those stuffed clams were seriously pretty— some of the shells had the most beautiful, deep purple edge.

Cherrystone Clams Stuffed With Chorizo (Adapted From Monahan's Seafood Market)

8 Cherrystone clams
2 tbsp butter
2 cloves garlic, minced
1 stalk celery, chopped
2 tbsp onion, chopped
4 tbsp parsley, minced
2 tbsp basil, minced
1 tbsp oregano, minced
1/4 cup dry white wine
1 tbsp fresh lemon juice
1/2 of a red pepper, chopped
5 tbsp Parmesan, grated
1 1/2 c (or so) bread crumbs
1 egg, lightly beaten
4 ounces chorizo, chopped
Salt and pepper, to taste

Preparation
Steam clams in 1/4–1/2 inch of water until they just begin to open. Remove meats and save the shells. Finely chop the clam meats and set aside.

Place the butter in a large sauté pan and heat until the butter is foaming over medium high heat. Sauté chorizo, celery, garlic, onion, herbs and red pepper until chorizo is cooked and the vegetables are softened. Add the wine and continue to cook for another couple of minutes. Combine in mixing bowl with chopped clams, parmesan, lemon, egg and mix in the bread crumbs until the mix holds together in a ball in your hand. Taste for seasoning and stuff the 8 shells. Bake at 375° for about 10–12 minutes or until nicely browned. Serve immediately.

Russian Tea Makes It All Better

Despite my best efforts, we've succumbed to the cold that has been traveling around the Bayfield peninsula. Since the kids are sick of green smoothies, we've moved on to Russian tea— my Mom's panacea to sniffling and sneezing. It seemed exotic to me as a kid. We never had Tang in the house (for some reason, I associated it with astronaut food and my parents were firm believers in real orange juice) and drinking 'tea' seemed like the grown-up way to handle a cold. As I was mixing it up this morning for my crew, the mildly citrus and über sweet smell brought me right back to my childhood kitchen on West 60th Street. I'm always struck by how smells and tastes conjure up memories I thought I had forgotten, food is powerful medicine.

Russian Tea

2 cups instant tea powder
2 cups Tang powder
1/4 cup sweetened lemonade mix (I used Country-Time)
1 cup white sugar
2 tsp cinnamon
3/4 tsp ground cloves

Preparation
Add all ingredients to a large bowl and combine thoroughly. Add 2 tablespoons to one cup hot water and mix to dissolve. Store in a sealed container.

Mu Shu Pork & Mandarin Pancakes

This was the final frontier in our quest to satisfy our hankering for Chinese take out but those thin little Mandarin pancakes gave me nightmares. Ted loves, loves, loves mu shu pork and mu shu from the Great Wall in Edina was his gold standard. I always thought the pancakes were crepes but I was wrong. They are made from a dough with two ingredients, water and flour, rolled paper-thin and cooked on the stove top in a hot skillet. Needless to say, I decided it sounded like a disaster in the making and who needs mu shu anyways when we have Thai curry to keep us satisfied? But it was always out there, the promise of pork wrapped in a pancake and drizzled with hoisin. I decided to man up, stop whining about rolling out paper-thin pancakes and get cooking. It was so much easier than I anticipated; I can't believe it took me so long to bring a little Edina Chinese food to Bayfield.

After a fair amount of trial and error, I learned two things: you really have to roll the pancakes out as thin as possible (think really thin tortillas) and generous use of sesame oil is going to make the whole process much more enjoyable (pancakes that stick together are no fun). I've made the pancakes a couple of days before I make the pork filling and they hold nicely in the refrigerator (tightly covered). They also freeze well, again tightly covered. The pork mixture is a breeze to pull together and if you have the pancakes in the freezer, I swear it kind of seems like take out— minus the little cello packages of soy sauce and fortune cookies.

The pork part of the equation is basically a very simple stir fry. As with most Chinese food, I find a mis en place approach to be the best. There is a fair amount of chopping and if you do it all at once, it really is just a matter of throwing it all in the pan, cooking and eating. The recipes I saw called for either pork loin or tenderloin. I've tried it both ways and frankly, since the pork is thinly sliced, I can't tell the difference. You can also substitute chicken thighs if you aren't a pork fan or tofu if you aren't a meat fan. One last caveat to make your mu shu experience the very best it can be— buy good hoisin. We like Lee Kum Kee or Koon Chun.

Mu Sho Pork & Mandarin Pancakes

Mandarin Pancakes(From Fine Cooking)

1-3/4 cups unbleached, all-purpose flour
3/4 cup boiling water
1 tbsp toasted sesame oil

In a bowl, mix the flour and the boiling water with a wooden spoon to combine. Turn the shaggy dough onto a lightly floured board, gather it into a heap, and knead it until smooth, about 3 min. Cover with a towel and let it rest for about 1/2 hour.

With your hands, shape the dough into an even cylinder about 12 inches long. With a sharp knife (I find gentle pressure and a serrated knife prevents squashing the dough), cut the roll into 1-inch pieces. If the cutting squashes any of the pieces, stand them on end and shape them back into rounds.

Lightly flour your palms and use them to flatten the pieces into 2-inch rounds. Brush the top of each round generously with sesame oil. Lay one round on top of another, oiled sides together. Flatten the pair together with the heel of your hand. Continue until you have 6 pairs.

With a floured rolling pin, roll each pair into a thin pancake about 7 inches in diameter, flipping the pancake over now and again to roll evenly on both sides. Stack the pancakes as you finish rolling them.

In an ungreased cast-iron skillet or nonstick pan over medium-high heat, cook the pancakes one at a time. Heat one side until it becomes less opaque and starts to bubble slightly, and just a few brown spots appear, about 1 min. Flip it over and cook it until a few light brown spots appear on the other side, about 30 seconds.

While the pancake is still hot, pick it up, look for a seam to grab, and separate it into two very thin pancakes. Stack them on a plate as you go and wrap them in foil to keep them warm and prevent drying. If not using right away, refrigerate until ready to use.

Mu Shu Pork

1 pound pork loin or tenderloin, julienned
4 tbsp soy sauce
2 tbsp oyster sauce
1 tbsp chile garlic sauce
2 tbsp toasted sesame oil
2 tbsp cornstarch
1 head green cabbage, thinly shredded
4 eggs, beaten
8 green onions, thinly sliced
3 cloves garlic, minced
1 1/2 cups Chinese black mushrooms, re-hydrated and sliced (you can substitute white or cremini mushrooms)
1 1/2 cup bamboo shoots, rinsed and drained
5 tbsp vegetable oil

Preparation
Place the soy, oyster sauce, chile garlic, toasted sesame oil and cornstarch in a bowl, mix to combine and add the pork. Toss to thoroughly coat the pork and set aside. In a large skillet, heat one tablespoon of oil over medium high heat and add the beaten eggs. Once the egg has set up enough to flip over in one piece, carefully flip it and continue to cook a few seconds more. Move to a cutting board, julienne and set aside. Add 2 tablespoons of oil to the skillet you cooked the eggs in and add the sliced green onions and green cabbage. Saute over medium high heat until the cabbage is wilted but still crunchy, about 5 minutes. Remove from the skillet and set aside. Add the remaining 2 tablespoons of oil in the same skillet and sauté the garlic, mushrooms and pork (with all the sauce that the pork was sitting in) over high heat until the pork is cooked. Add the sliced eggs, cabbage and green onions and sauté for 3 - 5 minutes. Put a smear of hoisin down the middle of the pancake, place the pork mixture on top and roll the pancake up (like a burrito). If you love hoisin as much as I do, drizzle additional hoisin on the outside of the pancake as well.
Persimmon Bread (It's Not Just For Dog Treats)

I forgot how incredibly good this bread is— until this morning when I pulled it out of the freezer for breakfast. My Mom and Dad came up to catch the kid's last performance of the Christmas Carol and since breakfast wasn't ready when they arrived (big surprise), I went to the freezer for a little something to tide us over. I made these loaves before Thanksgiving and I'm telling you, they tasted as good as the day I made them. Quick breads are a nearly foolproof baking adventure (except when I forgot the baking powder and ended up with dog biscuits) and I highly recommend having a few loaves of this bread in your freezer. It's like a beautiful slice of the holiday season— aromatic spices, chestnuts and spiced rum.

Persimmon & Chestnut Bread

3 1/2 cups flour
1 1/2 tsp salt
2 tsp baking soda
1 tsp nutmeg, freshly grated
2 cups sugar
1/4 cup crystallized ginger, chopped
1 cup butter, melted and cooled
1 tbsp vanilla
4 large eggs, lightly beaten
2/3 cup spiced rum
1/2 cup orange juice
3 persimmon, pureed
1 pear, pureed
1 cup chestnuts, toasted and chopped
1 cup dried cranberries

Preparation
Preheat oven to 350 degrees. Butter and flour 2 large or 7 small loaf pans.

Combine the flour, salt, baking soda, nutmeg and sugar in a large mixing bowl. Add the butter, eggs, vanilla, rum, orange juice, persimmon and pear purees and mix thoroughly. Fold in the cranberries, crystallized ginger and chestnuts. Bake for an hour (if using large loaf pans) or 30 minutes (if using small loaf pans). The bread is done when a toothpick inserted in the middle of the loaf comes out clean. This bread freezes beautifully, make sure to wrap it well and it'll keep in the freezer for up to 3 months.