My success with lasagna noodles emboldened me to try my hand at making ravioli. It was far easier than I expected— it's not much different from making pot stickers or cream cheese puffs.
Read MoreCookery Maven Blog
A Big Old Bowl Of Texas Red
Believe it or not, I won a chili contest five years ago at Mt Ashwabay. And believe it or not, I didn't write down the recipe.
Read MoreMore Sassy Goodness In Puff Pastry
Ellen had a great idea. She asked if I would like go caroling in Bayfield on Sunday— I'm tone-deaf but it's Christmas and anything goes, right?
Read MoreSassy, Sweet & Spicy Goat Cheese Gratin
Remember that classic, old school appetizer with red pepper jelly, a hunk of cream cheese and Ritz crackers? It had all the right components but was seriously deficient in the aesthetic department.
Read MoreYorkshire Pudding with Bacon, Blue Cheese & Onions
Reason number 47 why visiting Jack in Madison is a good idea— Whole Foods. So, when Ted walked in the house with two Whole Foods grocery bags, I added number 48 to my list— when Ted goes grocery shopping and brings home bacon.
Read MoreChicken Stuffed With Prosciutto, Roasted Tomatoes & Fontina
Do you know what's good about having a friend whose husband is a vegan? Prosciutto, as in 'here take this with you, we won't eat it and I know how much you love salty, cured pork'.
Read MorePork Vindaloo- Dinner For A Cold Winter's Night
The snow stopped falling last night and now the temperatures are falling into subzero territory— it appears winter has settled in. The kids had another snow day and we slept in late, stayed in our pajamas well into the morning, shoveled a path to the sauna, made cookies and kept the wood stove stoked. There were a few hiccups with the major snow removal portion of the day— both snow removal tools (the plow truck and the snow blower) had far different ideas of how to spend their day than Ted's idea of clearing a path for our cars.
Read MoreSnowstorms, Gnocchi & Cheese
I wanted to keep it easy and this frozen gnocchi from Scotti Pecotti was not only easy but also really good. In my experience, frozen gnocchi typically means chewy potato nuggets but Scotti's had a nice soft texture.
Read MoreWisconsin's Northernmost Sugarbush
There are all sorts of things I've learned since I moved North— don't call the cops when a bear is in the yard, there is no such thing as a perfectly ripe avocado in the grocery stores, saunas are clothing optional and maple syrup really does come from actual maple trees. Okay, I did know about the origins of maple syrup but I hadn't ever actually witnessed the process.
Read MoreApples, Fennel & Lamb, Oh My!
With the iconic turkey behind me, it was time to broaden my dinner horizon beyond poultry. A leg of lamb was a good place to start— it's not something we eat every day, I found two bags of the quince and cranberry sauce I made last Thanksgiving in the freezer and I remembered an article I read in Saveur about Sunday roasts.
Read MoreGood Old Fashioned White Bread
Growing up, Thanksgiving meant a couple of things— turkey (of course), cranberry relish with lots of orange peel and three loaves of golden crusted white bread. My Dad didn't cook much, he was the grill master of red meat and chicken and the kitchen was my Mom's domain— except on Thanksgiving.
Read MoreA Seriously Good Caramelized Apple Bread Pudding
Bread pudding is a brilliant use of stale bread and when you add caramelized apples and a rum caramel sauce, it soars right by ordinary brilliant and heads straight into quantum brilliance. We're not a dessert family (could have something to do with the fact we rarely finish dinner before nine) but the stars aligned— we ate dinner at 7, two stale baguettes were on top of the fridge and I had just picked up some apples from Blue Vista Farm. It was a huge hit and definitely worth eating an early dinner so we could have dessert.
Caramelizing the apples until they are a deep golden color really makes a difference, don't skip this step. It concentrates the apple flavors and helps them hold their own against the custard soaked bread cubes.
I've made this bread pudding about 10 times since the beginning of October (the kids really, really like it) and I've discovered a 50/50 mixture of artisan type bread and conventional white bread makes the best bread pudding. The artisan bread adds structure while the conventional bread holds it all together— kind of like coming up with the perfect blend of Syrah and Grenache. Too bad, blending stale bread cubes in Bayfield doesn't have the same cache as blending grapes in Provence!
Caramelized Apple Bread Pudding with a Rum Caramel Sauce
5 large tart apples (such as Jonagold or Honeycrisp)
3 tablespoons butter
3 tablespoons brown sugar
2 1/2 cups half and half
1 cup whole milk
1 teaspoon vanilla extract
4 large eggs
1/2 cup dark brown sugar
1/2 cup maple syrup
1/2 teaspoon salt
1/2 teaspoon freshly grated nutmeg
1 teaspoon cinnamon 8 cups stale bread, cut into 1 inch cubes (1 cup reserved for the topping)
1/2 cup pecans, chopped
2 tablespoons butter, melted
1 tablespoon sugar
1/4 teaspoon cinnamon
Preparation
Preheat oven to 350 degrees and butter a 9 x 13 pan. Peel the apples and cut into 1 inch chunks. Melt 3 tablespoons of butter in a 12 inch skillet over medium high heat. Add the sugar and stir until the mixture bubbles, then toss in the apples to coat them. Let the apples sit, in a single layer if your pan is large enough, undisturbed for about a few minutes to sear the exterior and then flip them over and let them sit another minute. Repeat this process until the apples are caramelized and tender (about 10 minutes). Remove the apples and juices from the pan and set aside.
In a large bowl, whisk together the eggs, brown sugar, maple syrup, salt, cinnamon and nutmeg to combine. Add the half and half, milk and vanilla and combine thoroughly.
In a small bowl, combine the tablespoon of sugar with the 1/4 teaspoon of cinnamon.
Place 7 cups of the bread cubes in the large mixing bowl and toss to coat with the liquid. Let sit for about 45 minutes (tossing another couple of times) and then place the bread cubes in the buttered baking dish. Place the caramelized apples, their juices and chopped pecans over the bread. Scatter the remaining cup of bread cubes over the apples and press them to partially submerge in the custard. Brush the exposed bread cubes with the rest of the melted butter, and sprinkle evenly with the cinnamon sugar.
Bake for about 45 minutes or until the bread pudding is golden and a knife inserted into the middle of the bread pudding comes out clean. Remove the pudding from the oven and let cool for at least 30 minutes. Serve warm with caramel sauce (recipe follows) or vanilla ice cream.
Rum Caramel Sauce
6 tbsp butter
1/2 cup cream
1 cup light brown sugar
3 tbsp spiced rum
Place the butter, cream, rum and brown sugar in a saucepan, bring to a boil and then simmer for 2 – 3 minutes until slightly thickened. Pour over bread pudding and serve.
Roasted Butternut Squash & Goat Cheese Lasagna
I love everything about fall— the golden light, shorter days, cooler weather and the food, oh the food. Provençal beef stew, roasted chickens, Indian curries, porchetta, bread puddings and lasagna. I've embraced homemade pasta and I have to admit, I enjoy making it. Yes, it's more work than dried pasta but there is something meditative about standing at the counter, rolling and cutting pasta. Forget yoga, I'll take my meditation with a side of lasagna.
Of course, I used Sassy Nanny goat cheese, it melted perfectly into the bechamel and the pecorino added a nice salty tang.
Bacon and caramelized onion rounded out the sauce and added an extra layer of layer that really complemented the rich sauce and roasted squash. Nothing but the best for my freshly made lasagna sheets.
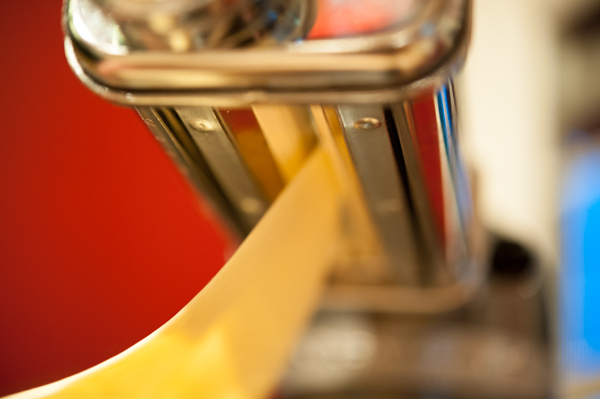
Speaking of lasagna sheets, the transformation of a round piece of dough into a silky ribbon of pasta is magical. I pass the dough through the pasta roller eight times— three times through #1 and then once through # 2 - # 5. I don't go beyond #5 because I like my pasta on the thick side. It's a matter of taste and if you like thin pasta, by all means go to #6 or even #8.
Another tricky part of the fresh pasta process is what do you do with the pasta after it's rolled out but before you are ready to cook it? I don't like to hang it— for some crazy reason, the dogs have a serious thing for fresh pasta and will spend the entire time attempting to leap and snag a mouthful of pasta while I'm busy rolling out the rest of the pasta. Necessity (or badly behaved dogs) being the mother of invention, I coated the sheets in flour and layered them on a sheet tray. One caveat— use lots of flour and dust the sheets evenly. There's nothing worse than a pile of fresh pasta stuck together in a giant mess....it'll make a grown woman weep.
I'm a firm believer in boiling pasta and lasagna noodles are no exception. The no-boil method, at least with fresh pasta, doesn't taste as good. I can taste the raw flour and I prefer the texture of noodles boiled for about a minute (if your sheets are thin, boil them for 30 seconds) prior to assembling the lasagna. An extra 10 minutes yields a superior pan of lasagna, trust me.
Roasted Butternut Squash & Goat Cheese Lasagna (adapted from Fine Cooking)
Lasagna Sheets
2 cups all-purpose flour
2 cups semolina flour (you can substitute all purpose flour if you don't have semolina)
4 large eggs
1 tsp kosher salt
3 tbsp olive oil
1/2 cup water
Lasagna Filling
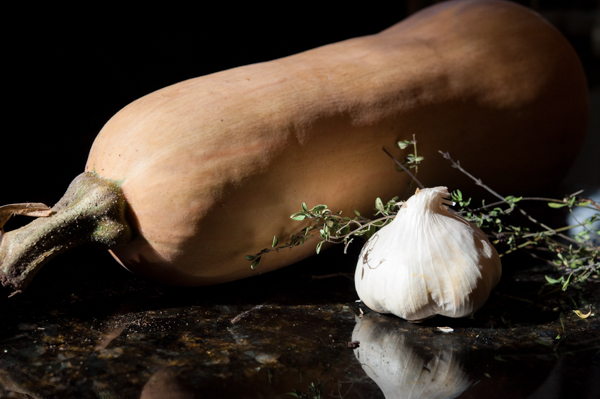
1 large butternut squash (about 3 lb.), halved lengthwise and seeded
10 - 12 medium cloves garlic, unpeeled
2 sprigs fresh thyme plus 2 teaspoons chopped leaves
2 teaspoons extra-virgin olive oil
Kosher salt
Freshly ground black pepper
1 cup bacon, cooked and chopped
1 large yellow onion, sliced
8 tablespoons butter
1/4 cup all-purpose flour
3 cups whole milk
1 1/2 cups fresh goat cheese
1 cup Pecorino Romano, finely grated
1 cup Parmesan, grated
Pasta Preparation
Place all ingredients in the bowl except for the water. Turn the mixer on slowly and add 3 tablespoons of the water. Add more water, 1 tablespoon at a time, until the mixture comes together and forms a ball. Knead the dough on a lightly floured board to make sure it is well mixed. Set aside to rest for 30 minutes.
Generously flour your counter top or work area. Cut the dough into 6 pieces and cover with a towel (don’t cover the pasta with kitchen towels if you use a scented fabric softener because the pasta will pick up the scent—use parchment instead). With your hands, flatten and shape one piece of dough into a 1/2-inch-thick rectangle. Dust it lightly with flour and pass it through the widest setting on the pasta machine. If the dough comes out oddly shaped, reform into a rectangle. Fold it in thirds, like a letter, and if necessary, flatten to 1/2 inch thick. Pass it through the widest setting again with the seam of the letter perpendicular to the rollers. Repeat this folding and rolling step three or four times, dusting the dough with flour if it becomes sticky.
Without folding the dough, pass it through the next setting on the pasta machine. Keep reducing the space between the rollers after each pass, lightly dusting the pasta with flour on both sides each time ( I stop at # 5 on the KitchenAid pasta roller).
Generously dust both sides of the pasta sheet and lay on the floured sheet tray. Roll out the remaining dough in the same manner. Cut each strip of dough into 11-inch lengths.
Bring a 10-quart pot of well-salted (it should taste like sea water) water to a boil over high heat. Put a large bowl of ice water near the pot of boiling water. Line a rimmed baking sheet with sheets of parchment and have more parchment ready.
Put 3 or 4 noodles in the boiling water. Once the water returns to a boil, cook for about one minute. With a large wire skimmer, carefully transfer them to the ice water to stop the cooking. Repeat with the remaining noodles.
Drain the noodles and rinse under cold water. Spread them flat on the parchment-lined sheet tray, I layered them on top of each other and they didn't stick but if you are concerned about sticking, layer the noodles between parchment and set aside until you’re ready to assemble the lasagna.
Lasagna Filling Preparation
Position a rack in the center of the oven and heat the oven to 425°F.
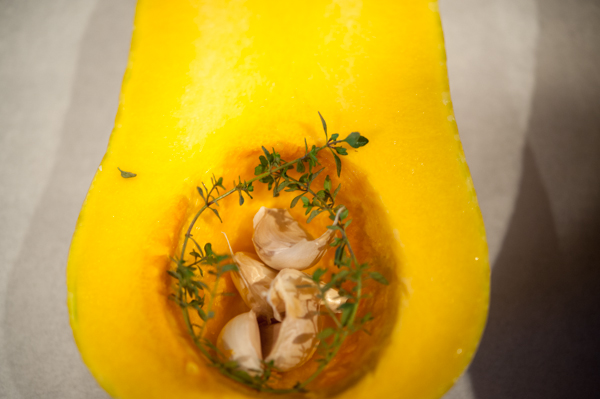
Put the squash cut side up on a large, heavy-duty rimmed baking sheet. Divide the garlic cloves and sprigs of thyme between the two halves and place in each cavity. Drizzle each half with 1 tsp. of the oil and then season each with 1/4 tsp. salt and a few grinds of pepper. Roast until the squash is browned in spots and very tender when pierced with a skewer, 45 to 50 minutes. Remove from the oven and let cool completely.
Discard the thyme sprigs. Peel the garlic and put in a large bowl. Scoop the squash flesh from the skins and add it to the garlic. Mash with a fork until smooth. Season to taste with salt and pepper.
Melt 3 tablespoons of butter in a sauté pan over medium heat. Add onions and 2 teaspoons of thyme leaves, reduce heat to medium-low and cook until golden brown and caramelized, about 45 minutes. Set aside.
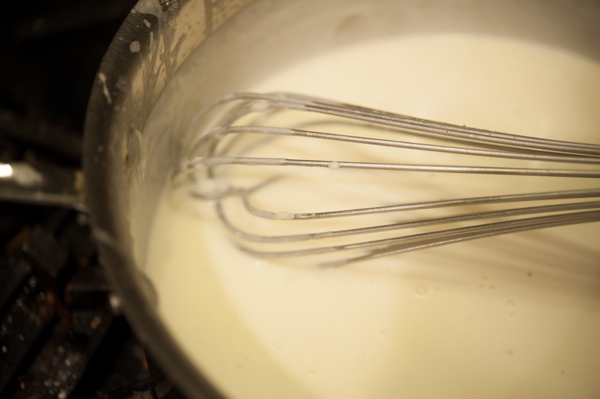
Melt 5 tablespoons of butter in a 3-quart saucepan over medium heat. Add the flour and whisk until smooth and golden, about 2 minutes. Gradually whisk in the milk and cook, whisking occasionally, until thickened enough to coat the back of a spoon, about 15 minutes. Stir in the goat cheese, pecorino, 1 teaspoon salt, and a few grinds of pepper. Season to taste with more salt and pepper.
In a large bowl, add the cheese sauce, the squash/garlic mixture, crumbled bacon and caramelized onions. Stir to combine thoroughly and taste for seasoning.
Spread 1/2 cup of the squash/cheese sauce over the bottom of a 9x13 inch baking dish. Cover the sauce with a slightly overlapping layer of cooked noodles, cutting them as needed to fill any gaps. Spread 1 cup of the cheese/squash mixture evenly over the noodles and sprinkle with the shredded Parmesan. Add another layer of noodles and repeat the layers as instructed above, to make a total of 4 squash layers and 5 pasta layers. Spread the remaining cheese/squash sauce evenly over the top. Sprinkle with the remaining Parmesan cheese.
Heat oven to 350 degrees. Cover the baking dish with foil and bake for 40 minutes. Remove the foil and bake until the top is browned and bubbly, 15 to 20 minutes. Cool for at least 10 minutes before serving.
Make Ahead Instructions You can make the roasted squash mixture up to 1 day ahead of assembling the lasagna. You can assemble the lasagna up to 2 days ahead of baking it. Tightly wrap the baking dish in plastic and refrigerate it. Let the lasagna come to room temperature before baking it.
The Best Of Summer...In A Quiche
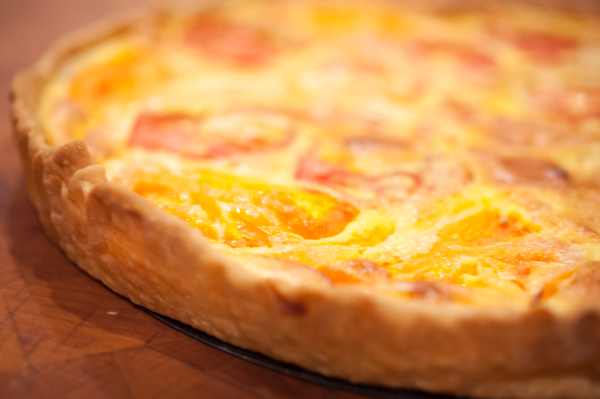
Nothing says summer like Corn Man corn and nothing says 'summer is over' than bags of his corn, freshly shucked, in my freezer and a kitchen full of tomatoes in various shades of green, yellow and red. Quiche is a quick and easy dinner option and since breakfast for dinner is a Dougherty family favorite, it was a no-brainer as I stared into the refrigerator, looking for inspiration. This quiche really shines with garden fresh tomatoes and sweet corn— although it won't be as good with grocery store tomatoes, it's still worth making. That corn cream is seriously good.
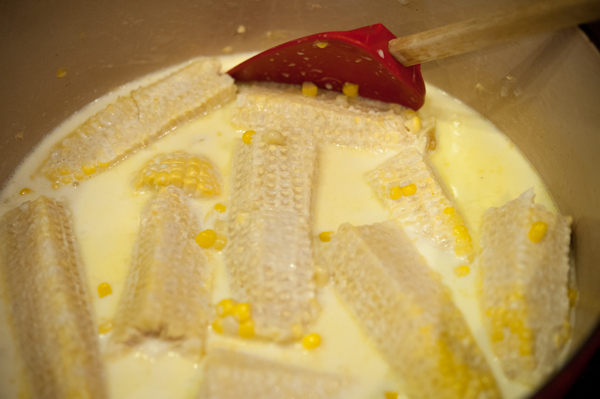
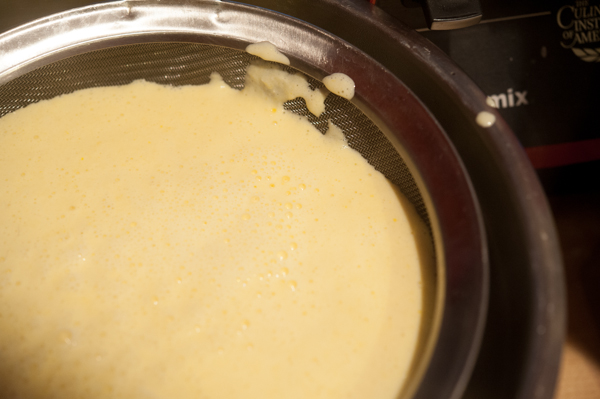
I've made lots of quiches over the years but this recipe had a technique I haven't used before, steeping the sweet corn in cream, and it was a revelation. The quiche is loaded with the essence of sweet corn without the kernels (you pass the cream/corn mixture through a fine mesh sieve and you end up with a seriously delicious corny cream). I added a few corn cobs to the cream and corn mixture to guarantee an intensely flavored custard. If you don't have any cobs, don't worry about it— the corn kernels will flavor the cream just fine on their own.
I used dried beans and parchment when I blind baked the crust— an important step if you like a flaky pastry home for your quiche.
The corn cream is out of this world delicious and it's the most beautiful color of light yellow.
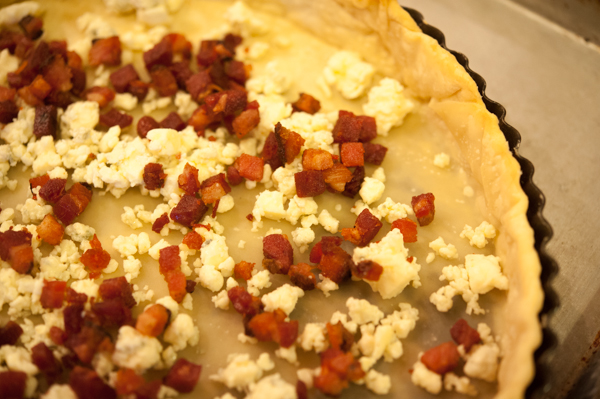
I added pancetta and Gorgonzola to the original recipe— nothing like gilding the lily, right?
Tomato & Sweet Corn Quiche (adapted from FreshTartSteph & Minnesota Monthly September 10, 2013)
1 9-inch pie crust (I used Pillsbury pie crust from the grocery store)
2 teaspoons butter
3 ears peak-season sweet corn, shucked, kernels sliced off cob (about 2 1/2 cups)
3 - 6 corn cobs (optional)
1 cup whole milk
1 cup heavy cream
1 teaspoon salt
1/2 teaspoon black pepper
3 large eggs
1/2 cup Gorgonzola, crumbled
1/2 cup pancetta or bacon, cooked and crumbled
2 cups assorted garden-ripe tomatoes, cut into 1/2-inch slices 9-inch pie plate, nonstick cake pan, or fluted tart pan
Preheat oven to 350 degrees F.
Roll out the crust and fit into baking pan. Trim and crimp the edges. Gently set a large piece of foil or parchment paper into and on top of the crust and fill with pie weights or dried beans. Bake crust for 15 minutes. Remove foil and pie weights and set crust aside while you prepare the filling.
In a sauté pan over medium heat, cook the pancetta or bacon until crisp. Remove from the pan and set aside.
In a Dutch oven, heat butter over medium heat. When butter is melted, stir in the corn. Saute the corn, stirring a couple of times, for 5 minutes. Stir the milk, cream and corn cobs into the corn. Bring the mixture to a boil, then turn heat to low and simmer corn for 20 minutes. Remove from the heat and discard the corn cobs.
Set out a colander placed over a medium bowl.
In the bowl of a blender, purée the corn and cream together (use caution when blending hot liquids). Pour the pureed corn and cream into the colander to strain out the cream. Press down on the corn to extract as much of the cream as possible. Discard the corn. Measure out and 1 1/2 c. of the cream and return it to the bowl.
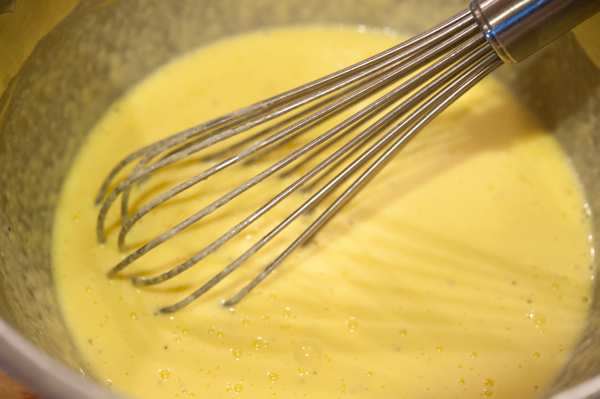
Add salt, pepper and eggs to the corn cream and whisk to combine.
Sprinkle the pancetta and Gorgonzola over the bottom of crust. Pour egg mixture into crust, stopping 1/2-inch from top of crust. Arrange tomato slices over the top of the egg mixture. Bake quiche for 40-45 minutes, until edges of crust are golden brown and center of quiche is just-set. Cool on a wire rack for 15 minutes before serving warm.
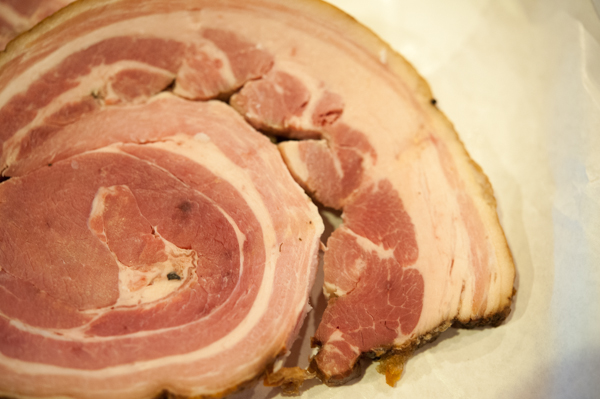
Braised Pork Belly With An Asian Flair
Pork belly— it's not just for bacon. In fact, it's extremely well-suited to a nice long bath in Asian spices, an equally long braise in the oven, a pile of Jasmine rice and a spoonful of quick pickled cucumbers. I bought my pork belly in hopes of making pancetta but the 'cut a hole in one corner and hang it to dry for a week' part of Michael Ruhlman's recipe was a deal breaker. There is no place in my house where 6 pounds of pork, suspended 5 feet off the ground, would be safe from harm or ingestion by the dogs. George already knows how to open peanut butter jars, unzipper lunch sacks and speak Spanish— pork hanging from the ceiling would be a breeze for his extraordinary yellow Lab intellect. An Asian braise was the safest way to cook the meat and foil George's amazing knack for commandeering food for his dinner.
Braised Asian Pork Belly (Adapted from Emeril Lagasse 2006)
One full pork belly, about 8 - 10 pounds (you can substitute pork shoulder)
2 cups orange juice
1/2 cup pineapple juice
1 1/4 cup soy sauce
1 cup light brown sugar
1/8 cup fish sauce
1/2 cup lime juice, freshly squeezed
1/2 cup lemon juice, freshly squeezed
1/3 cup garlic, minced
1/4 cup ginger, minced
1/4 cup green onion, minced
1/4 cup plus 3 tbsp sambal oelek (chile paste)
4 cups chicken broth
Preparation
Day 1— Combine the orange juice, pineapple juice, soy sauce, fish sauce, brown sugar, lemon juice, lime juice, garlic, ginger, green onion and sambal oelek in a medium bowl and whisk to blend well. The pork belly will, most likely, be too large for your roasting pan so cut it in half and place it in a large (2 gallon size) plastic bag. Add the marinade to the plastic bag, squeeze all the air out and seal tightly. Place in the refrigerator overnight.
Day 2— Preheat the oven to 325 degrees. Remove the pork from the refrigerator and allow to sit at room temperature for an hour. Place the pork belly, fat side down, in a roasting pan, pour 3 cups of chicken broth and the marinade over and around the pork belly and place in oven. If your roasting pan is not wide enough to accommodate the pork bellies side by side, use two roasting pans and divide the chicken broth and marinade evenly between the pans. Roast for an hour and then turn the pork belly over and roast for another 1 1/2 hours. Remove from the oven and allow to cool for an hour or so. Once cool enough to handle, cover with plastic wrap and refrigerate overnight.
Day 3— Preheat the oven to 400 degrees. Remove the pork from the refrigerator, uncover and skim off any congealed fat that rests on top of the cooking liquid. Add the remaining cup of chicken broth to the pan and place in the oven. Cook until the belly is slightly caramelized and warmed through, about 30 minutes. You can either shred it, as I did, or cut into slices and serve over rice with the pan juices.
Long Island Corn Dogs
What's better than a hot dog from the O'Dovero's? An O'Dovero hot dog dipped in batter, fried in a cast iron skillet and eaten on Long Island. I'm a picky corn dog connoisseur (if there is such a designation) and the only corn dog worth eating is hand dipped in batter— trust me, I've done a fair amount of market research. I grew up in a family of devout Minnesota fair-goers and I earned my carnival food chops through good old-fashioned trial and error.
I fried the corn dogs at home, placed them in a foil and paper towel lined cooler and boarded the Karl for a boat ride to Long Island for cocktails and dinner on the beach. The corn dogs weren't quite as crispy as I would have liked but I have my limitations and frying corn dogs on a beach is one of them. They were gobbled up without complaint.
A little tree love on the beach.
My photo safari sidekick— I couldn't have asked for a better partner.
The back side of Long Island, facing Chequamegon Bay, bathed in evening sunlight.
Corn Dogs
(adapted from the Pioneer Woman)
6 cups Krusteaz pancake mix
2 cups yellow corn meal
2 whole eggs, slightly beaten
2 cups buttermilk 2 cups water, more if needed to thin batter
All beef, natural casing hot dogs ( I made 24 corn dogs and had plenty of batter left over) Chopsticks Canola Oil, For Frying
Preparation
In a large bowl, combine pancake mix and cornmeal. Stir to combine. Add eggs, buttermilk and water, adding more water as needed for the batter to become slightly thick (but not overly gloopy.) Start out by adding 2 cups, then work your way up to 4 cups or more.
Heat canola oil over medium-high heat. Drop in a bit of batter to see if it's ready: the batter should immediately start to sizzle but should not immediately brown/burn.
Insert sticks into hot dogs so that they're 2/3 of the way through.
Dip the hot dogs into the batter and allow excess to drip off for a couple of seconds. Carefully drop into the oil (stick and all) and use tongs or a spoon to make sure it doesn't hit the bottom of the pan and stick. Flip it here and there to ensure even browning, and remove it from the oil when the outside is deep golden brown, about 2 to 3 minutes.
A Riff On Gyros
I owe it all to Julie. She made these flavor packed lamb burgers (according to Saveur, they were supposed to be kebabs but there were major implementation problems) earlier in the summer and I was blown away— it was as close as I've been to a gryo-esque dinner for years. I realize my tendency to use superlatives might make you a little suspect (I mean, how can everything be fantastic) but seriously, these burgers are out of this world. If you make a little naan (recipe here), a bowl of tzatziki (recipe here) and sauté some red onions with sumac— you'll have a dinner you won't soon forget. Opa!
Ground Lamb, Bulgur & Pistachio Burgers(Adapted from Saveur Magazine, June 2013)
1/2 cup pistachios, shelled
1/4 cup water
1/4 cup oregano, roughly chopped
1/4 cup mint, roughly chopped
1 teaspoon red chile flakes
1/2 teaspoon allspice
6 cloves garlic, peeled
2 green onions, roughly chopped
1/2 small yellow onion, roughly chopped
1 jalapeño, stemmed, seeded and roughly chopped
1 pound ground lamb
1/4 cup finely ground bulgur, soaked in warm water for 10 minutes and then drained
1 red onion, sliced
2 teaspoons sumac
2 tablespoons olive oil
Salt and pepper, to taste
Preparation
Puree the pistachios and 1/4 cup of water in a food processor until very smooth. Add the oregano, mint, chile flakes, allspice, garlic, green onions, onion and jalapeño and pulse until smooth. Transfer to a bowl. Add lamb, bulgur, salt and pepper and, using your hands, mix until combined. Form into patties, cover and place in refrigerator for about an hour to set up.
Heat a sauté pan, over medium heat, and add the olive oil, red onion and sumac. Sauté until the onion is softened, about 10 minutes. Set aside.
Light a charcoal or gas grill and grill the burgers, flipping once or twice, until they are thoroughly cooked— about 12 - 15 minutes. Serve on the naan with sautéed onions and tzatziki.
An Abbot's Table & A Dandelion Addiction
I walked in to Bayfield Wine and Spirits to buy a nice bottle of wine to celebrate the end of summer and the beginning of the school year (always a good idea to celebrate anything with wine). The minute my eyeballs spied the Abbot's Table from Owen Roe, I was definitely in a celebratory mood. It's a field blend of Zinfandel, Sangiovese, Blaufrankisch, Merlot and Malbec— medium bodied. lots of berries and a little spice and cedar. It was a lovely wine and perfect for the pizza I planned for dinner.
Pizza is always a good idea at our house— the kids prefer a more traditional approach while I like to shake things up a little. Michael, of Sassy Nanny fame, shares a cheese factory with an equally talented cheese maker, Fred Faye, and the Dandelion Addiction makes me so very happy. Happy Hollow Creamery makes a variety of sheep and cow cheeses and I'm a big fan of all of them. The Dandelion Addiction is a nice, mild brie without a hint of ammonia to be found, anywhere. It's hard to wrong when you take a good brie, sliced pear, caramelized onion and a reduced sherry glaze but it was a seriously good pizza.
Brie, Caramelized Onion & Pear Pizza
Pizza dough, use your own recipe or my recipe, here Crème fraiche, enough to coat the bottom of the pizza dough, about 1/3 cup 1 wheel of Dandelion Addiction brie (or your favorite brie), sliced into wedges 1 garlic clove, minced 1/2 cup caramelized onion 1 pear, sliced thin 2 tablespoons sherry vinegar glaze (available here) Maldon sea salt
Preparation Preheat oven to 500 degrees and place your pizza stone on the middle rack (a pizza stone makes all the difference, trust me). Make the pizza dough and stretch out into a 12 inch round. Sprinkle a pizza peel with flour or cornmeal and place the pizza dough on top. Coat the pizza dough with crème fraiche and sprinkle, evenly, the garlic and Maldon sea salt on top. Evenly place the brie wedges, pear slices and caramelized onions over the pizza round and then drizzle the sherry reduction over the pizza. Place in the oven and bake for 10 minutes. Let the pizza cool slightly and then slice and serve.
Pickled Rhubarb With A Curry Kick
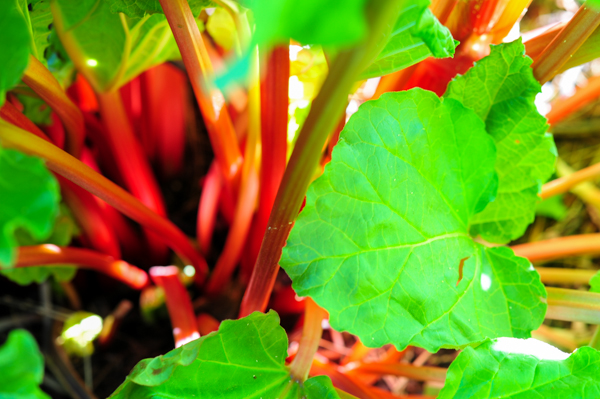
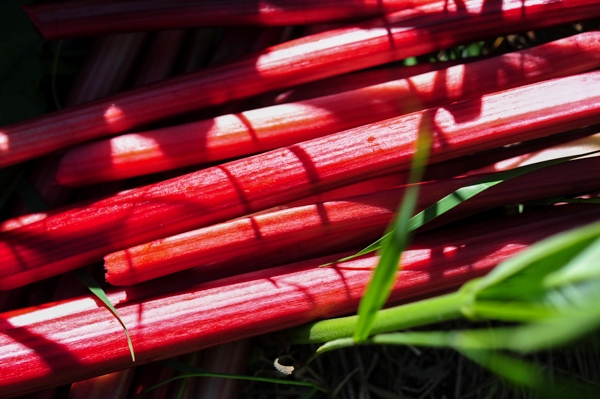
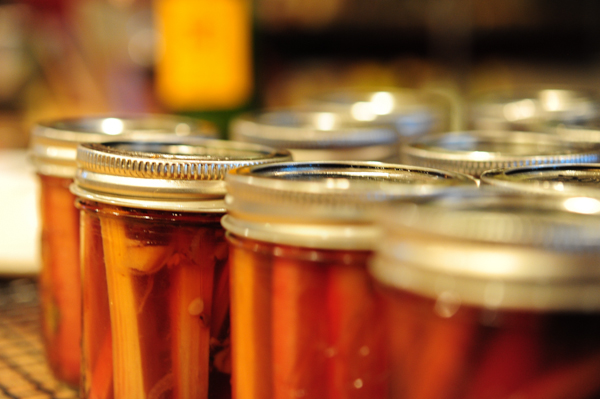
The rhubarb in my garden is like the Energizer bunny— it just keeps going and going. Given my (relative) success with jam, I decided to try my hand at pickling the excess rhubarb. Rhubarb is a little mushy when it's pickled and canned but the brine and spices are lovely. I've used it as a condiment on hot dogs with riata, on grilled chicken and vegetables with naan— it adds a little sour, spicy kick and who doesn't like that?
Curried & Pickled Rhubarb
1 pound rhubarb, rinsed and cut into 1 inch matchsticks 2 cups apple cider 1 1/4 cup raw sugar 3 peels of lime peel, left whole 1 cinnamon stick, broken and divided among the jars 1/4 cup vegetable oil 1/2 teaspoon fenugreek seed 1/2 teaspoon mustard seed 1/2 teaspoon fennel seed 1/2 teaspoon red chile flakes 1/2 teaspoon coriander seed 1/4 teaspoon cumin seed 1/4 cup cilantro, chopped and divided among the jars 2 jalapenos 1/2 red onion, thinly sliced 1/2 teaspoon kosher salt
Preparation Prepare 6 half pint jars for canning. In a medium-sized sauce pot, bring the vinegar, sugar, lime peel and cinnamon stick to a gentle boil and hold over low heat.
In another sauté pan, heat the vegetable oil over medium high heat until hot. Stir in the fenugreek, mustard seeds, fennel seed, coriander seeds, chile flakes and cumin seeds. When the spices begin to pop (about 4 minutes), add the ginger, garlic, salt, jalapeños and onion, stirring until soft and slightly caramelized, about 6 to 8 minutes. Set aside.
Pack the canning jars with the rhubarb and cilantro, leaving 1/2 inch of head space. Pour equal spoonfuls of the spice mixture into each jar. Pour the hot vinegar over the carrots, submerging them and leaving about a 1/2 inch of head space. The contents should sit right below the bottom ring of the glass jar.
Process the jars in a water bath for 15 minutes. Make sure the seals are secure and store in a cool, dark cupboard for at least three weeks before eating.
Strawberry & Lavender Balsamic Preserves
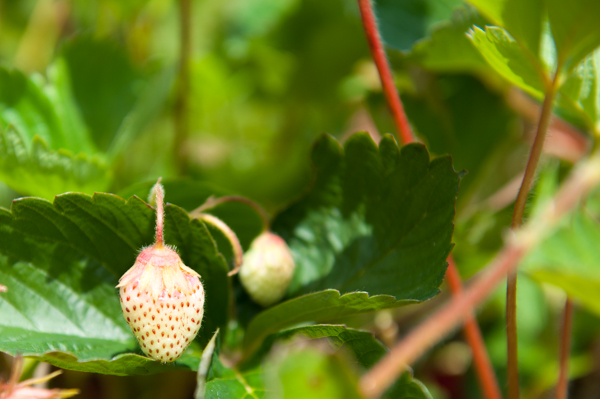
Summer has flown by— it seems like yesterday we were picking strawberries and remarking on the intense berry perfume rising up from around our feet. But it wasn't and we are picking the last of our blueberries, buying school supplies and getting ready to send Jack off to his first year at Madison. This year, I promised we would pick heaps and heaps of berries and make piles and piles of jam, enough to bathe my tribe of PB&J eating children in jam for months. Well, I happy to report we've done it. My shelves are full of jam and we had enough strawberries left over to allow for a little experimentation on my part. There is something about cheese and fruit chutney (blueberry chutney recipe here and cranberry/quince preserves recipe here) that makes me happy and this year I decided to play around with strawberries.
Will has joined the world of espresso drinkers and his drink of choice this summer was a lavender mocha and it got me thinking about lavender as a food, not bath, product. I love lavender, in the garden, and have tended to steer clear of lavender as a culinary herb until this summer. I was visiting with my garden one evening and noticed my lavender plants were loaded with flowers. If lavender is good in a mocha, it would be fantastic with strawberries, right? I thanked the lavender for its abundant flowers, picked a handful and headed into the kitchen to get started on my strawberry and lavender concoction.
Since I needed a recipe (I'm still a little unsure of myself when it comes to making jams and jellies), I did a quick internet search and stumbled upon a recipe for strawberry preserves with black pepper and balsamic vinegar— the perfect place to start. I monkeyed around with the recipe a little, added lavender flowers and some pectin (a little gel-ing insurance) and it was exactly what I hoped for— sweet, spicy with subtle lavender tones. I'm definitely making this again next year.
Strawberry & Lavender Balsamic Preserves(adapted from Gourmet Magazine June 1997)
8 cups strawberries, washed and trimmed
5 cups white sugar
3/4 cup balsamic vinegar
3/4 cup water
3 teaspoons coarsely cracked black pepper
2 tablespoons lavender flowers
1 teaspoon kosher salt
1 tablespoon butter
1/8 cup Pomona's Pectin
Preparation
Bring the strawberries, lavender and pectin to a boil, add the butter, stir and skim any foam off the surface for about 5 minutes. Add the water, sugar, vinegar, salt and pepper and simmer for 15 - 20 minutes, or until thickened. At this point, you can cool completely and it will keep in the refrigerator, covered, for up to a month.
You can also ladle hot chutney into hot sterilized jars, leaving 1/4-inch head space. Wipe rims of the jars, cover with lids, and screw bands on until just barely tight. Place jars on rack in pot and cover completely with water. Cover pot and bring to a boil over high heat. Boil for 10 minutes. Turn off heat, uncover pot, and allow jars to rest in water for five minutes. Remove jars from pot and allow them to rest undisturbed on countertop for six hours or overnight.


