Lake Superior CSA

Sweet, Smoky, and Spicy Pork Chops

_DSC4475.jpg
_DSC4478.jpg

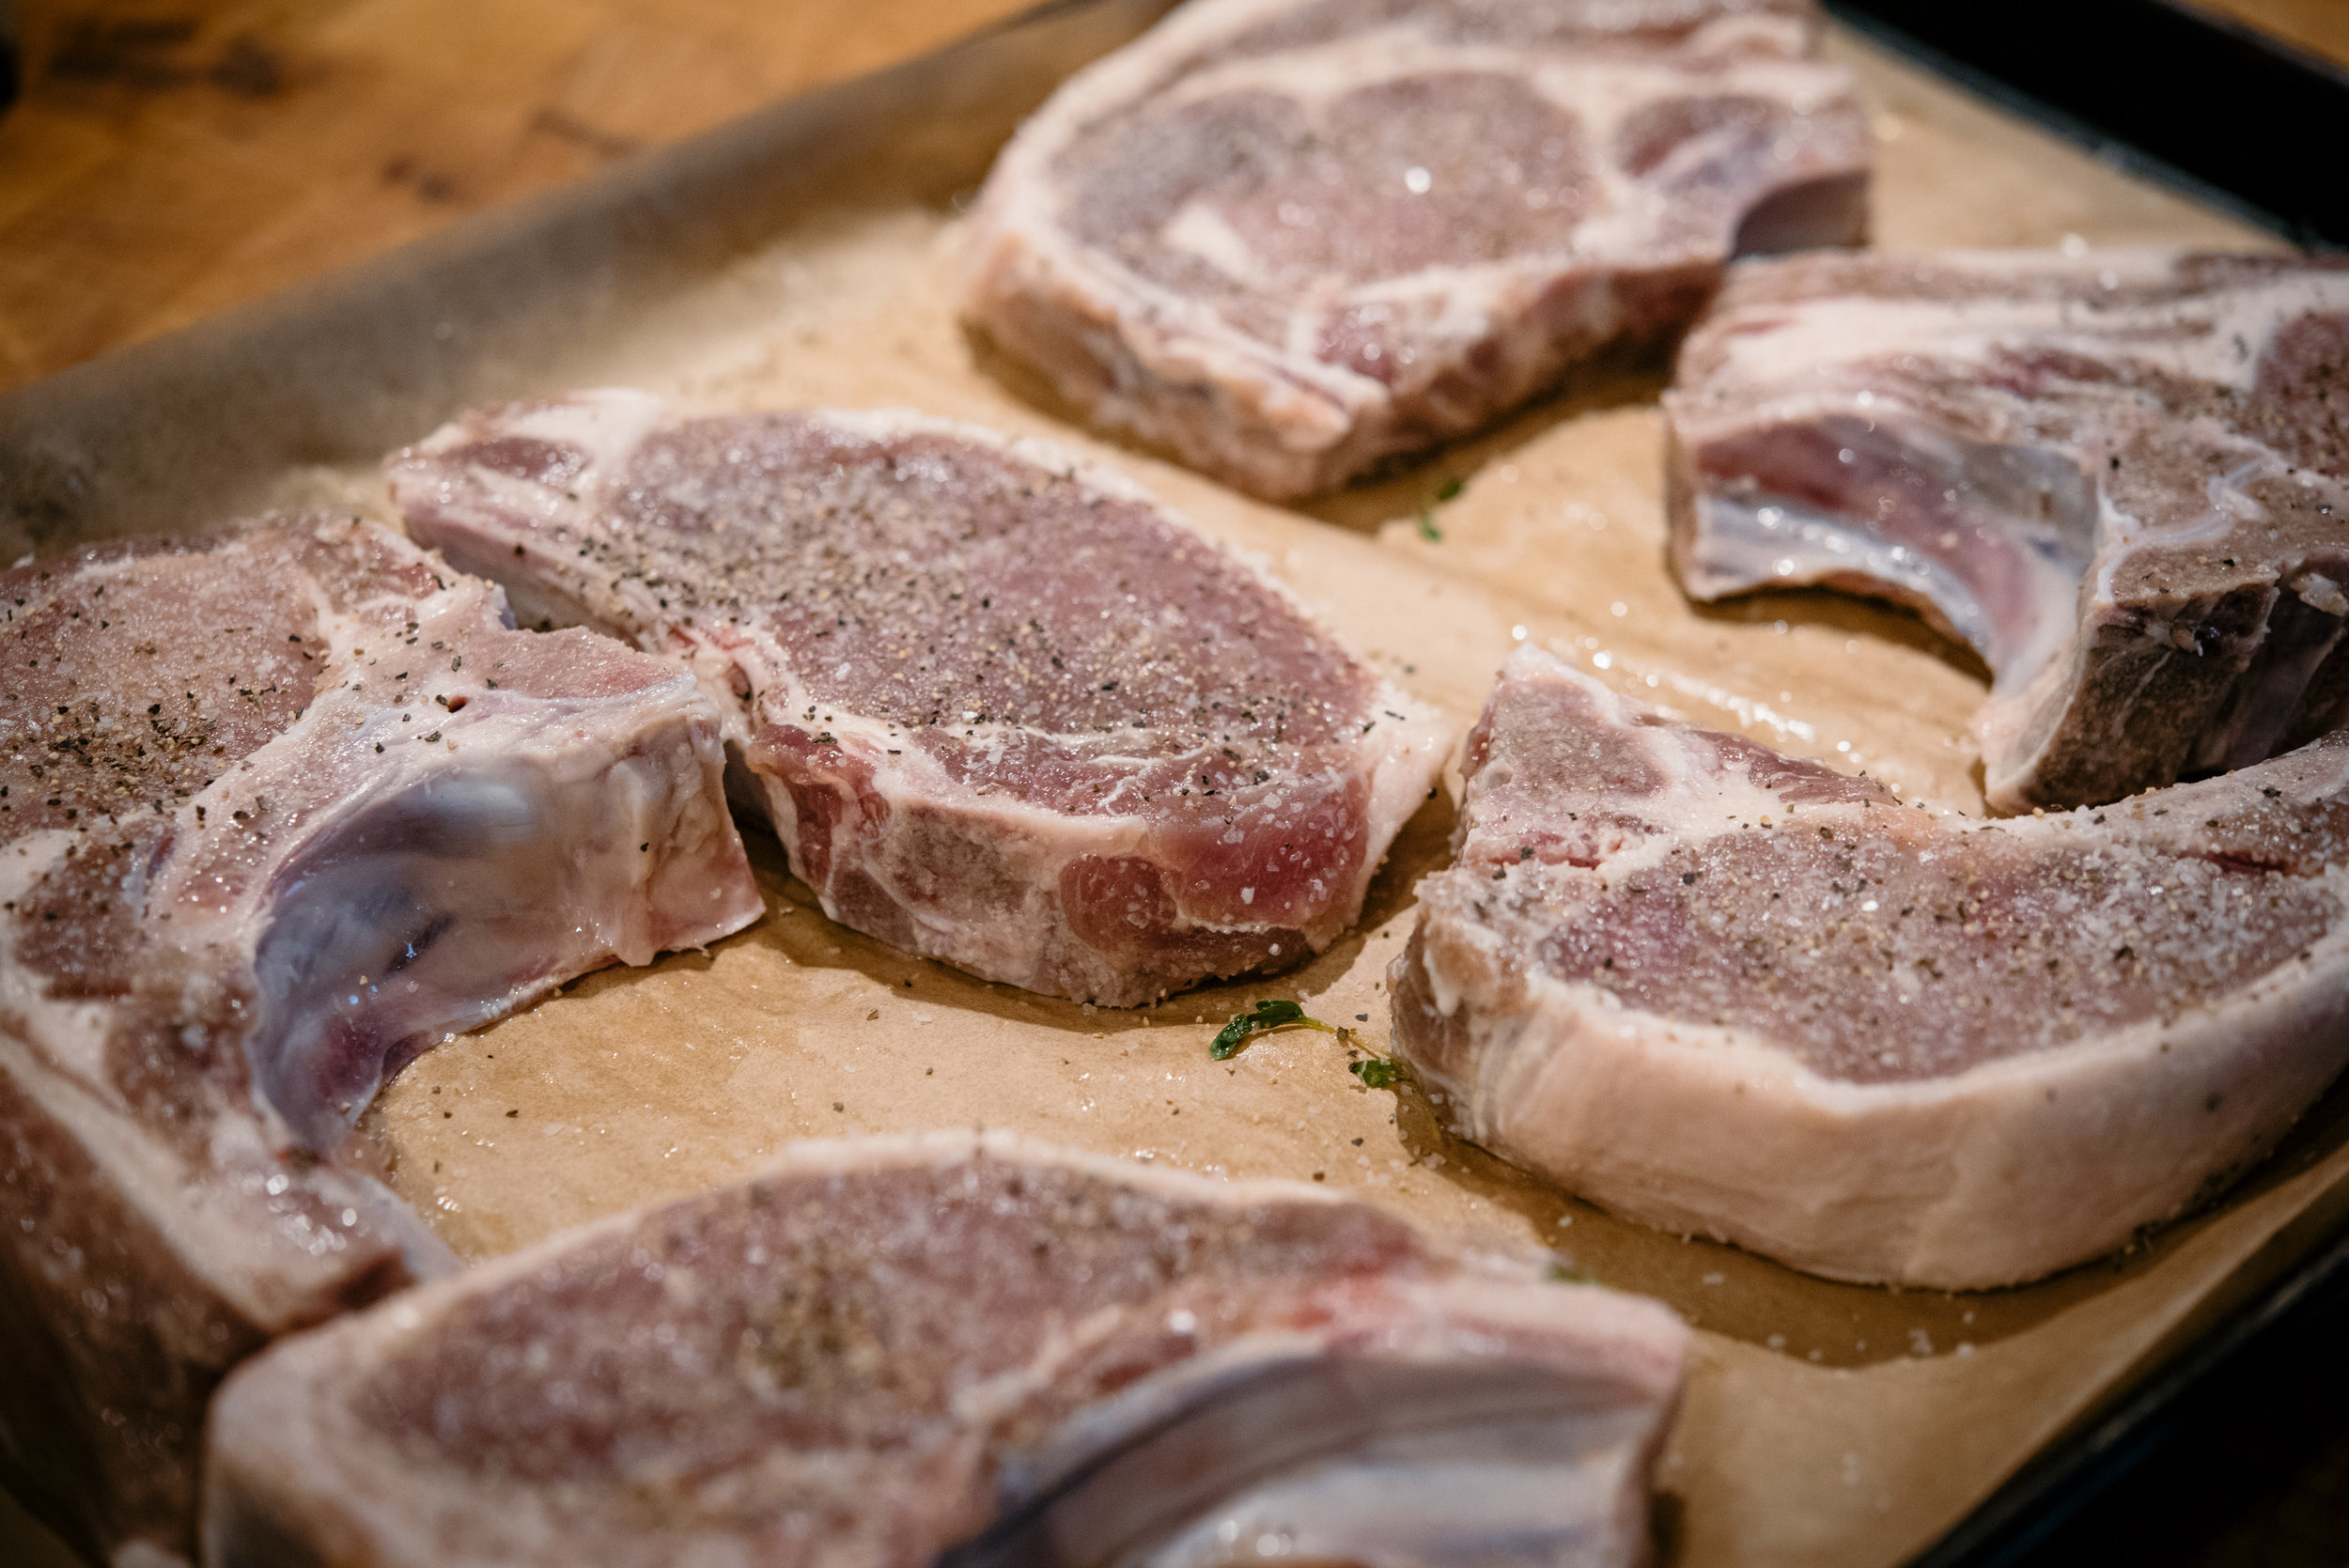
Pork chops remind me of my Grandma Duffy and the Sunday dinners we ate her house when I was growing up -- except those chops were thin-cut and were a little on the tough side (likely a combination of overcooking and super lean pork). Not so with these chops -- Maple Hill Farms pork chops are thick and nicely marbled. When they came in my CSA box a few weeks ago, I knew I was in for a treat and wanted to do them justice when they hit the dinner table. 

_DSC4491.jpg
_DSC4500.jpg

Back in March, I was at Trader Joe's in Madison and saw a display with the last of that season's blood oranges. I immediately added three bags to my cart with the intention of making marmalade (the recipe is in my cookbook, Life in a Northern Town) and went to check out. When I got home, I tucked them away in the back of the fridge and promptly forgot about them (and the marmalade)....evidently my intentions need reminders. 

_DSC4503.jpg
_DSC4505.jpg
_DSC4509.jpg

Fast forward to mid-May when I was rooting around in the nether-regions of the fridge and happened upon the bags of oranges. They were in decent shape but were slightly less juicy and fresh than when I stuck them back there in March. There weren't suited for a batch of marmalade so I decided to preserve them (like the lemons I always have in the fridge -- recipe in Life in a Northern Town). I wasn't sure how they'd turn out but after three weeks of gathering themselves, I was pleasantly surprised -- concentrated orange flavor without any bitterness.

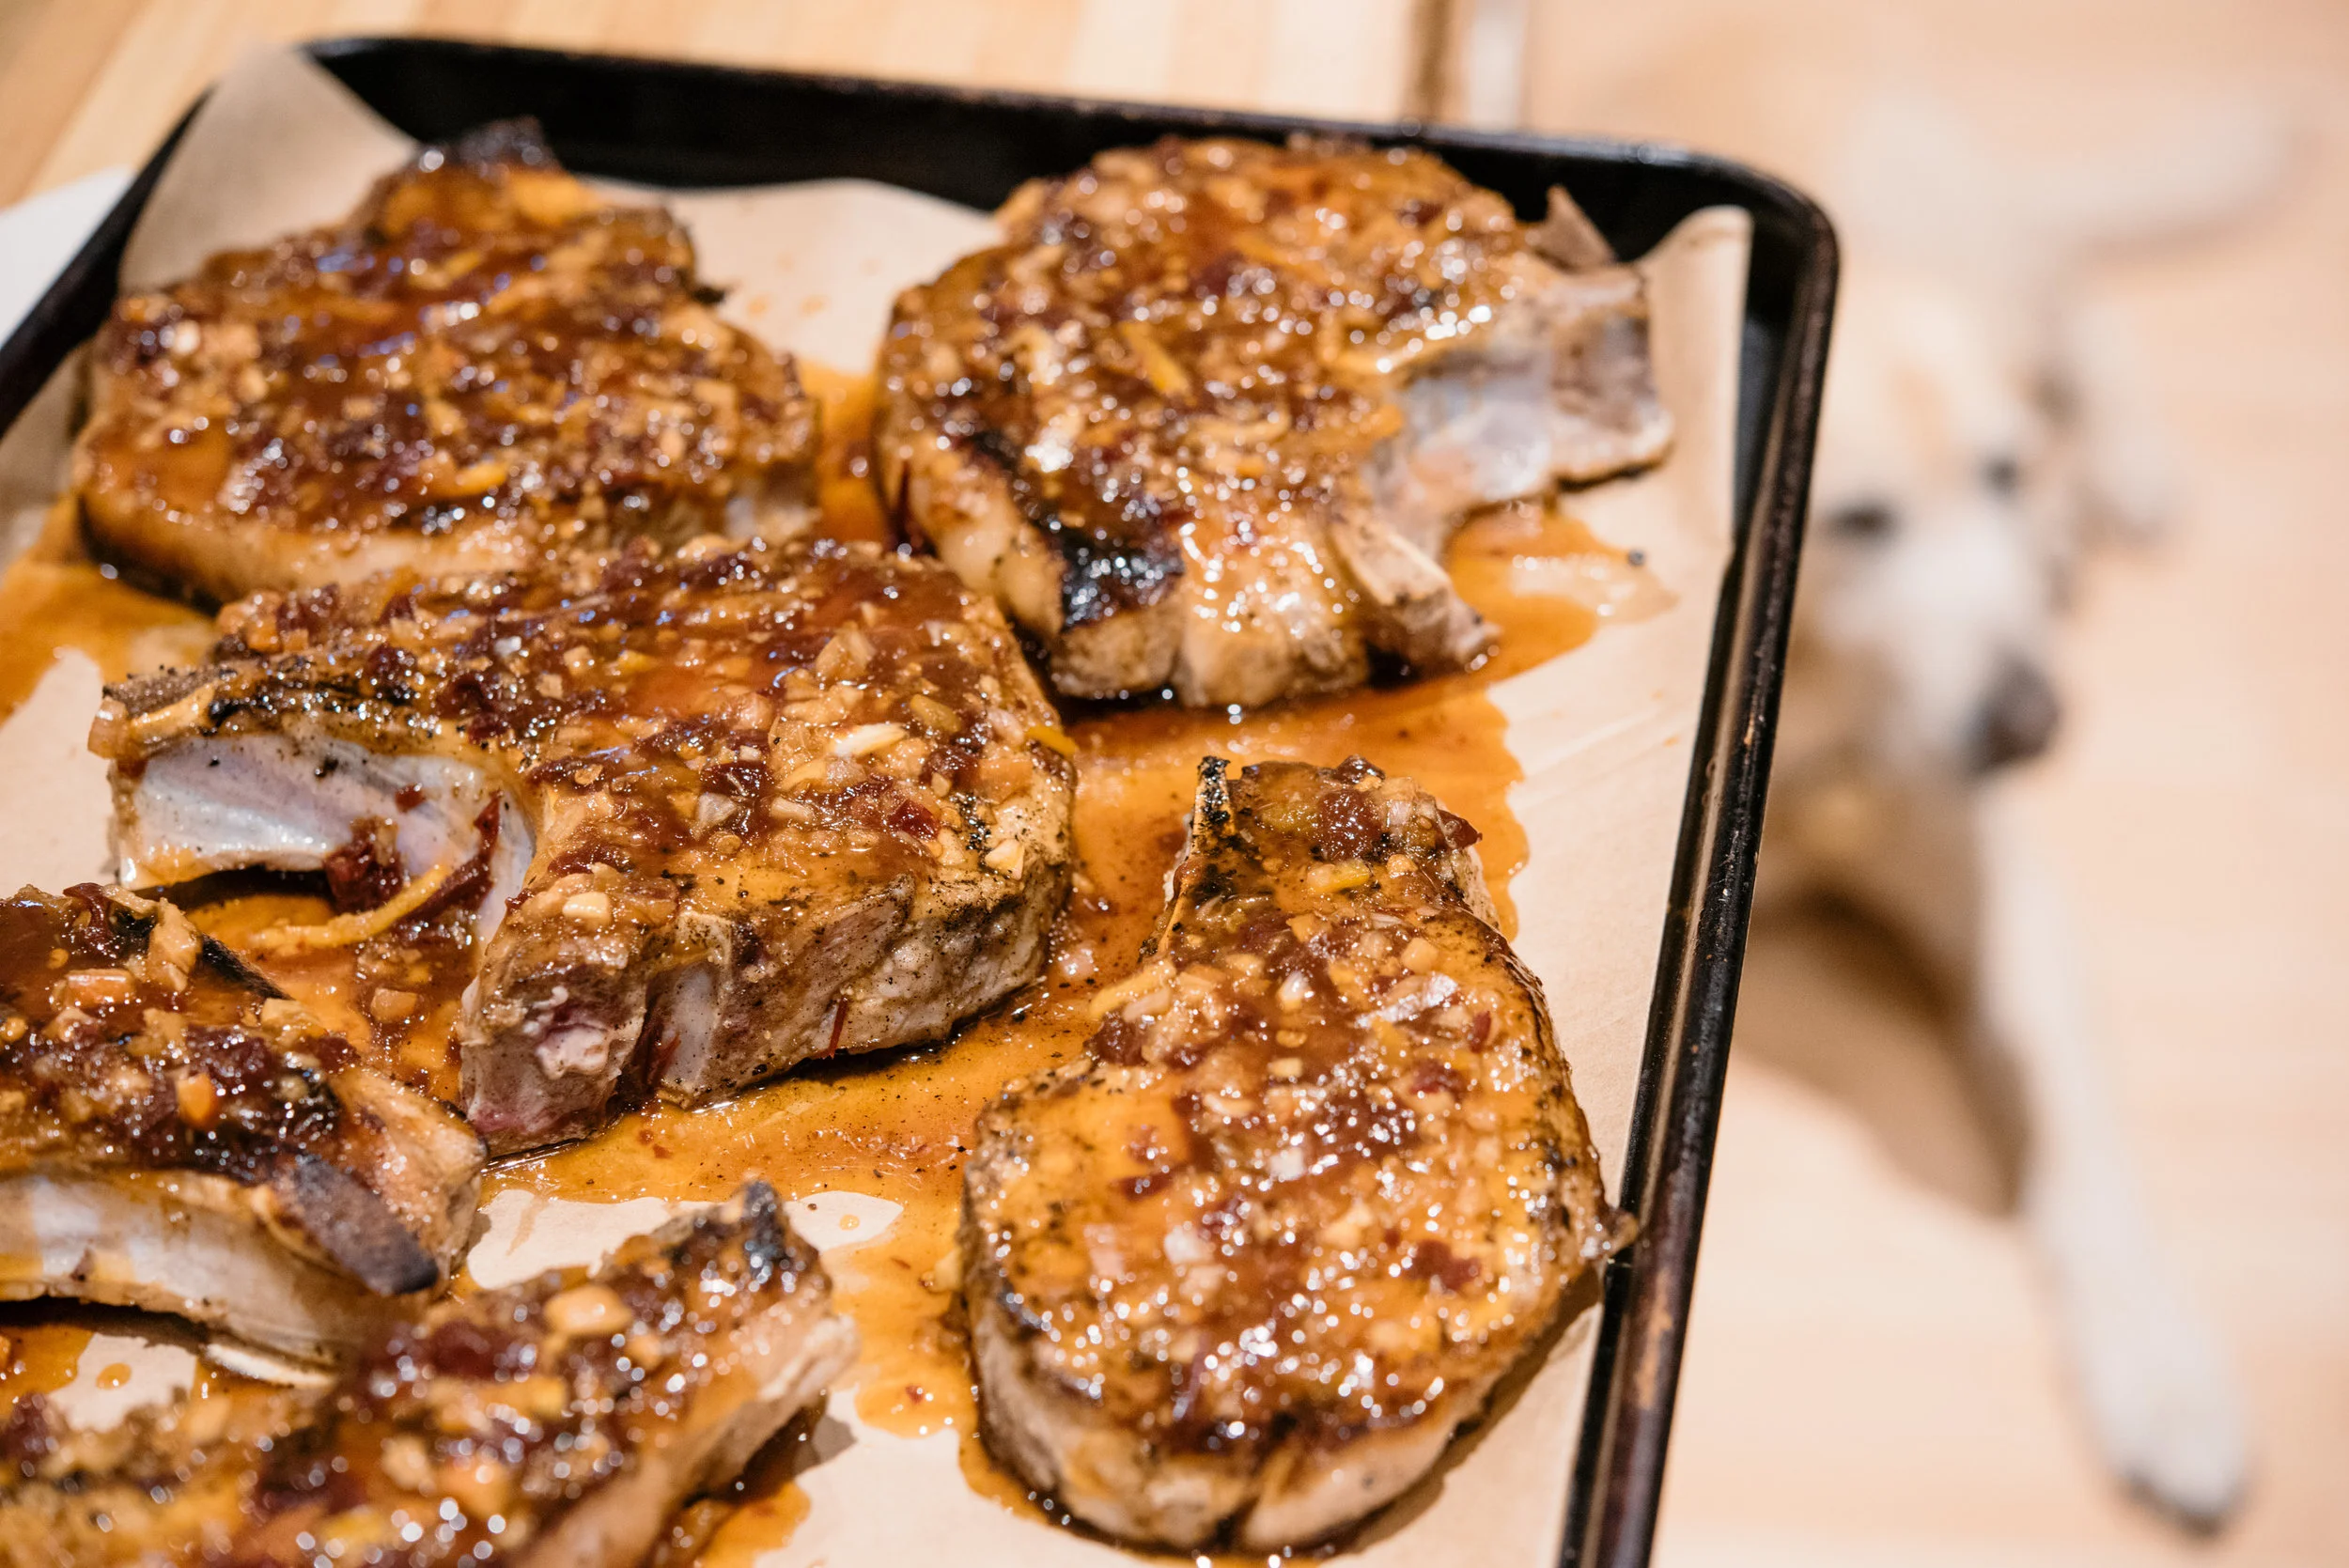
They were just the thing to pair with the pork chops (along with some marmalade, maple syrup, and chipotles). My husband, Ted, said they were the best pork chops he's ever eaten (and that's quite the compliment since he's eaten his fair share of pork)! 

_DSC4518.jpg
_DSC4524.jpg

Sweet and Spicy Pork Chops

Brine
5 cups water, divided
1 cup orange juice
1/2 cup kosher salt
1/2 cup brown sugar
Small handfuls of thyme sprigs
4 cloves garlic, sliced
2 Chile de Arbol

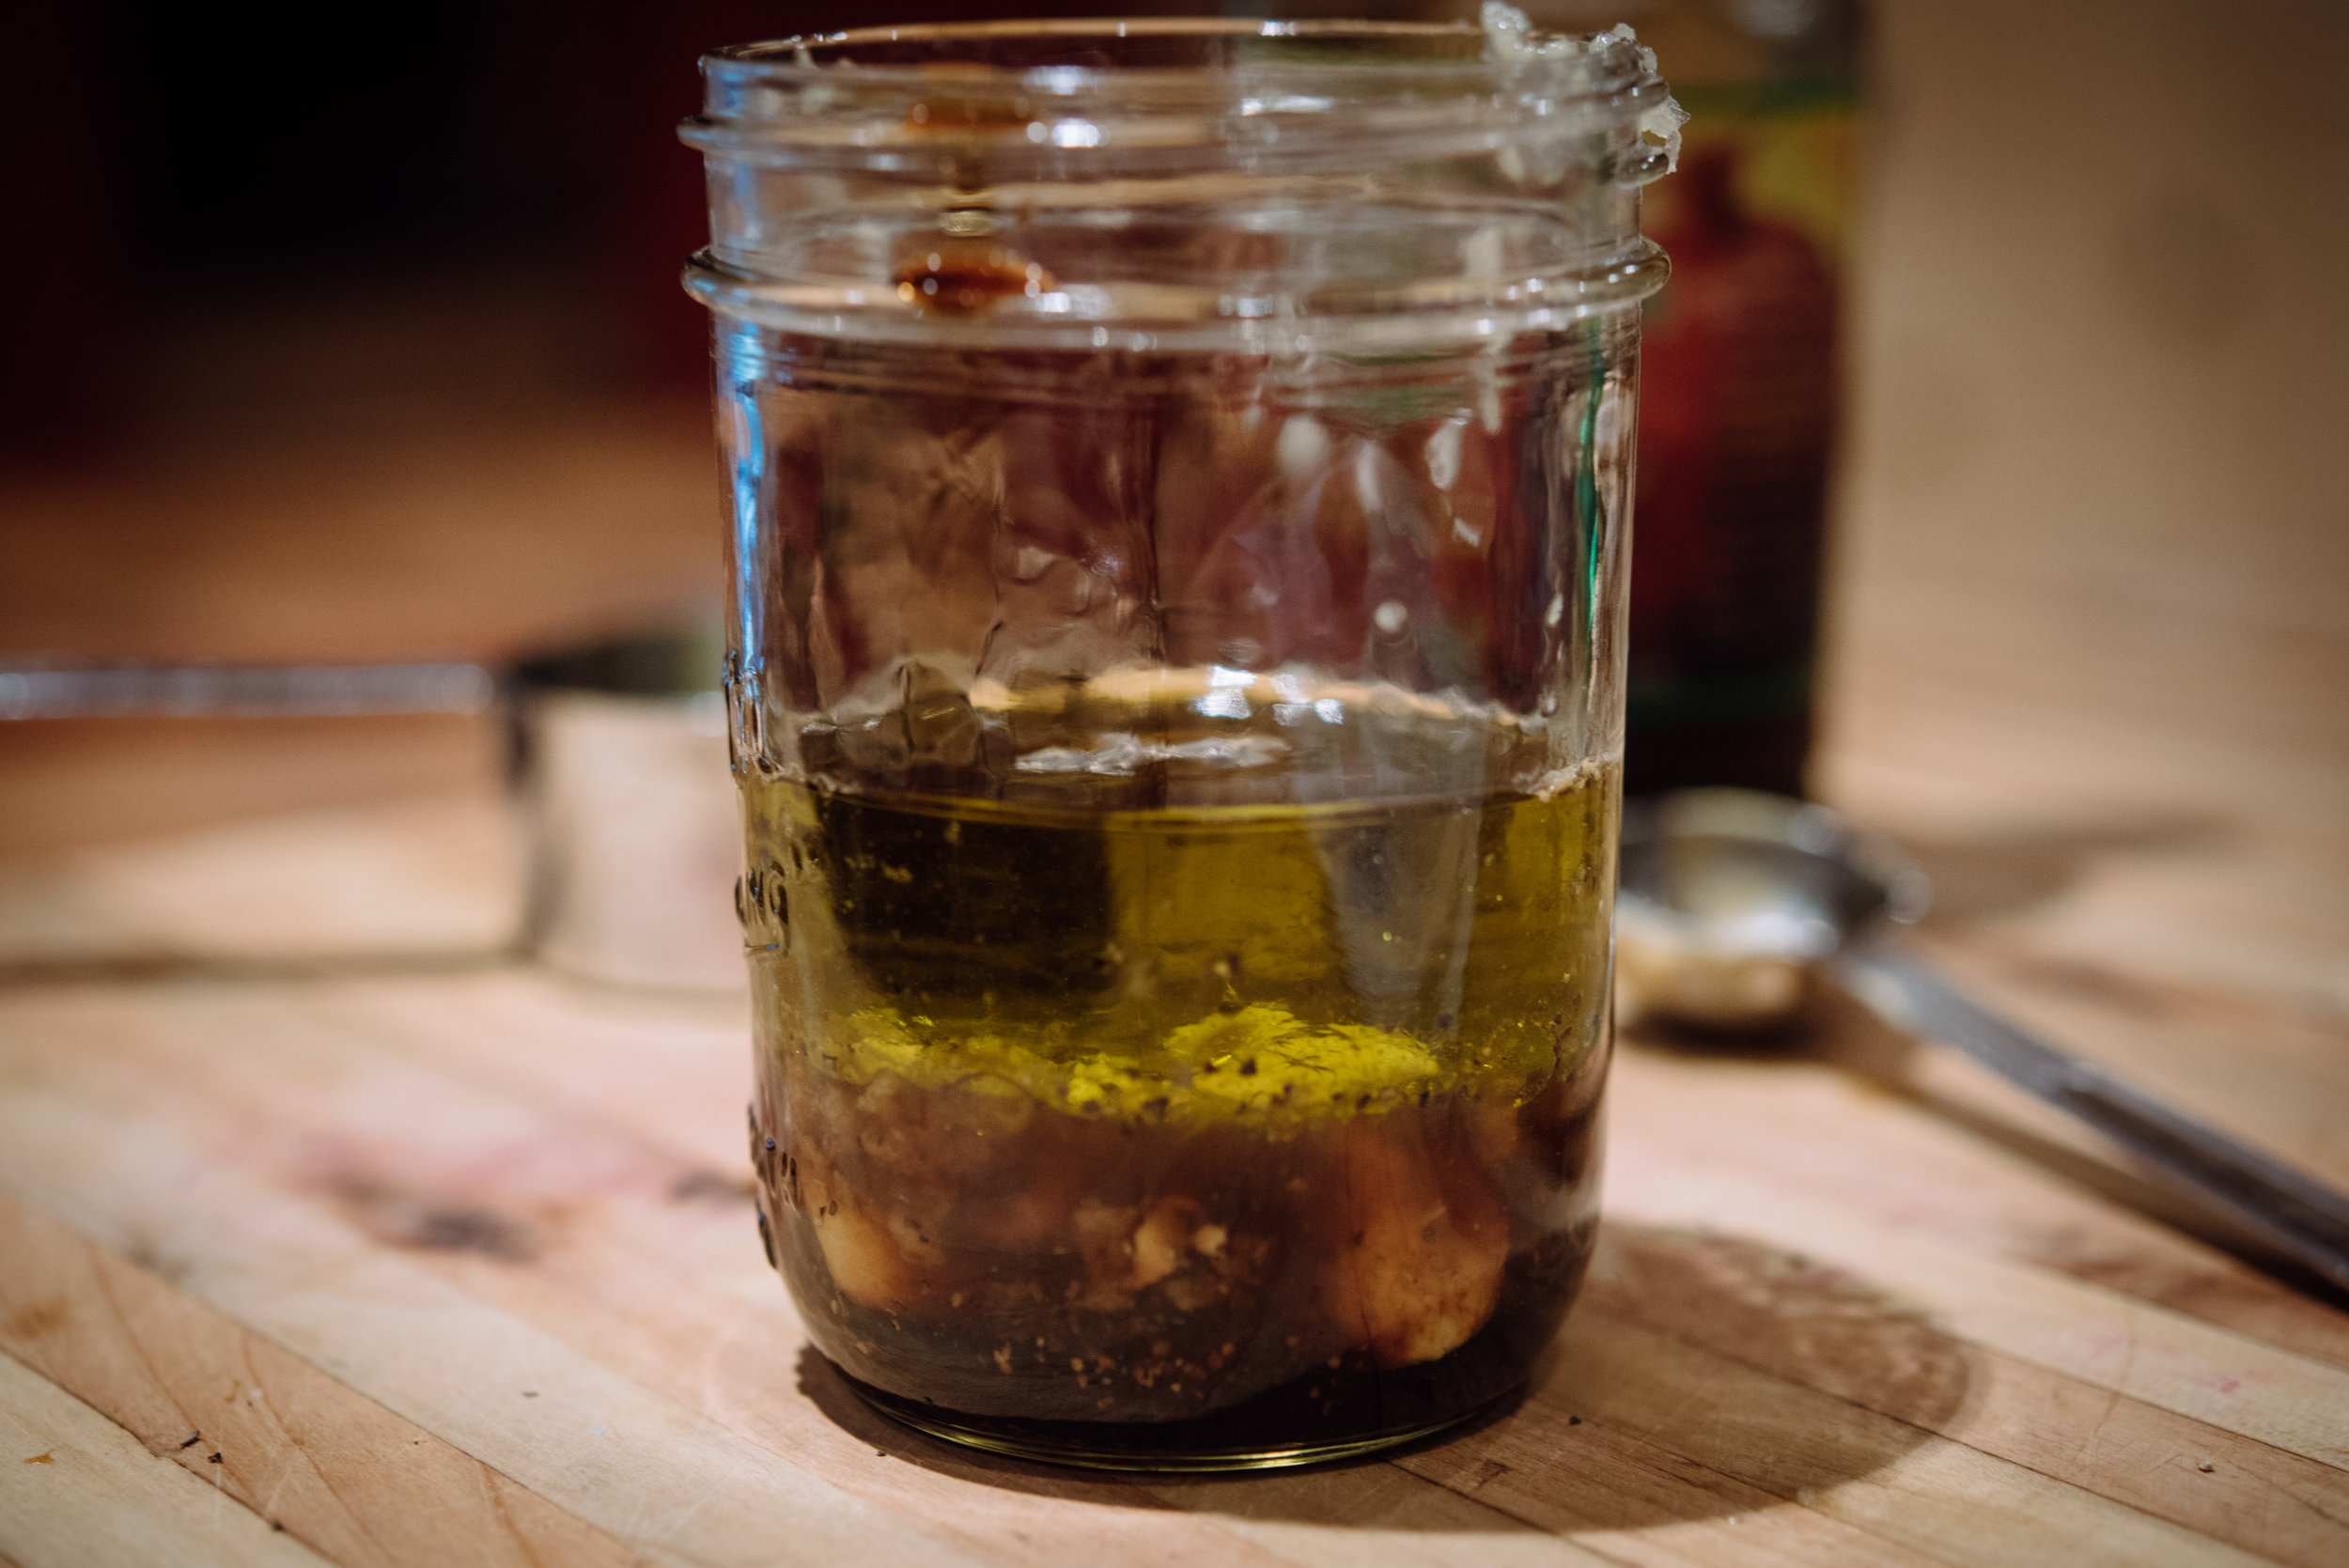
Glaze for Pork Chops
1/3 cup orange marmalade
1/3 cup maple syrup
1/4 chop chipotle in adobe (peppers, seeds, and adobe sauce)
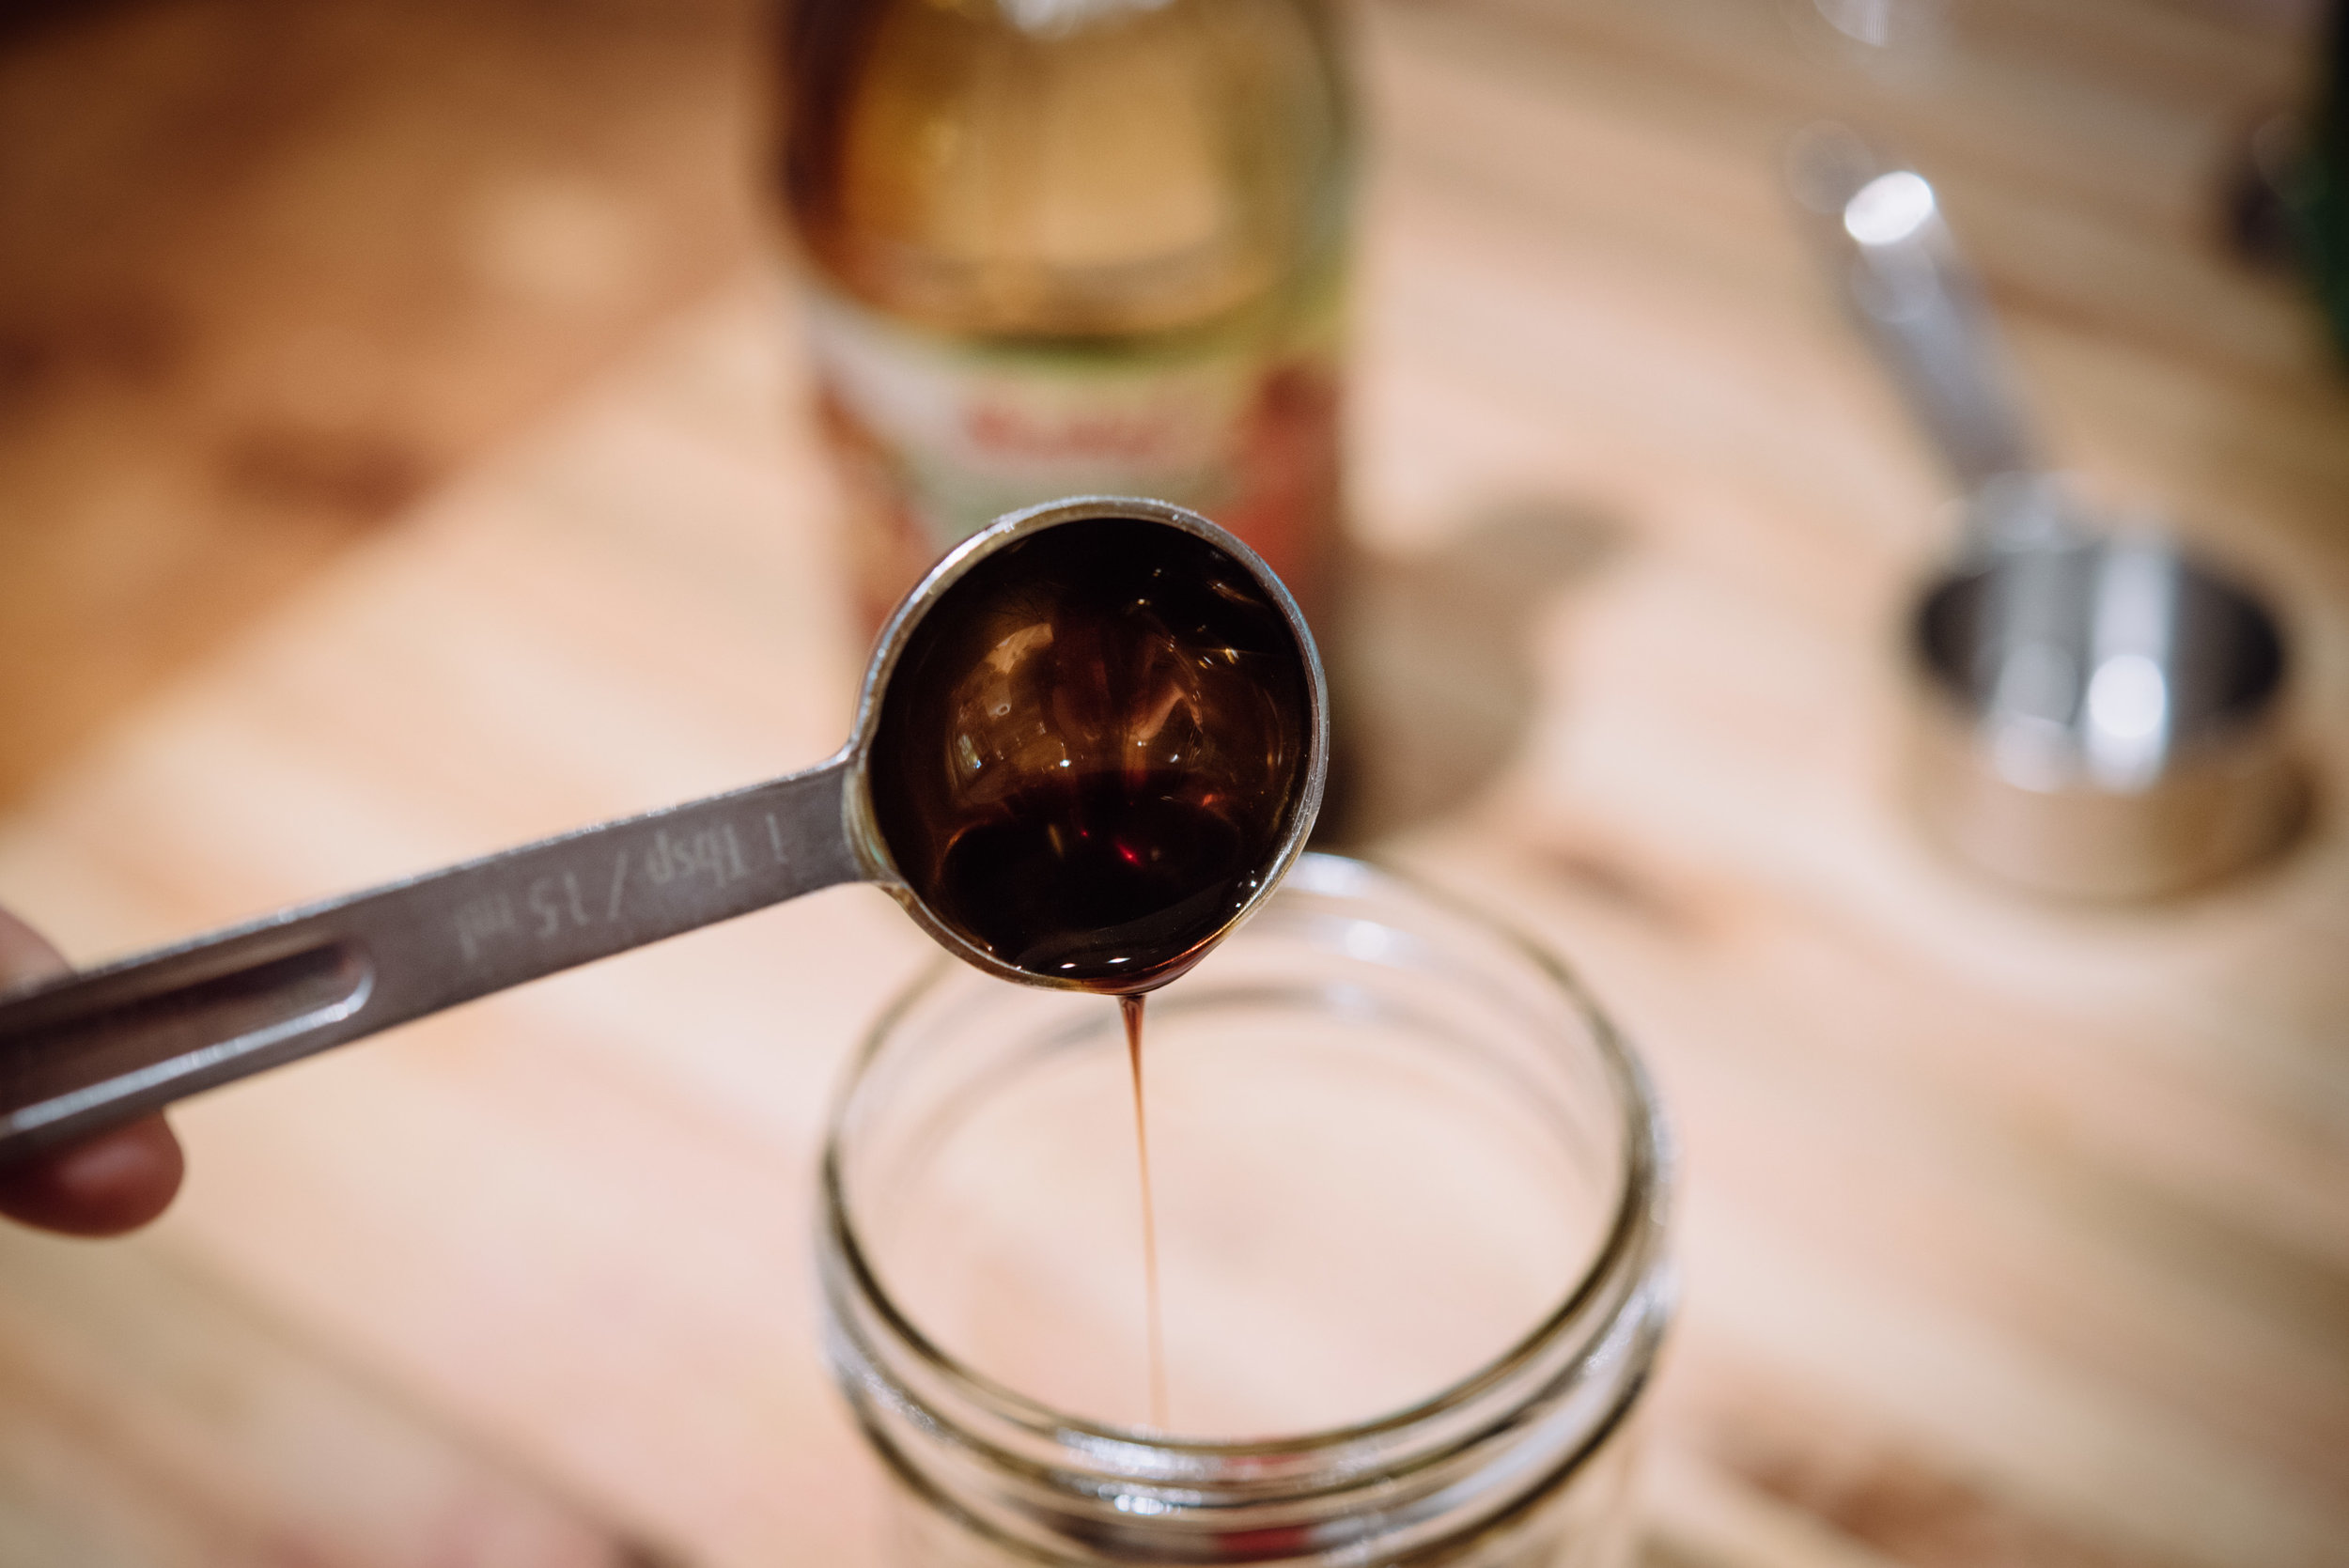
2 tablespoons sherry vinegar
1 clove garlic, minced
1 shallot, minced
3 tablespoons preserved orange rind (can substitute 1 tablespoon orange zest
Salt and pepper, to taste
6 bone-in South Shore Meats pork chops
4 tablespoons butter, divided

Preparation 
Heat all ingredients for brine, except orange juice and 2 1/2 cups water, over medium heat just until the salt and sugar dissolves. Remove from heat, add 2 1/2 cups water and orange juice and allow to cool (about 10 minutes). Place the pork chops in a large non-reactive container, add the brine and place in the refrigerator for 8 hours, or overnight. 

Preheat oven to 400 degrees. Remove pork chops from brine, pat dry, and sprinkle with salt and pepper (not a lot because the brine had salt in it) and set aside. Over low heat, combine the orange marmalade, maple syrup, chipotles, sherry vinegar, garlic, shallot, and preserved orange rind in a medium saucepan and simmer for 10 minutes, or until slightly thickened. Set aside. 

Place a cast iron skillet over medium-high heat and heat for a couple of minutes. Once the pan is hot, add two tablespoons of butter (it'll foam up slightly) and add three pork chops. Sauté the pork chops for four minutes per side and place on a parchment lined sheet tray. Repeat with the remaining three pork chops. 

Spoon the glaze over the pork chops and place in the oven for 10 minutes, basting the pork chops with the glaze halfway through. The pork chops are done when they reach an internal temperature of 140 degrees. Let the pork chops rest for 10 minutes and then serve with glaze/pan juices spooned over top.  


_DSC4545.jpg

A Good Hot Dog Makes For A Good Corn Dog

_DSC4447.jpg
_DSC4439.jpg
_DSC4442.jpg

I love a good hot dog and I love a good hot dog even more when it's encased in a cornmeal batter and deep-fried. I love them enough that I included the recipe in my cookbook. Sadly, I'm often disappointed when I encounter a carnival corndog. There's nothing worse than a bland, mushy hot dog wrapped in soggy breading (although there is a vendor at Applefest every year that has decent hand-dipped corn dogs) and a few years ago (when I was writing the cookbook), I set out to crack the corn dog code. 

_DSC4445.jpg
_DSC4449.jpg
_DSC4457.jpg

Turns out, it's like everything else -- the raw ingredients are key to a kickass finished product. And in this case, the hot dogs from South Shore Meats are first-rate -- dense, meaty, and just enough seasoning to remind you that you are, indeed, eating a sausage. The rest of recipe is pretty simple -- make a batter (with the consistency slightly thicker than pancake batter), heat some oil, and fry. These are best eaten right away -- a soggy corn dog is a sad corn dog. 

_DSC4461.jpg
_DSC4466.jpg

Good Corn Dogs
(Adapted from The Pioneer Woman)

3 cups pancake mix
1 cup yellow cornmeal
1 whole egg, slightly beaten
1 cup buttermilk
1 cup water, plus more if needed to thin batter
Peanut or vegetable oil, for frying
12 South Shore Meats all-beef hot dogs
Chopsticks
Rhubarb Ketchup (recipe here)

Preparation
In a large bowl, combine pancake mix and cornmeal. Stir to combine. Add egg and buttermilk. Add 1 cup water and stir, adding more water as needed for the batter to become slightly thick but not overly gloopy.

Heat peanut or vegetable oil over medium-high heat to 375°F in a cast-iron skillet. Drop in a bit of batter to see if it’s ready; the batter will immediately start to sizzle but should not immediately brown or burn.

Insert sticks into hot dogs lengthwise so they’re two-thirds of the way through. Pour the batter into a large drinking glass or quart-sized canning jar. Dip the hot dogs into the batter and allow excess to drip off for a couple of seconds. Cooking two corn dogs at a time, carefully drop them into the oil (stick and all) and use tongs or a spoon to make sure they don’t hit the bottom and stick. Using the tongs, rotate to ensure even browning, and cook until the batter is deep golden brown, about 4–5 minutes. Remove from the oil and continue with remaining corn dogs. 

_DSC4467.jpg
_DSC4471.jpg

Roasted Beet and Rhubarb Salad with Sassy Nanny Chèvre

_DSC4364.jpg
_DSC4372.jpg
_DSC4382.jpg

Our rhubarb plant is an over-achiever and produces copious amounts of those ruby red stalks nearly all summer long. It eventually bolts and starts to flower sometime in late July but by then, we have cherries, strawberries, raspberries, and blueberries in the queue and we're ready to part ways....until next year. Given that our rhubarb plant thinks its a zucchini plant, I've had to find interesting ways to cook and eat all that tart and fibrous goodness. 

_DSC4386.jpg
_DSC4394.jpg
_DSC4400.jpg

Salads are a staple in our kitchen and given that we have a couple of vegetarians at the table, a hearty salad can fill the dinner bill (with a decent loaf of bread and good butter) without too much trouble.  This salad is really easy to pull together -- you roast the beets and rhubarb, make a salad dressing, and toss it all together. If you don't have pomegranate molasses laying around (it's available at the Chequamegon Co-op, or Middle Eastern/Greek grocery stores), you can make a close-ish substitute by reducing apple cider down to a syrup. 

_DSC4403.jpg
_DSC4408.jpg
_DSC4412.jpg

River Road Farm's green are always top-notch but this batch was particularly beautiful -- the colors were so vibrant. Throw in some garnet colored beets and pink rhubarb and this salad a regular feast for the eyes. And I'm so happy to see Sassy Nanny chèvre back in the stores, it's my hands-down favorite goat cheese! It's officially summer now and I can't wait to start cooking with fresh veggies and fruits in the next few weeks -- stay tuned! 

_DSC4414.jpg
_DSC4420.jpg

Roasted Beet and Rhubarb Salad with Sassy Nanny Chèvre

2 pounds of Great Oak Farms beets
1 pound rhubarb, sliced into 1 inch pieces
1/3 cup raw sugar (can substitute light brown sugar)
1/2 cup olive oil, plus 1 tablespoon
1/4 cup sherry vinegar
2 tablespoons pomegranate molasses
2 tablespoons maple syrup
1 tablespoon Dijon mustard
1 garlic cloves, minced
1 small red onion, thinly sliced
1/3 cup basil leaves, torn into bite-sized pieces
4 ounces Sassy Nanny chèvre, pinched into small chunks
4 -- 5 cups River Road Farms salad mix and/or head lettuce
Salt and pepper, to taste

Preparation
Preheat the oven to 350 degrees. Wash and trim the beets and place in an oven-proof dish, and drizzle with 1 tablespoon olive oil. Cover and place in the oven for about 45-60 minutes, depending on size. The beets are done when you can push a sharp knife in center and it's soft all the way through. Set aside to cool, then remove the peel, and chop. 

Toss the rhubarb with the raw sugar and spread it on a parchment-lined sheet tray. Place in the oven and roast for 15 minutes, or until just softened. Set aside to cool. 

In a Mason jar, place the remaining olive oil, sherry vinegar, pomegranate molasses, maple syrup, Dijon mustard, and minced garlic. Cover and shake vigorously until thoroughly combined. Taste for salt and pepper, and set aside. 

Assemble the salad with the chopped beets, rhubarb, chèvre, red onion, and torn basil leaves on a large platter or bowl, pour the dressing over top, toss to combine and serve immediately. 

_DSC4424.jpg
_DSC4429.jpg
_DSC4430.jpg

Meatloaf in a Cast Iron Skillet

_DSC4353.jpg
_DSC4084.jpg

Remember that Seinfeld episode where Elaine started selling muffin tops? That's where this cast iron skillet meatloaf came from -- more crusty, ketchup-ey meatloaf top to go around. The recipe calls for rhubarb ketchup but you can substitute regular tomato ketchup -- it won't have as much of a 'bite' but will still get that nice crusty top (and that's what I was going for)!  

_DSC4092.jpg
_DSC4119.jpg
_DSC4121.jpg

Meatloaf with Mushrooms, Red Wine, and Rhubarb Ketchup

2 pounds ground beef
1 medium onion, chopped
8 ounces of cremini mushrooms, chopped (can substitute white button mushrooms)
3 medium garlic cloves, minced
2 large eggs, beaten
1 cup red wine
1/2 cup Asiago cheese, shredded
1/2 cup breadcrumbs
1 cup rhubarb ketchup (recipe here), plus more for serving
3 tablespoons butter, divided
1 1/2 tablespoons Worcestershire sauce
1 teaspoon fresh thyme, chopped
1 teaspoon fresh rosemary, chopped
1 teaspoon kosher salt
1 teaspoon black pepper

Preparation 
Heat the oven to 350 degrees and using 1 tablespoon of butter, grease the cast iron skillet and set aside. 

Melt the remaining two tablespoons of butter in a large sauté pan over medium heat and add the onions, mushrooms, thyme, rosemary, and salt. Cook, stirring occasionally, until the onions are softened and any moisture from the mushrooms has evaporated, about 10 minutes. Add the garlic and cook for another minute, or until the garlic is fragrant. 

Add the wine to the pan and simmer until the wine has almost completely evaporated, about 5 minutes. Place the vegetables in a large bowl, set aside and let cool for 10 minutes. 

While the vegetables are cooling, place the beaten eggs in bowl and add the Worcestershire sauce and black pepper and set aside. 

Add the eggs, ground beef, 1/2 cup of rhubarb ketchup, breadcrumbs, and cheese to the cooled vegetable mixture in the bowl and, using your hands, combine thoroughly. Place the meatloaf mixture in the buttered cast iron skillet, brush with remaining 1/2 cup of rhubarb ketchup, and place in oven.  Bake meatloaf until an instant-read thermometer inserted into the center registers 155°F, 60–75 minutes. Let rest 15 minutes before slicing. Serve with more rhubarb ketchup alongside.

_DSC4126.jpg
_DSC4132.jpg

Rhubarb Takes a Walk on the Savory Side

_DSC4064.jpg
_DSC4067.jpg

Let's face it -- nobody likes being pigeonholed and I figured rhubarb might be getting sick and tired of strawberries and pie so I set out in search of new rhubarb horizons. A quick Google search turned up a number of different savory rhubarb iterations and I had all sorts of ideas percolating in my head for Raspotnik Farm's rhubarb in last week's CSA delivery. I do love a good condiment (a look in my fridge will bear that out) and I started thinking about taking the chutney route (figured rhubarb might want to meet an aged cheddar) but since I didn't have an aged cheddar laying around and we were having meatloaf for dinner -- rhubarb ketchup was the only logical choice. 

_DSC4072.jpg
_DSC4075.jpg

Turn out, ketchup was not only a logical choice but fortuitous as well since this week's delivery included a package of Hidden-Vue hot dogs, which means one thing around here -- corn dogs (I'll get that recipe up on the blog in the next few days). I hadn't made ketchup before because, in spite of my condiment habit, it never really grabbed my attention -- Heinz was the go-to for brats or burgers and that was about as far as I took it. I was surprised how easy ketchup is to make (basically you throw everything in a pot, cook it down, and then puree it) and the sweet and spicy flavors combined with a bite from the vinegar and rhubarb makes it a good companion for the meatloaf and corn dogs! 

_DSC4078.jpg
_DSC4082.jpg

Rhubarb Ketchup

4 cups rhubarb, sliced
1 28-ounce crushed tomatoes
1 medium onion, chopped
2 garlic cloves, chopped
1 1/2 cup brown sugar
1 cup red wine vinegar
1/2 cup ruby port
2 tablespoons butter
2 tablespoons Worcestershire sauce
2 tablespoons Ancho chile powder
2 teaspoons kosher salt
1 teaspoon black pepper
1/2 teaspoon cinammon

Preparation 
Melt the butter in a large saucepan or Dutch oven over medium heat and add the onions. Sauté, stirring occasionally, until the onions are softened and add the garlic. Sauté for another 2 minutes, or until the garlic is fragrant, and then add the remaining ingredients. Reduce to heat to low and simmer, uncovered, for about 45 minutes, or until the rhubarb is starting to break down and the ketchup is beginning to thicken slightly. 

Remove from heat and let cool for about 30 minutes. Carefully transfer to a blender or food processor and process until smooth. Place in a clean jar and store, covered, in the refrigerator for about a month. 

_DSC4361.jpg

Pickled Radishes and Swiss Chard Stems

_DSC4023.jpg
_DSC4026.jpg
_DSC4030.jpg

I'm a big fan of pickles -- the bite of the brine and the crunch of the vegetable have always been a favorite of mine. Last week I made a quiche with Swiss chard and I couldn't bear to throw away the colorful stems, they were too tender and fresh-from-the-farm for the compost pile. So, I tucked them away in the fridge while I waited for inspiration to strike. 

And then it did. When I was looking for a hunk of Parmesan, I ran into the bunch of radishes from the Lake Superior CSA box last week (my fridge isn't exactly organized -- more like a treasure hunt, in the dark, with blinders on). I immediately thought about pickling them...which reminded me that I had tucked the chard stems away as well (another hunt and gather expedition in the fridge was in order) and a pickling match-made-in-heaven was born. 

Since I prefer my vegetables to be crunchy, I always make refrigerator pickles -- they are easy to put together, take about a week to cure, and keep for a couple of months in the fridge. These pickles are a good companion for cured meats, tuna salad, sandwiches, or anywhere else you'd put a pickle! 

_DSC4034.jpg
_DSC4044.jpg
_DSC4048.jpg

Pickled Radishes & Swiss Chard Stems

1 bunch of radishes, stems discarded and quartered
Stems from a bunch of Swiss chard, cut into 2 -3 inch pieces
1 jalapeno, sliced
2 garlic cloves, sliced
3-inch piece of ginger, peeled and sliced
3 cups of white vinegar
1 1/2 cups water
1/2 cup white sugar
1/4 cup kosher salt
2 teaspoons yellow mustard seeds
1 teaspoon fennel seeds
1 teaspoon dill seeds

Preparation 
Place the vinegar, water, sugar, and salt in a saucepan and heat over medium-high heat until salt and sugar have dissolved. Remove from the heat and set aside. 

Toast the seeds in a skillet, stirring them frequently over medium heat, until they're fragrant. Set aside.

Divide the radishes, chard stems, jalapeño, ginger, garlic, and seeds (mustard, fennel, and dill) between two 16-ounce Mason jars and pour the vinegar mixture over top. Cover tightly and place in the refrigerator until cured, about a week. 

_DSC4055.jpg
_DSC4059.jpg

Swiss Chard Quiche With Mushrooms, Lemon Thyme, and Pine Nuts

_DSC3917.jpg
_DSC3918.jpg

You know you've got some good food on your hands when you have to text your kids to say -- don't eat the Swiss chard, I need it for a recipe. If you would have told me 15 years ago (when I had five kids who's idea of an palatable vegetable was French fries), that I'd have to protect green leafy vegetables from consumption, I would have laughed and said you're nuts. But here we are -- with a house full of kids who love spinach, kale and chard, times (and tastes) sure have changed. 

_DSC3922.jpg
_DSC3925.jpg
_DSC3926.jpg

Now that everyone (expect Jack) is home for the summer, we eat a lot of eggs (about 4 dozen a week) and they are the perfect thing to cook when you're pressed for time. We eat them poached on leftover beans, fried in a sandwich with smashed avocado, or in a tart with vegetables with Swiss chard and mushrooms. Their bad rap as being cholesterol time-bombs is beginning to unravel and it turns out, they may actually help prevent heart disease and stroke. There's a reason they're called incredible and edible! 

_DSC3936.jpg
_DSC3943.jpg

Quiches are really easy to put together (I rarely make my own pie crust and instead use the refrigerated Pillsbury pie crusts from the grocery store), are good hot or at room-temperature, and are a blank canvas when it comes to what you put in them. There's a recipe for a tomato and corn quiche in my cookbook that I can't wait to make once my tomatoes start to produce and Corn Man shows up in Ashland -- here's a link (in case you are dreaming of summer produce too). While we're waiting, this quiche with Swiss chard and pine nuts is a good stand-in!  

_DSC3945.jpg
_DSC3948.jpg

Swiss Chard Quiche With Mushrooms, Lemon Thyme and Pine Nuts

1 9-inch pie crust, store-bought or homemade
1 small yellow onion, chopped
1 package of cremini mushrooms, sliced (you can substitute white button mushrooms)
4 cups Swiss chard (about 7 pieces), stalks removed and rough chopped
4 eggs, beaten
1 cup cream
1/4 cup pine nuts, sautéed in 1/2 tablespoon butter
2 garlic cloves, chopped
1/2 tablespoon preserved lemon (recipe here), or substitute 1/2 teaspoon lemon zest
1 tablespoon lemon thyme, substitute regular thyme, chopped
1 teaspoon kosher salt
1/2 teaspoon coarse ground pepper

Preparation
Preheat the oven to 350 degrees. 

In a sauté pan, heat olive oil over medium heat. When oil is warm, add the onions and sauté until softened but not brown (about 5 minutes). Add the mushrooms, sauté for an additional 3 or 4 minutes, and add the garlic. Sauté, stirring occasionally, until the garlic is fragrant and then add the chopped chard. Cook until the chard has wilted, remove from the heat, and set aside.

Place the eggs, cream, preserved lemon, thyme, salt, and pepper in a bowl and combine. Set aside. 

Roll out the crust and fit into a 9-inch pie pan or fluted tart pan. Place the sautéed chard and mushroom mixture in the pie pan and then pour the egg mixture over top. Sprinkle the toasted pine nuts on top and place in the oven. 

Bake until edges of crust are golden brown and center of quiche is just set, 30 -- 40 minutes. Cool on a wire rack for 15 minutes before serving.

_DSC3949.jpg

Cannellini Bean and Swiss Chard Soup or Another Reason Why Instant Pots Rock

_DSC3733.jpg
_DSC3736.jpg

So, I had a plan for my blog post this week and it was a good one -- roast chicken for the meat-eaters and my favorite kale salad for the vegetable fans. Except I made a serious miscalculation -- the kids are home from college and that means what I put in the fridge doesn't always stay there. Kale is a hot commodity around here and when I went looking for it this morning (I like a poached egg on kale salad for breakfast) -- it was nowhere to be seen. Evidently, River Road Farm's kale is a hit around the Dougherty house. 

_DSC3765.jpg

Which brings to me to Instant Pot. I'm not a fan of counter-top kitchen appliances and as a result, was skeptical of the all the fuss and bluster around Instant Pots....until 2017's Black Friday. Amazon had a deal on an Instant Pots that I couldn't pass up and since my crock-pot had recently bit the dust, there was an empty spot on the shelf (so I wasn't technically adding counter-top clutter). I haven't used it as a slow-cooker yet but it cooks beans like a champ (in about 45 minutes)! Given my penchant for last minute meal planning, the Instant Pot, and its super speedy bean cooking, has literally upped my bean game to a semi-pro-at-meal-planning level. 

_DSC3772.jpg
_DSC3774.jpg

Faced with a lack of my main ingredient for the kale salad, I spied the chard and wondered what I could cook with that equally lovely and healthy greenery. Given the cold and damp, I naturally thought about soup and since I recently purchased some cannellini beans from Fraboni's in Madison, unearthed two jars of our canned tomatoes in the basement and found a half bottle of Chardonnay in the fridge -- I decided a hearty, vegetable soup was in order. I fired up the Instant Pot, made my vegetable stock from my favorite bouillon from the Chequamegon Co-op, and started chopping and sautéing. 

I always make a double batch of soup so I can freeze a couple of quarts -- it's like having Blue Apron in your freezer!

_DSC3798.jpg

Cannellini and Swiss Chard Soup 

1 pound of dried cannellini beans (about 6 cups cooked)
4 carrots, peeled and sliced
1 red onion, chopped
6 garlic cloves, chopped, divided
1 large bunch of Great Oak Farms Swiss chard, leaves chopped and stems sliced
1 quart canned tomatoes with juice, or one 28-ounce can of chopped tomatoes with juice
4 cups vegetable stock
1 cup white wine
1 tablespoon fresh rosemary, chopped
1 tablespoon sherry vinegar
1 teaspoon red pepper flakes
Olive oil
Kosher salt and pepper
A couple sprigs of rosemary and thyme (for the beans)

Preparation
Place the beans, 6 cups of water, 2 cloves of chopped garlic, and the rosemary and thyme sprigs in the Instant Pot and cook at high pressure for 20 minutes. When timer goes off, let sit 10 minutes, then release steam valve. Remove cover and place the beans in a bowl. Set aside. You can also make the beans on the stovetop or use canned beans -- it's up to you....just make sure you end up with about 6 cups of beans.

Over medium heat, place about 2 tablespoons of olive oil, 1 teaspoon of kosher salt, and 1/2 teaspoon of coarse black pepper and the chopped red onions in a medium Dutch oven or stockpot. Cook, stirring occasionally, for about 5 - 7 minutes, or until the onions are softened. Add the garlic and rosemary and cook for another 2 - 3 minutes. Add the tomatoes (with the juice), vegetable stock, wine, and carrots and cook, covered, over medium-low heat for 15 minutes. Add the Swiss chard, cooked cannellini beans, red pepper flakes, and sherry vinegar and cook, uncovered, for another 5 minutes. Taste for salt and pepper and serve immediately. 

_DSC3809.jpg

What's For Dinner When June Feels Like March??

_DSC3724.jpg
_DSC3726.jpg

I have to admit, I'm happy it's going to be a little chilly and rainy for the next few days -- one more chance to roast a chicken without worrying about turning our kitchen into a sauna. Our old house likes to hold onto the heat on summer days and use of the oven is relegated to absolutely necessary things like birthday cakes and chocolate chip cookies. So, when I opened my CSA box a few days ago and saw a whole chicken, I knew what was for dinner! 

But the question remained -- what was special enough to pass muster for my first blog post for the Lake Superior CSA?? 

_DSC3729.jpg
_DSC3731.jpg

Food inspiration comes in all sorts of packages and in the case of this chicken board -- it came from the magical world of Instagram and their algorithms. One morning, bright and early thanks to Aldo and his tiny bladder, I was scrolling through my Instagram feed and a picture of a pile of chicken, potatoes, and greens on a wooden board flew by and I quickly started back-pedaling (or whatever scrolling backwards is called) to figure out what that amazing photo was all about. 

_DSC3741.jpg
_DSC3751.jpg

Turns out it was all about a restaurant in Aspen called Meat & Cheese Restaurant Farm Shop that has a variety of different boards topped with all sorts of good stuff: sausage, steak, bread, biscuits, and pate. Needless to say, if I end up in Aspen anytime in the future -- I know where I'm eating dinner (since I don't ski, eating seems like the next best thing to do in the Rocky Mountains). 

_DSC3754.jpg
_DSC3758.jpg

I did a quick Google search to see if there were any recipes on-line for the chicken and vinaigrette  and came up empty handed so I opened my fridge and grabbed my old stand-bys: preserved lemon, butter, and some fresh herbs. This meal is really about the vinaigrette and presentation, you can make any sort of roasted chicken and vegetables you'd like (I roasted the radishes that were in our CSA box). Since a major component of the vinaigrette is the chicken/pan juices, I decided to make a flavorful compound butter in order to ensure the vinaigrette was top-notch. 

_DSC3760.jpg
_DSC3763.jpg
_DSC3775.jpg

Chicken Board with Roasted Vegetables and Vinaigrette

1/2 cup butter (1 stick), at room temperature
2 garlic cloves, chopped
1/2 tablespoon fresh rosemary , chopped
1/2 of a preserved lemon, minced, or 1 teaspoon lemon zest
1 teaspoon fresh thyme, chopped
1 teaspoon kosher salt
1/2 teaspoon coarse ground black pepper
1 whole chicken from Heritage Acres
Vegetables for roasting (I used a half of a lemon (thinly sliced), Great Oak Farm radishes, and 2 medium onions), tossed in olive oil, salt, and pepper
Fresh greens (I used River Road Farm's spring mix) dressed with freshly squeezed lemon juice, olive oil, salt and pepper

Vinaigrette
1 clove garlic, minced
3 tablespoons sherry or red-wine vinegar
2 tablespoons Dijon mustard
2 tablespoons olive oil
1/2 teaspoon maple syrup
Kosher salt and pepper, to taste
All of the pan drippings (in order to get as much of the good chicken juices as possible, let the chicken rest, on the pan with the vegetables, for 5 - 10 minutes. Cover the chicken/vegetables with aluminum foil to keep it warm while it’s resting)

Preparation
Line a sheet tray with parchment paper. Combine all ingredients for the compound butter except chicken, vegetables and fresh greens and mix thoroughly. Spatchcock the chicken (cut out the backbone and then flatten with your hands, pressing in between the breasts). Loosen the chicken skin over the breasts, thighs and legs and rub the compound butter under the skin. Rub any remaining butter on the outside of the bird, place on the parchment lined sheet tray, and place in the refrigerator, uncovered, for 4 hours.

Preheat the oven to 350 degrees. Take the chicken out of the refrigerator and place the onion and lemon slices around the chicken. Place in oven and cook for 1 1/2 hours, or until the breasts and thighs reach 165 degrees.

While the chicken is cooking, remove the tops of the radishes and cut the radishes in half or quarters (depending on how large they are), toss with olive oil, salt and pepper and place on a parchment covered sheet tray. Set aside. 

In a medium bowl, combine the garlic, Dijon, vinegar, olive oil, and maple syrup and set aside.

Take the chicken out of the oven and let rest for 15 minutes, covered (see above). While the chicken in resting, increase the oven temperature to 375 degrees, place the radishes in the oven and cook for 15 minutes. 

Cut the chicken into pieces and place it on a large platter, parchment covered cookie sheet, or wooden board with the vegetables and greens. Quickly whisk in the pan juices and drippings into the Dijon/vinegar mixture and serve immediately alongside the chicken, vegetables, and greens. 

_DSC3779.jpg
_DSC3786.jpg

CONNECTING FARMERS AND EATERS -- ONE CSA BOX AND ONE RECIPE AT A TIME

DSC_9157.jpg

Like most good things that come my way, this opportunity came calling out of the blue but was something I had been thinking about recently -- what can I do to connect eaters and farmers in my community?? When Jason Fischbach, one of the masterminds behind the Bayfield Regional Food Producers Cooperative, called with an idea -- would I be interested in partnering with them and doing weekly blog posts and recipes (that will coincide with delivery of the Lake Superior CSA boxes), I needed about 30 seconds to formulate my answer -- heck yeah! 

DSC_9807.jpg

Local food has become the rallying cry across Wisconsin in response to an increasingly industrialized food system for a variety of reasons but for me, it can boiled to one simple statement: all food comes from somePLACE and that place is someone's HOME. Buying locally or sustainably raised meats or vegetables isn't important because they taste better (although they do). It's important because all food comes with consequences, good or bad, for the community where it's grown. The old adage, 'you are what you eat' should be expanded to 'HOW what you eat is RAISED matters' because community and food are intertwined. These questions about our food system (local and industrial) are complex and our answers need to be as diverse as the food on our tables and the people sitting around them. 

DSC_6760.jpg

And that's why I'm excited to partner with the Lake Superior CSA and Bayfield Regional Food Producers Cooperative -- in the next year or so, we'll share recipes, ideas, and stories because we support agriculture that not only feeds us but sustains a healthy community as well. I'll send out a weekly blog post every Friday starting June 1 through October 31 and then monthly every Wednesday November through March. I'll develop recipes that will utilize what's in your CSA box, as well as additional links to recipes I discovered on some of my favorite websites. That way, if you aren't a fan of gazpacho or corned beef, you'll have plenty of choices for making good meals from good food! I'll also try to include gluten-free and vegan recipes -- please send your suggestions my way -- this is meant to a conversation, not a lecture!  

DSC_8978.jpg

We'll send an email to you with a link to the recipes but you can also find the recipes on my website, The Cookery Maven, and the Lake Superior CSA website. I imagine our conversation will change as we move forward and get to know each other and I can't wait -- the sky is the limit! Our personal approach to food doesn't have to be a precious manifesto. It just has to be authentic, to be real enough to admit every day isn't about homemade puff pastry or roasted heirloom tomatoes but that there are moments of wonder, gratitude, and connection that live amidst and within us. Let's build a community of eaters and farmers who are working in concert with each other -- one CSA box, one table, one gathering at a time. Cheers! 

_DSC2665.jpg