Lake Superior CSA

Wild Rice Salad with Roasted Vegetables and A Brown Butter Vinaigrette

_DSC6295.jpg
_DSC6297.jpg
_DSC6306.jpg

Between the subzero temperatures and the couple of feet of snow on the ground, it seems like winter is here to stay for a while. Which is okay because it means I can continue roasting squash and carrots to my heart’s content. Not only do they taste good, it’s nice to have a little color in the kitchen — given that it’s pretty monochromatic outside our kitchen windows. Last week’s Lake Superior CSA box came along at exactly the right time, my squash and carrot stash was nearly gone and we have another 10 inches of snow in the forecast tonight. Time to turn on the oven and get roasting.

_DSC6308.jpg
_DSC6312.jpg
_DSC6316.jpg

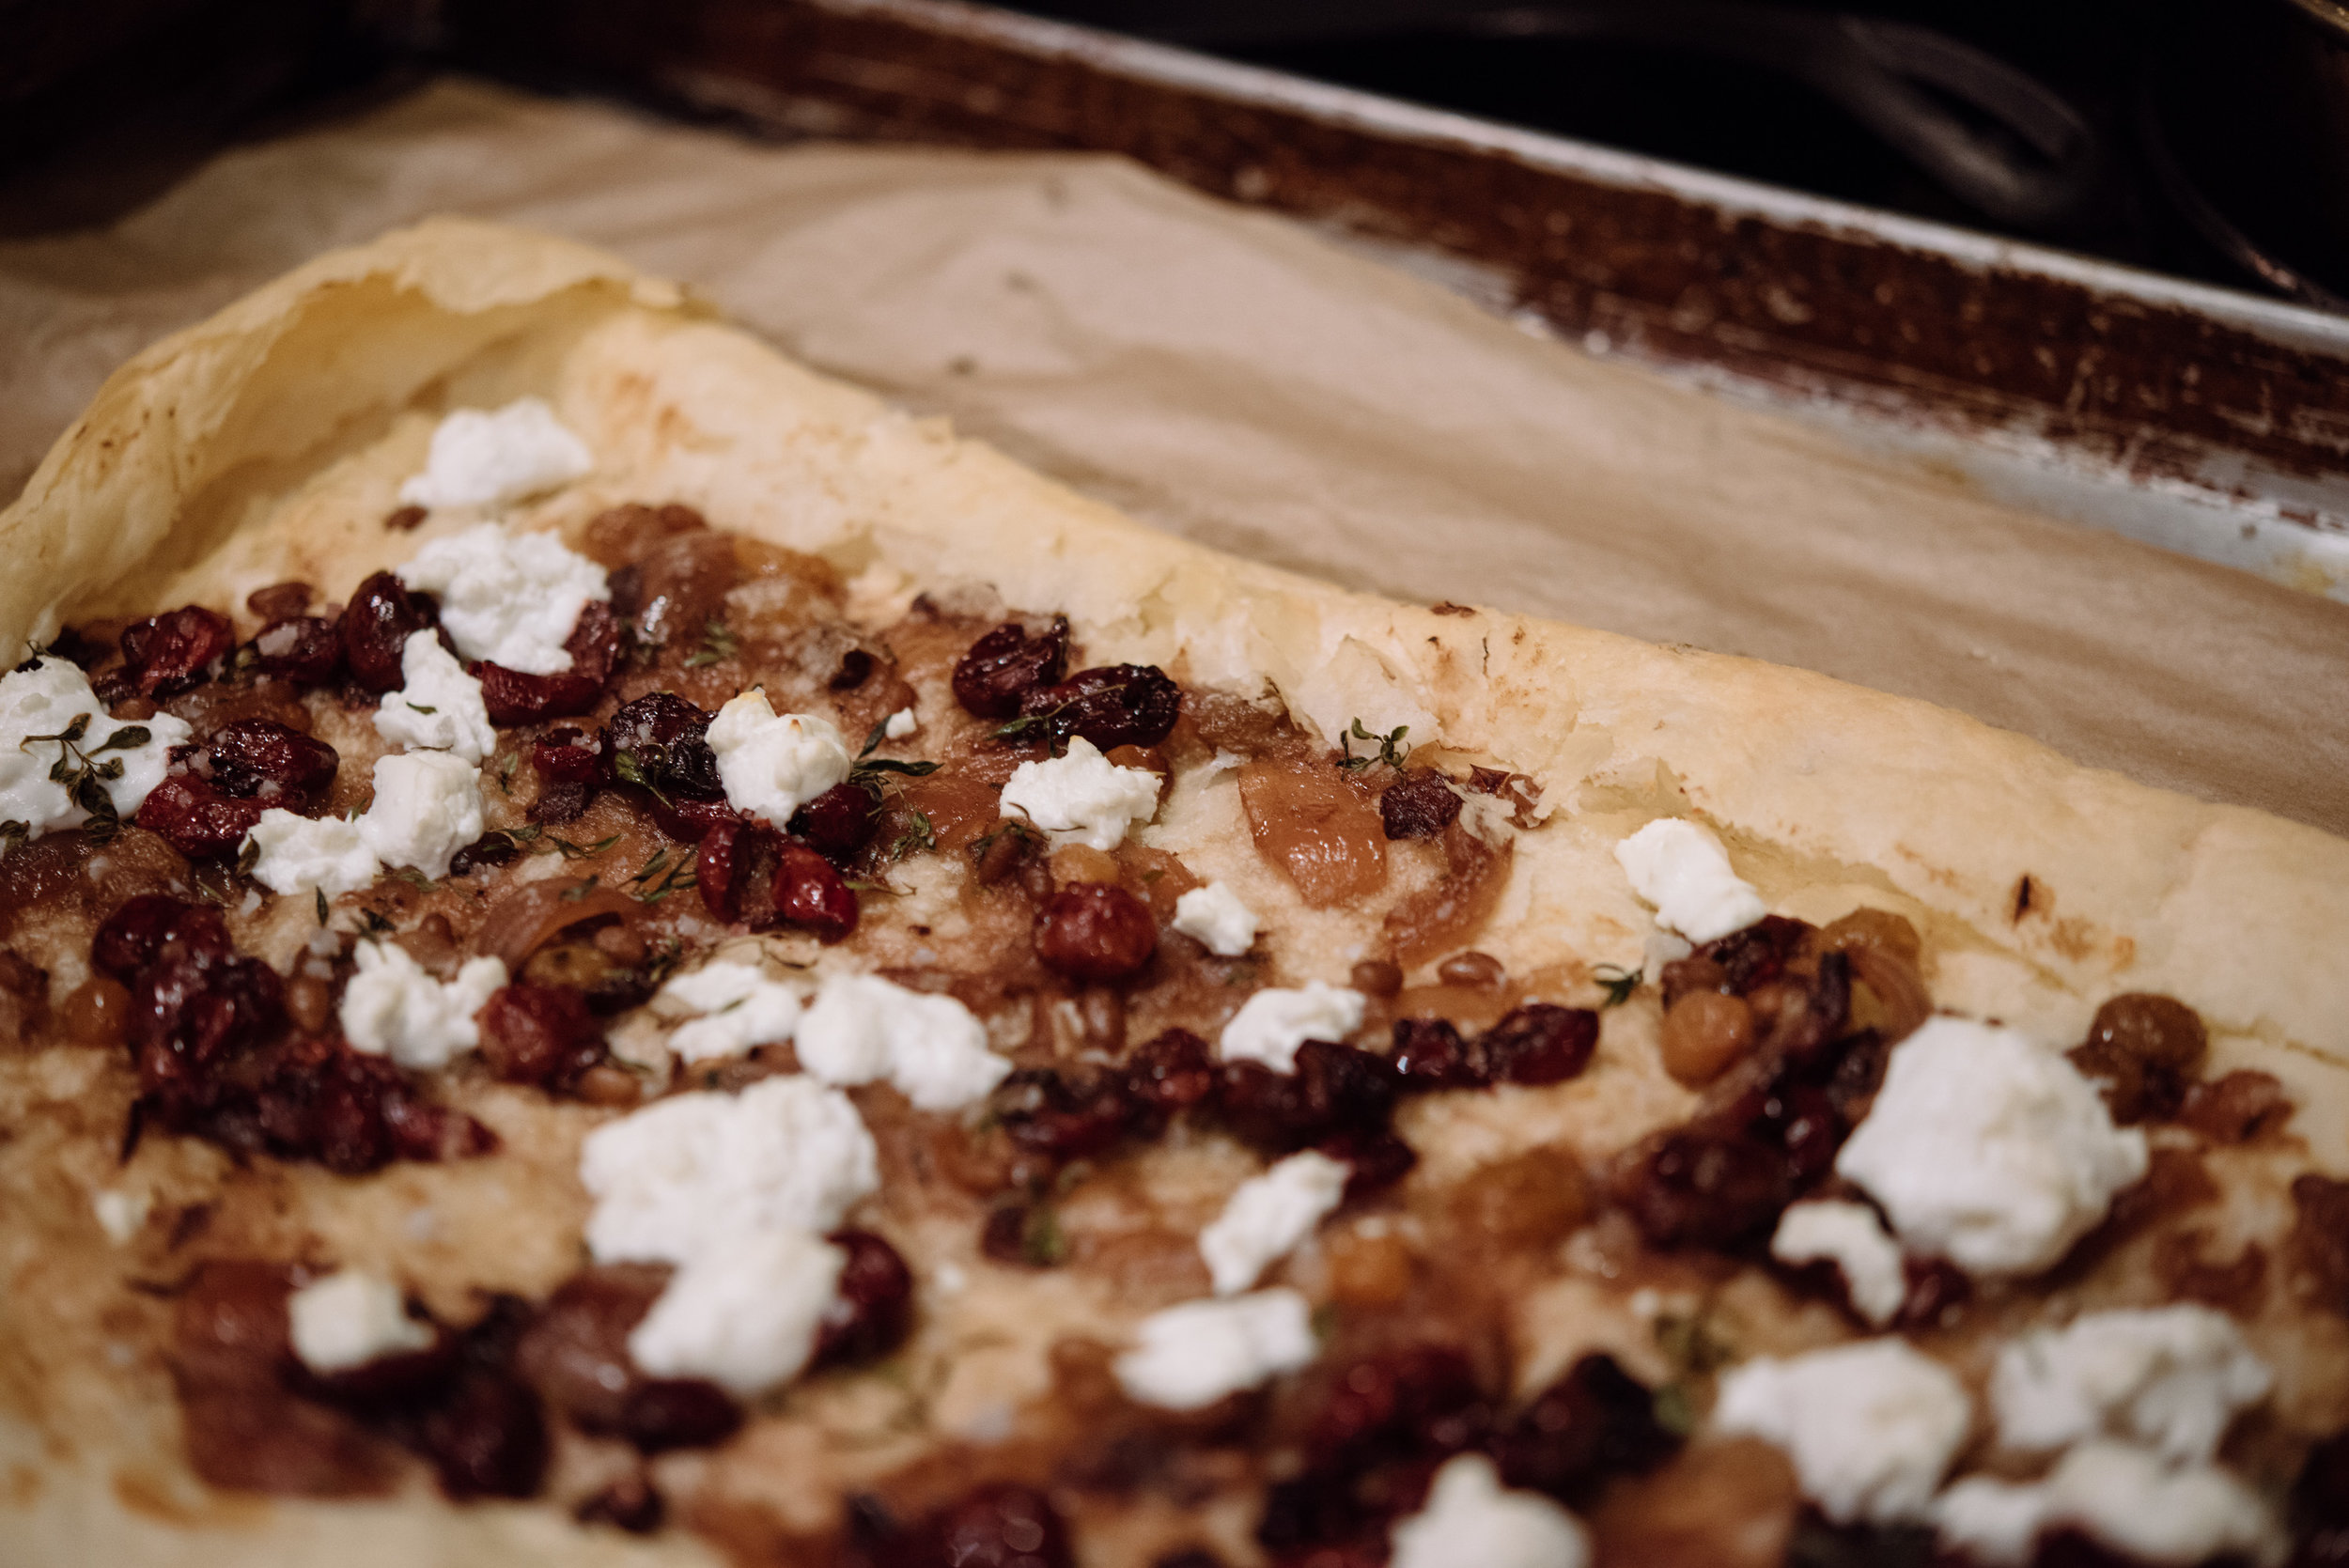
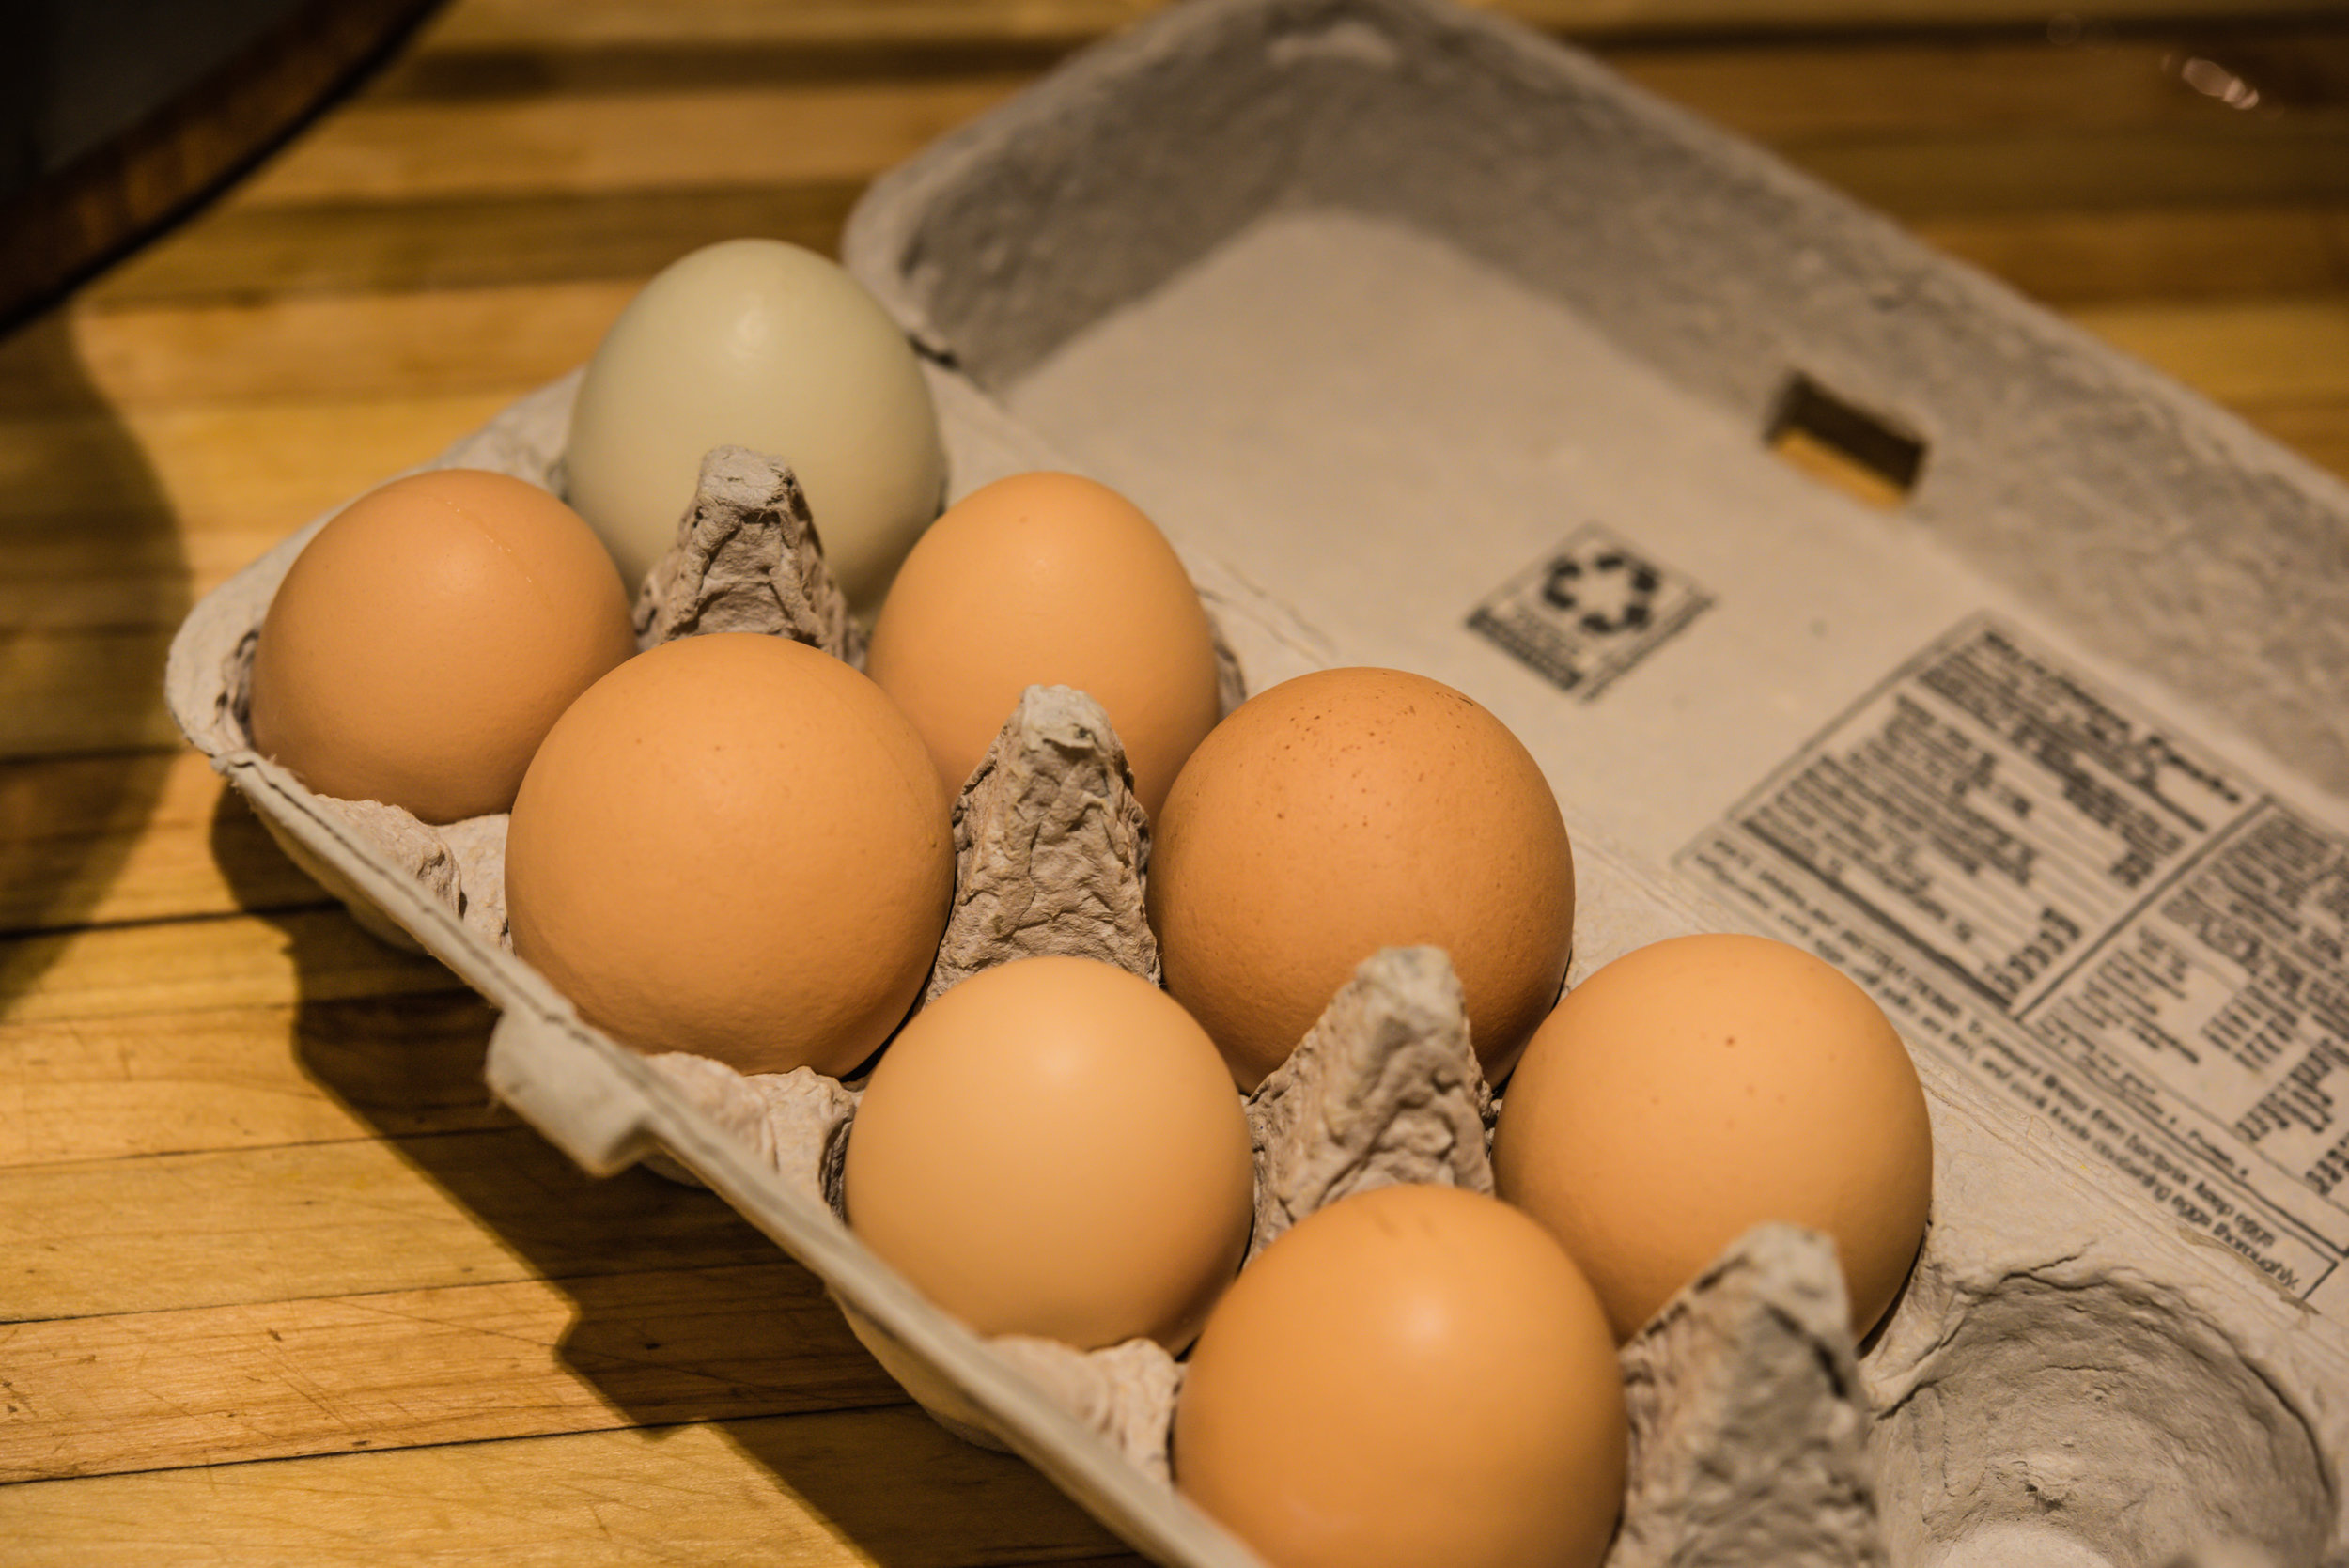
I’ve never made a brown butter vinaigrette before and I’m definitely going to do it again and again — it’s really good. The wild rice and pine nuts are a nice compliment to the nuttiness of the brown butter (although I’d be hard pressed to come up with anything that’s not good with brown butter) and the cranberries add just enough sweetness to balance out the tangy vinaigrette. This salad would be perfect to bring to a potluck (it’s best served at room temperature) and it’s really good left-over (I ate it for breakfast this morning with a 6 1/2 minute egg on top). All in all, this salad is a winner — it’s relatively healthy, makes your kitchen smell great, and is sturdy enough to keep for a few days in the fridge. And since my CSA box had a bunch of carrots and squash in it, I can whip up a batch next week!

_DSC6350.jpg
_DSC6351.jpg
_DSC6360.jpg

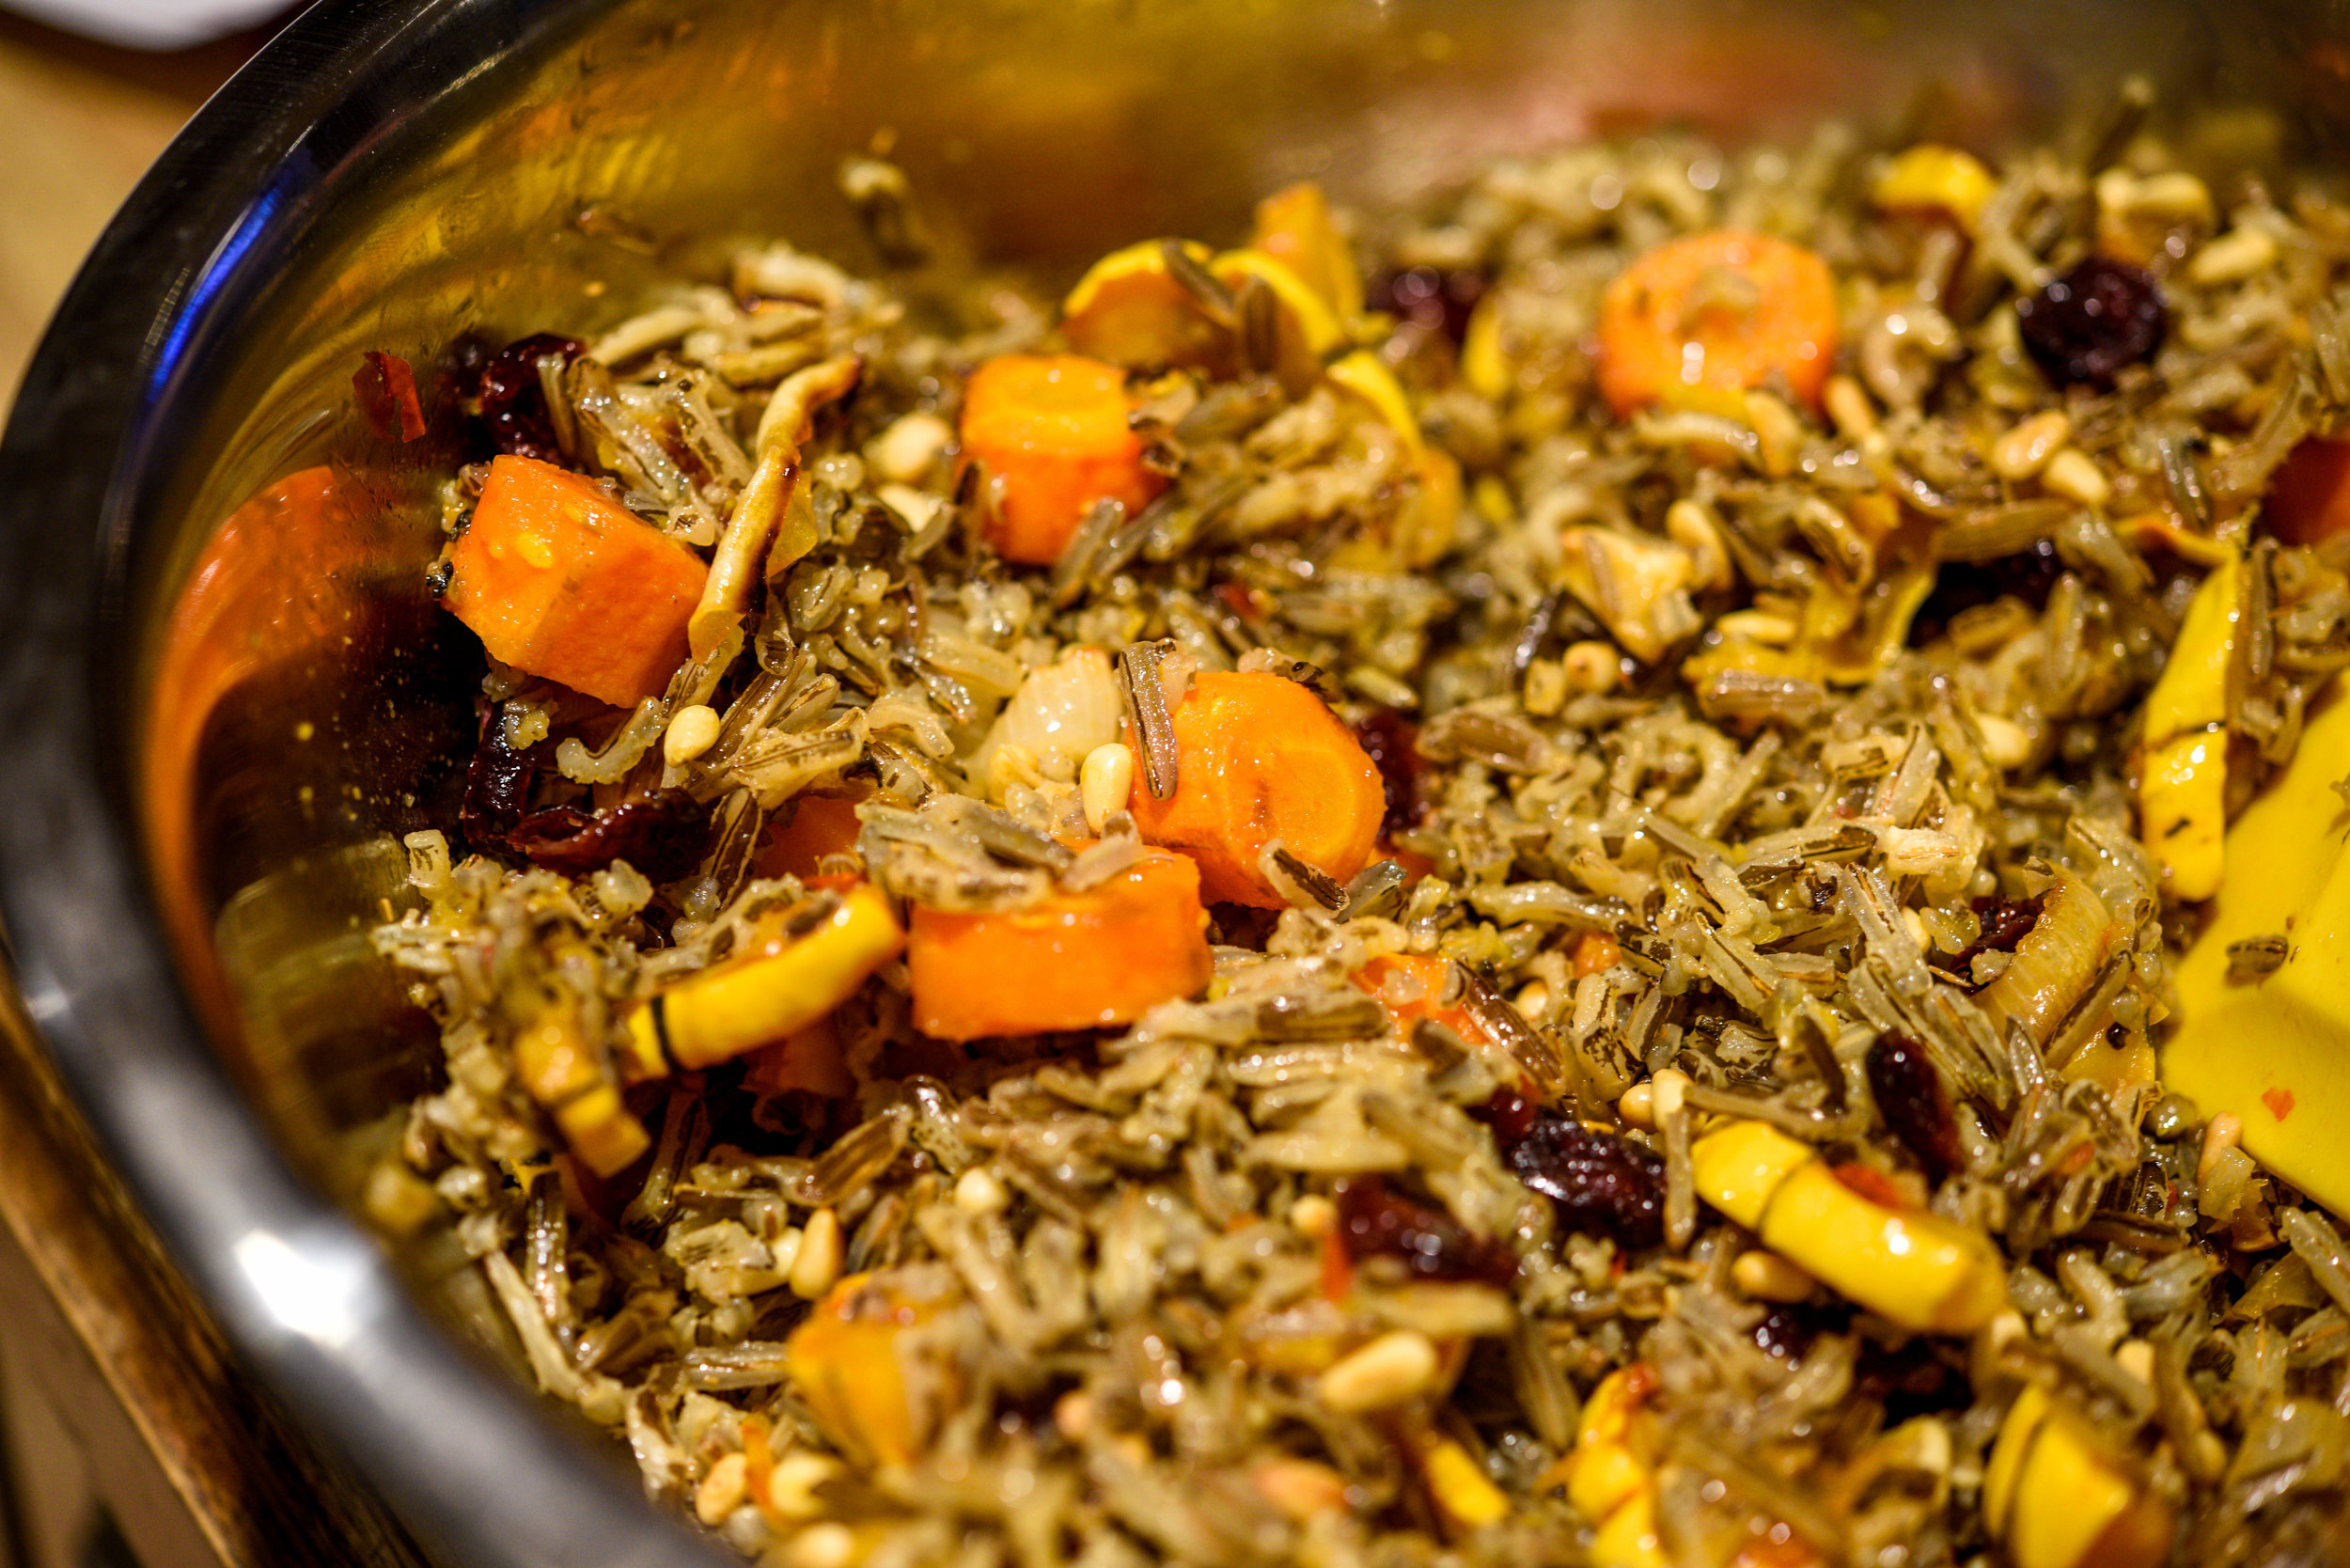
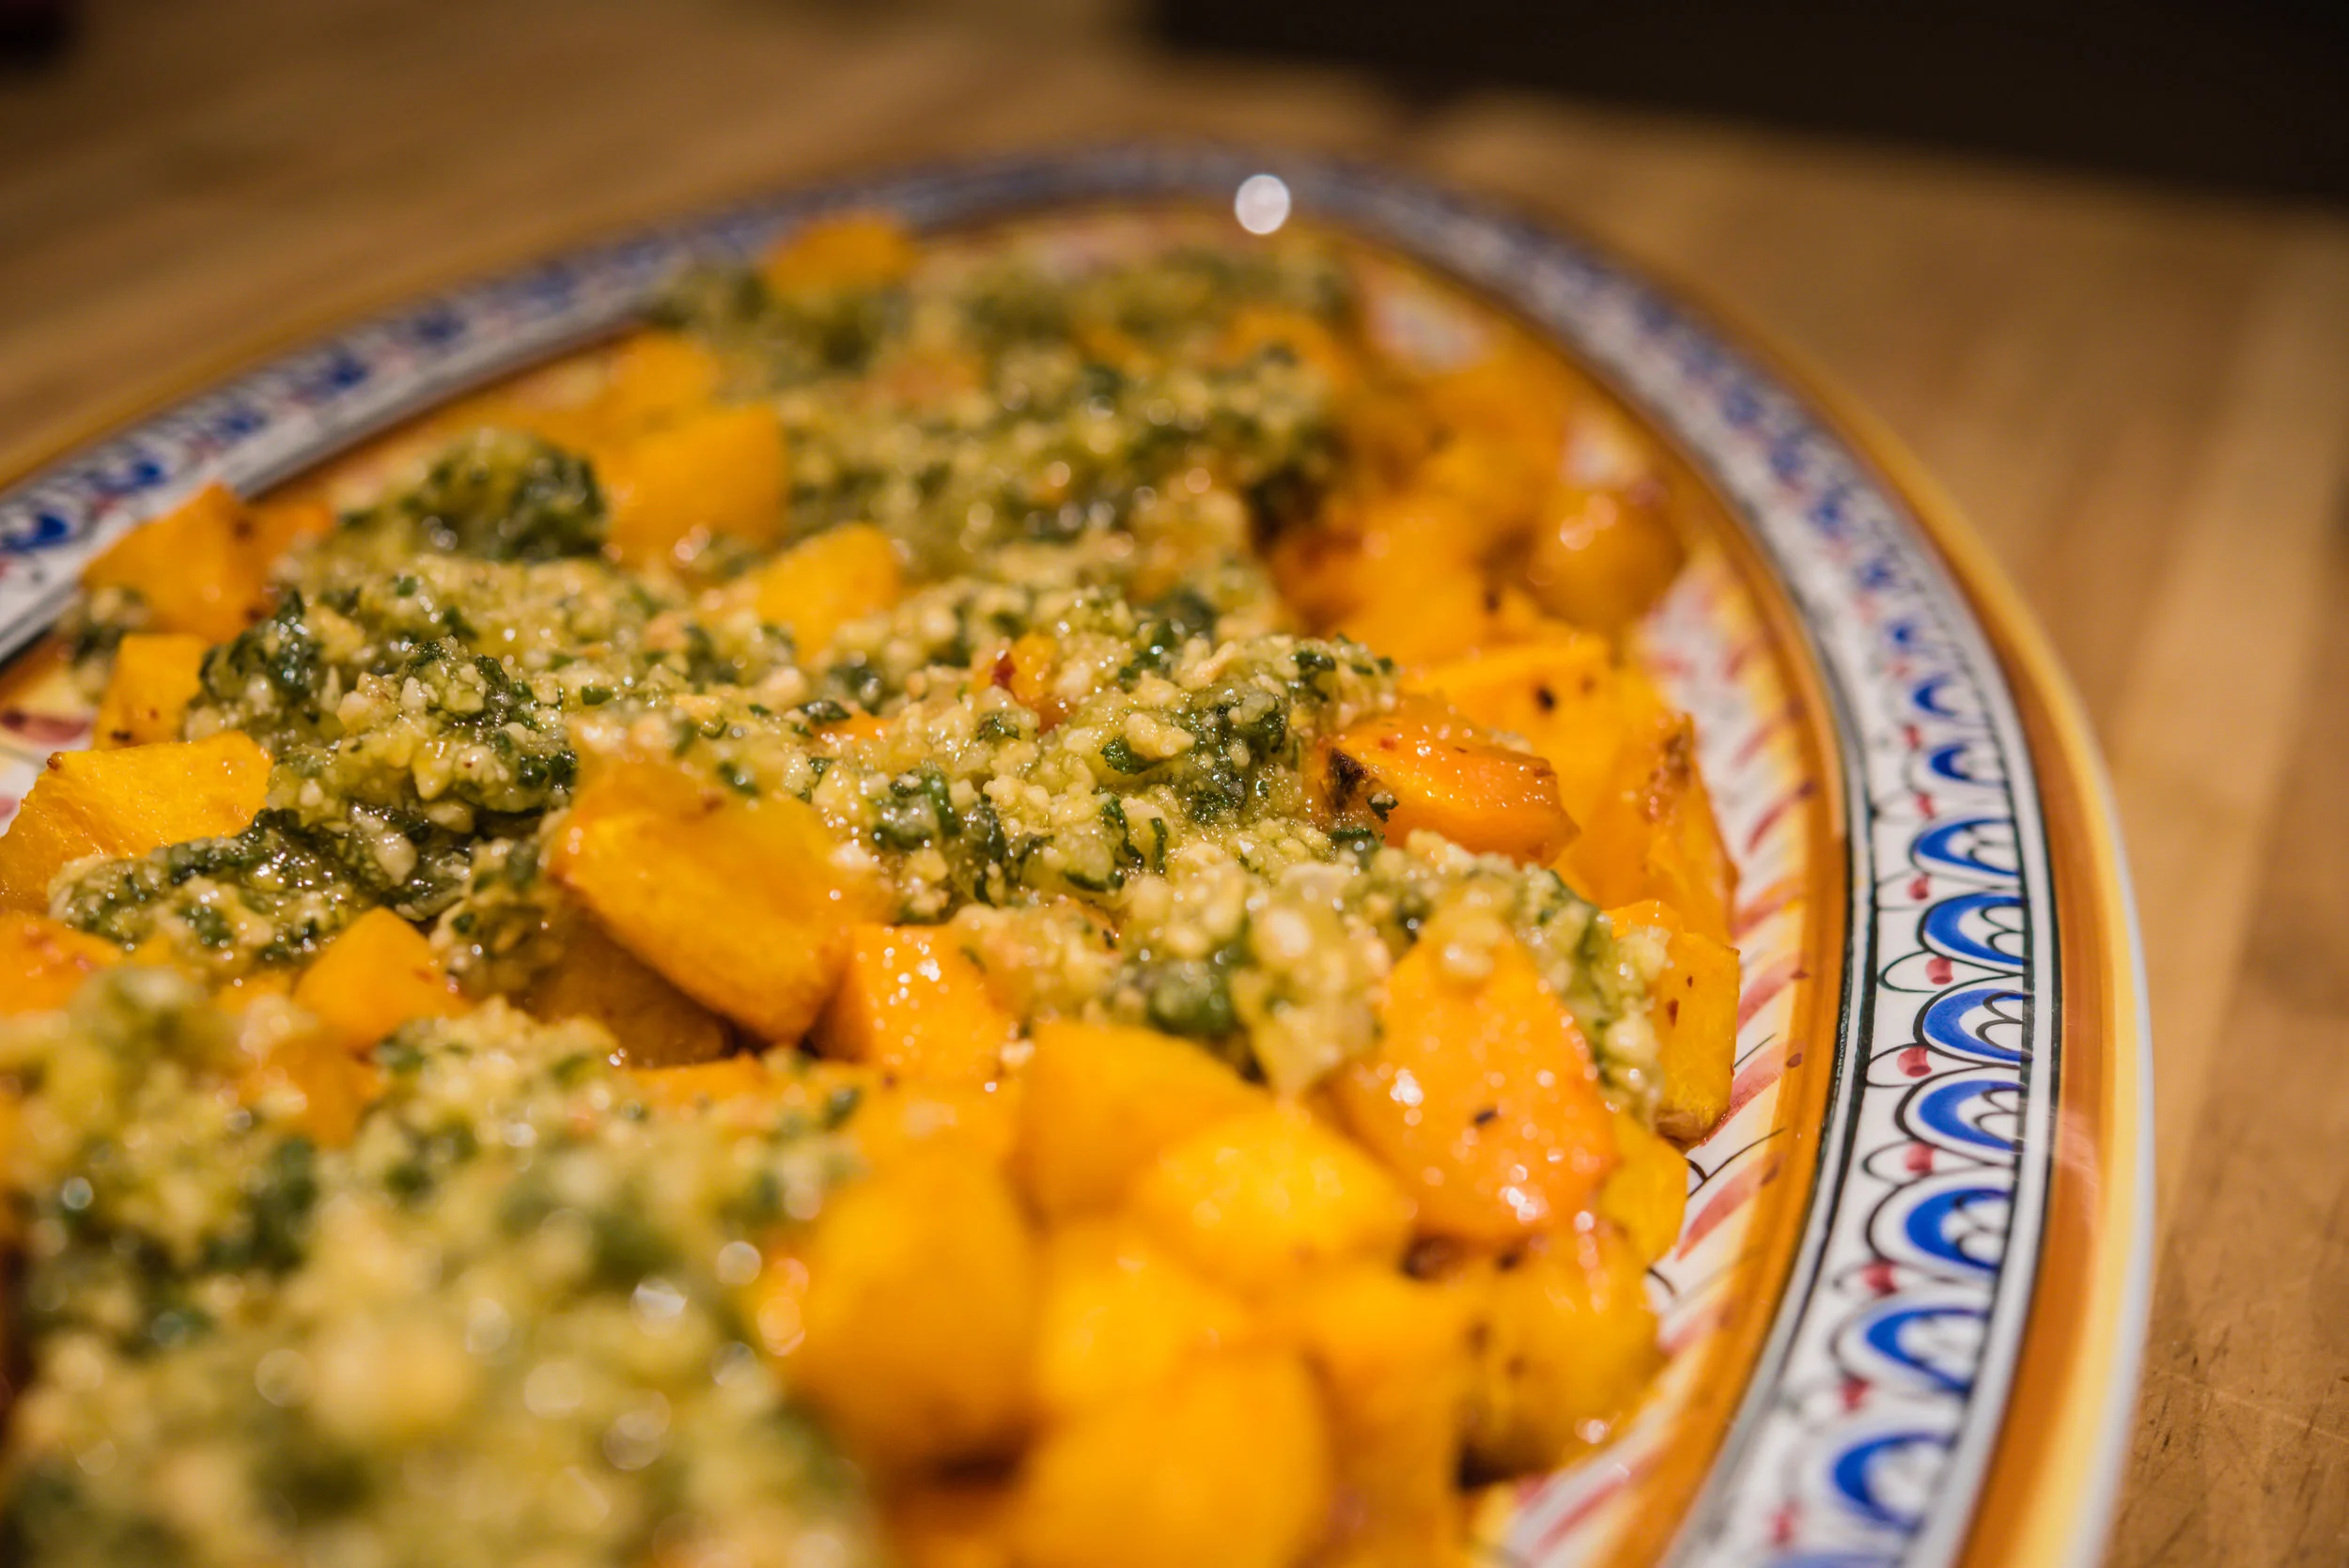
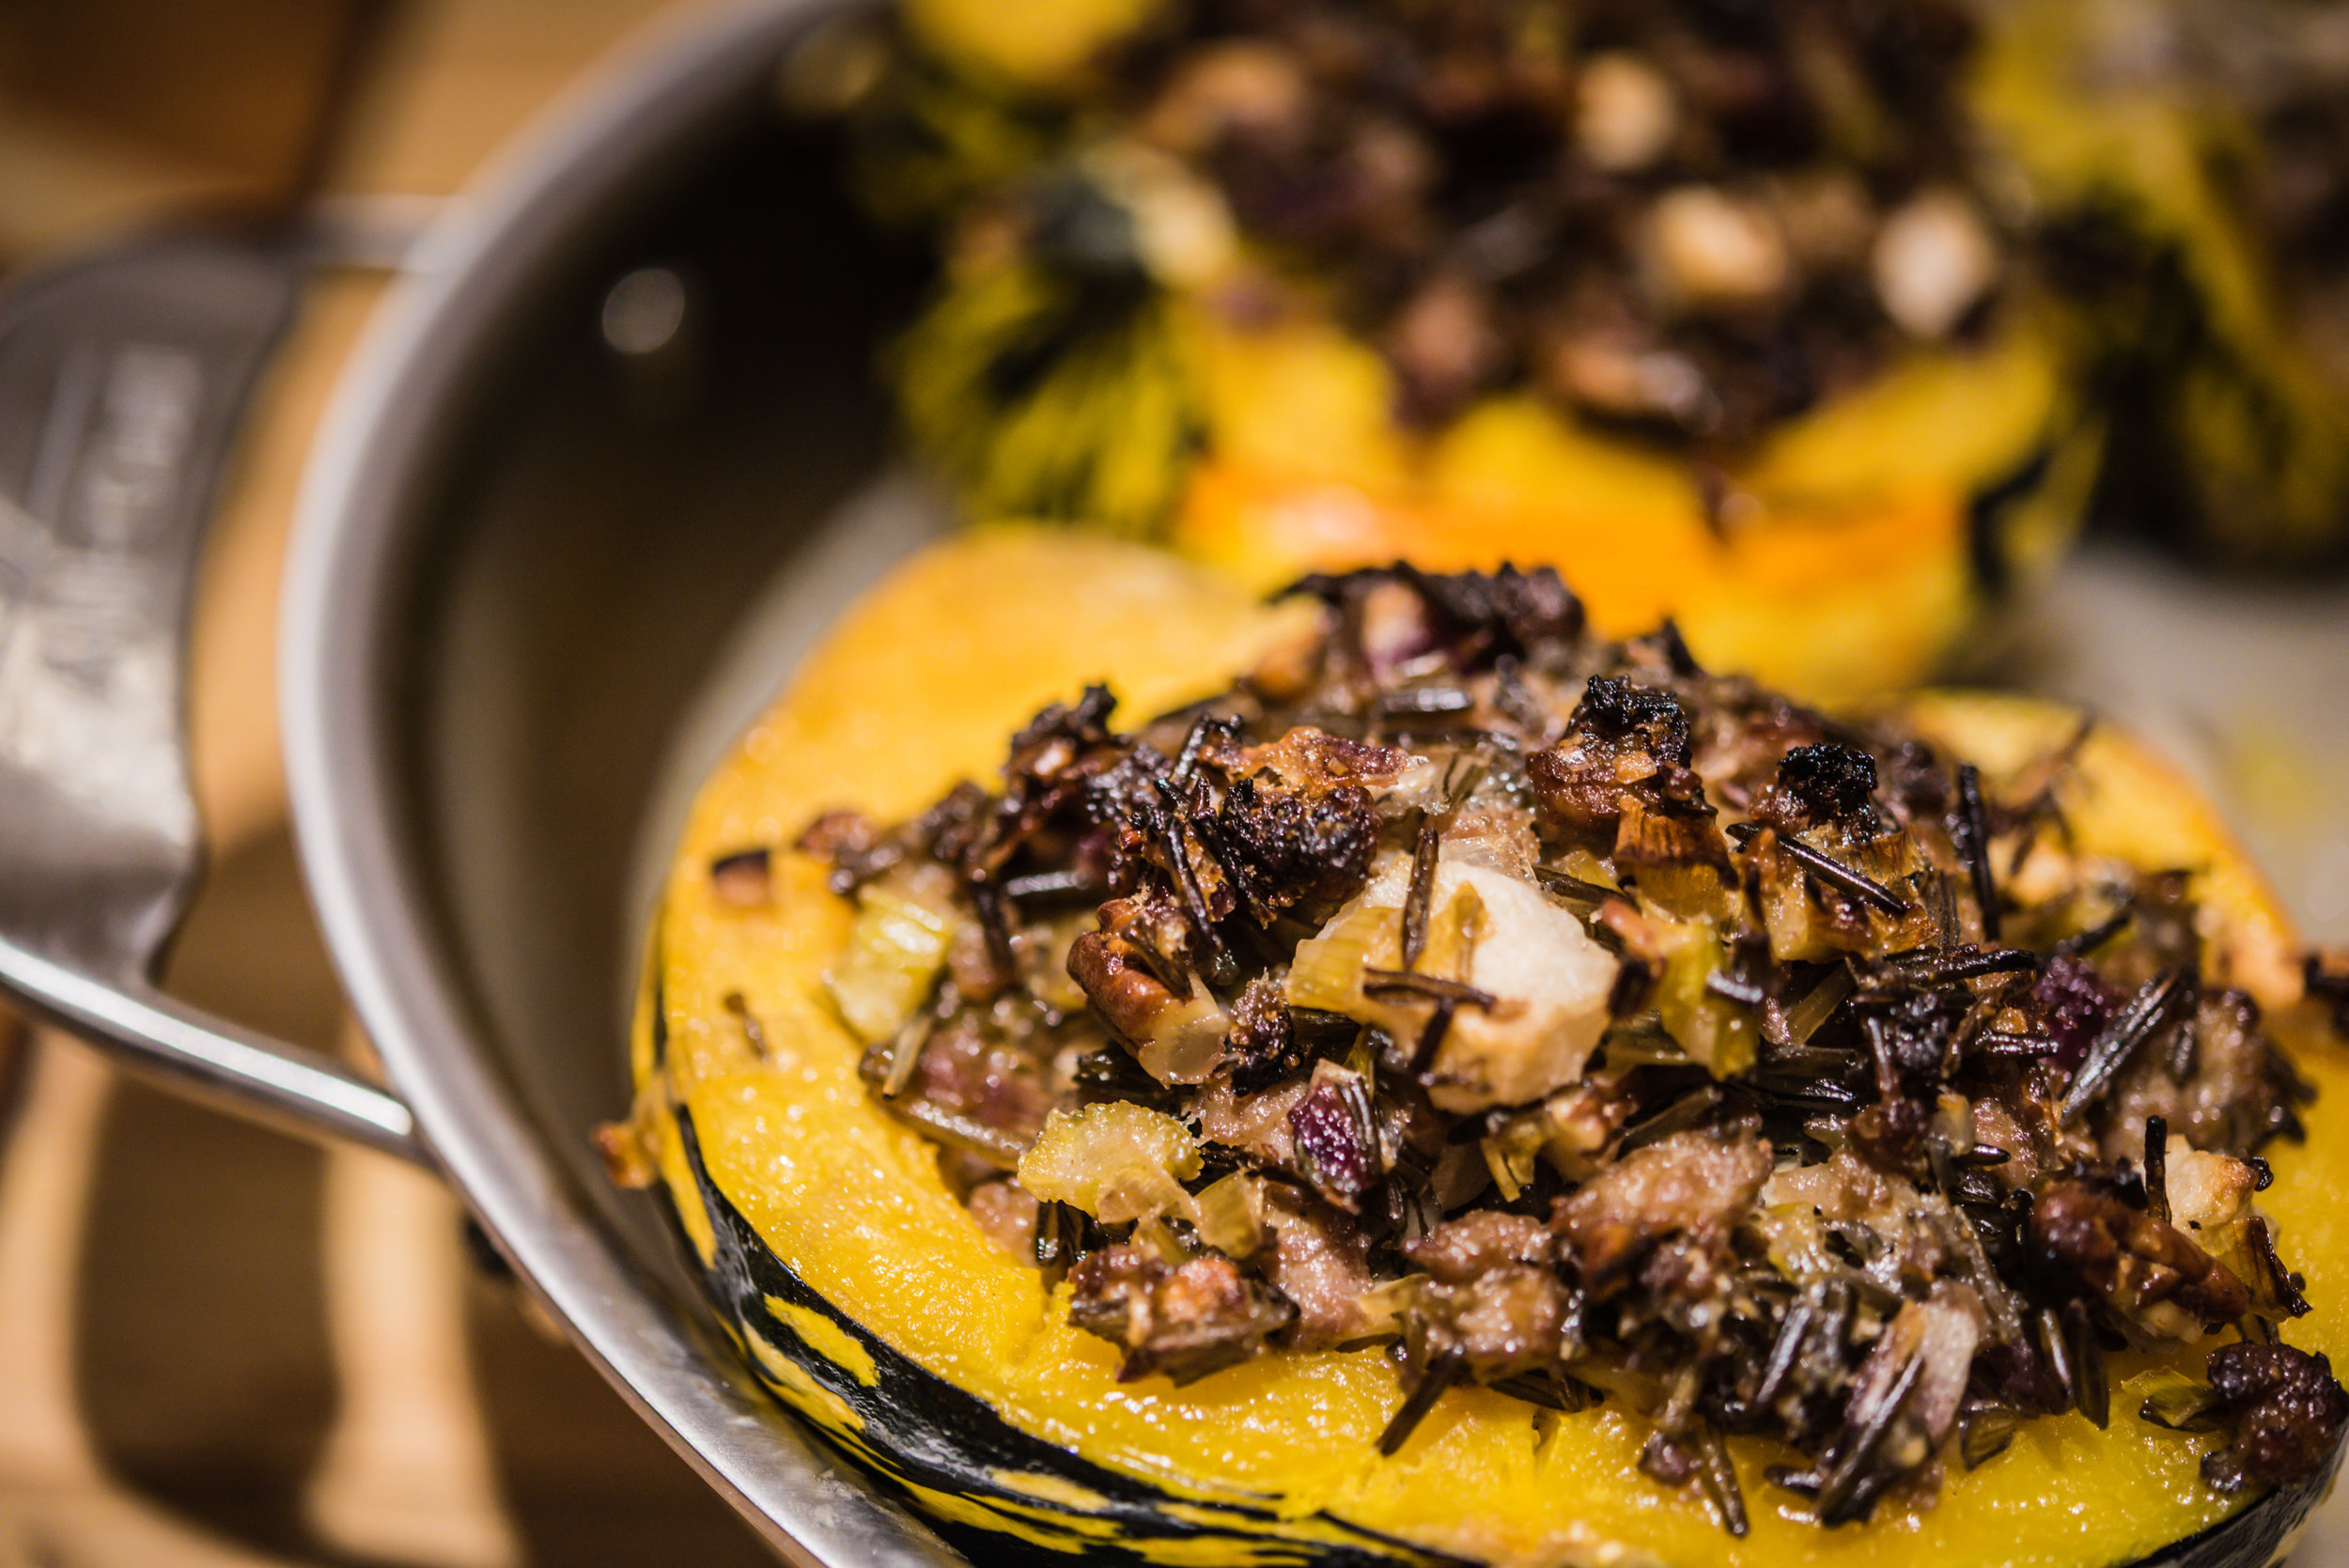
Wild Rice Salad with Roasted Vegetables and Brown Butter Vinaigrette

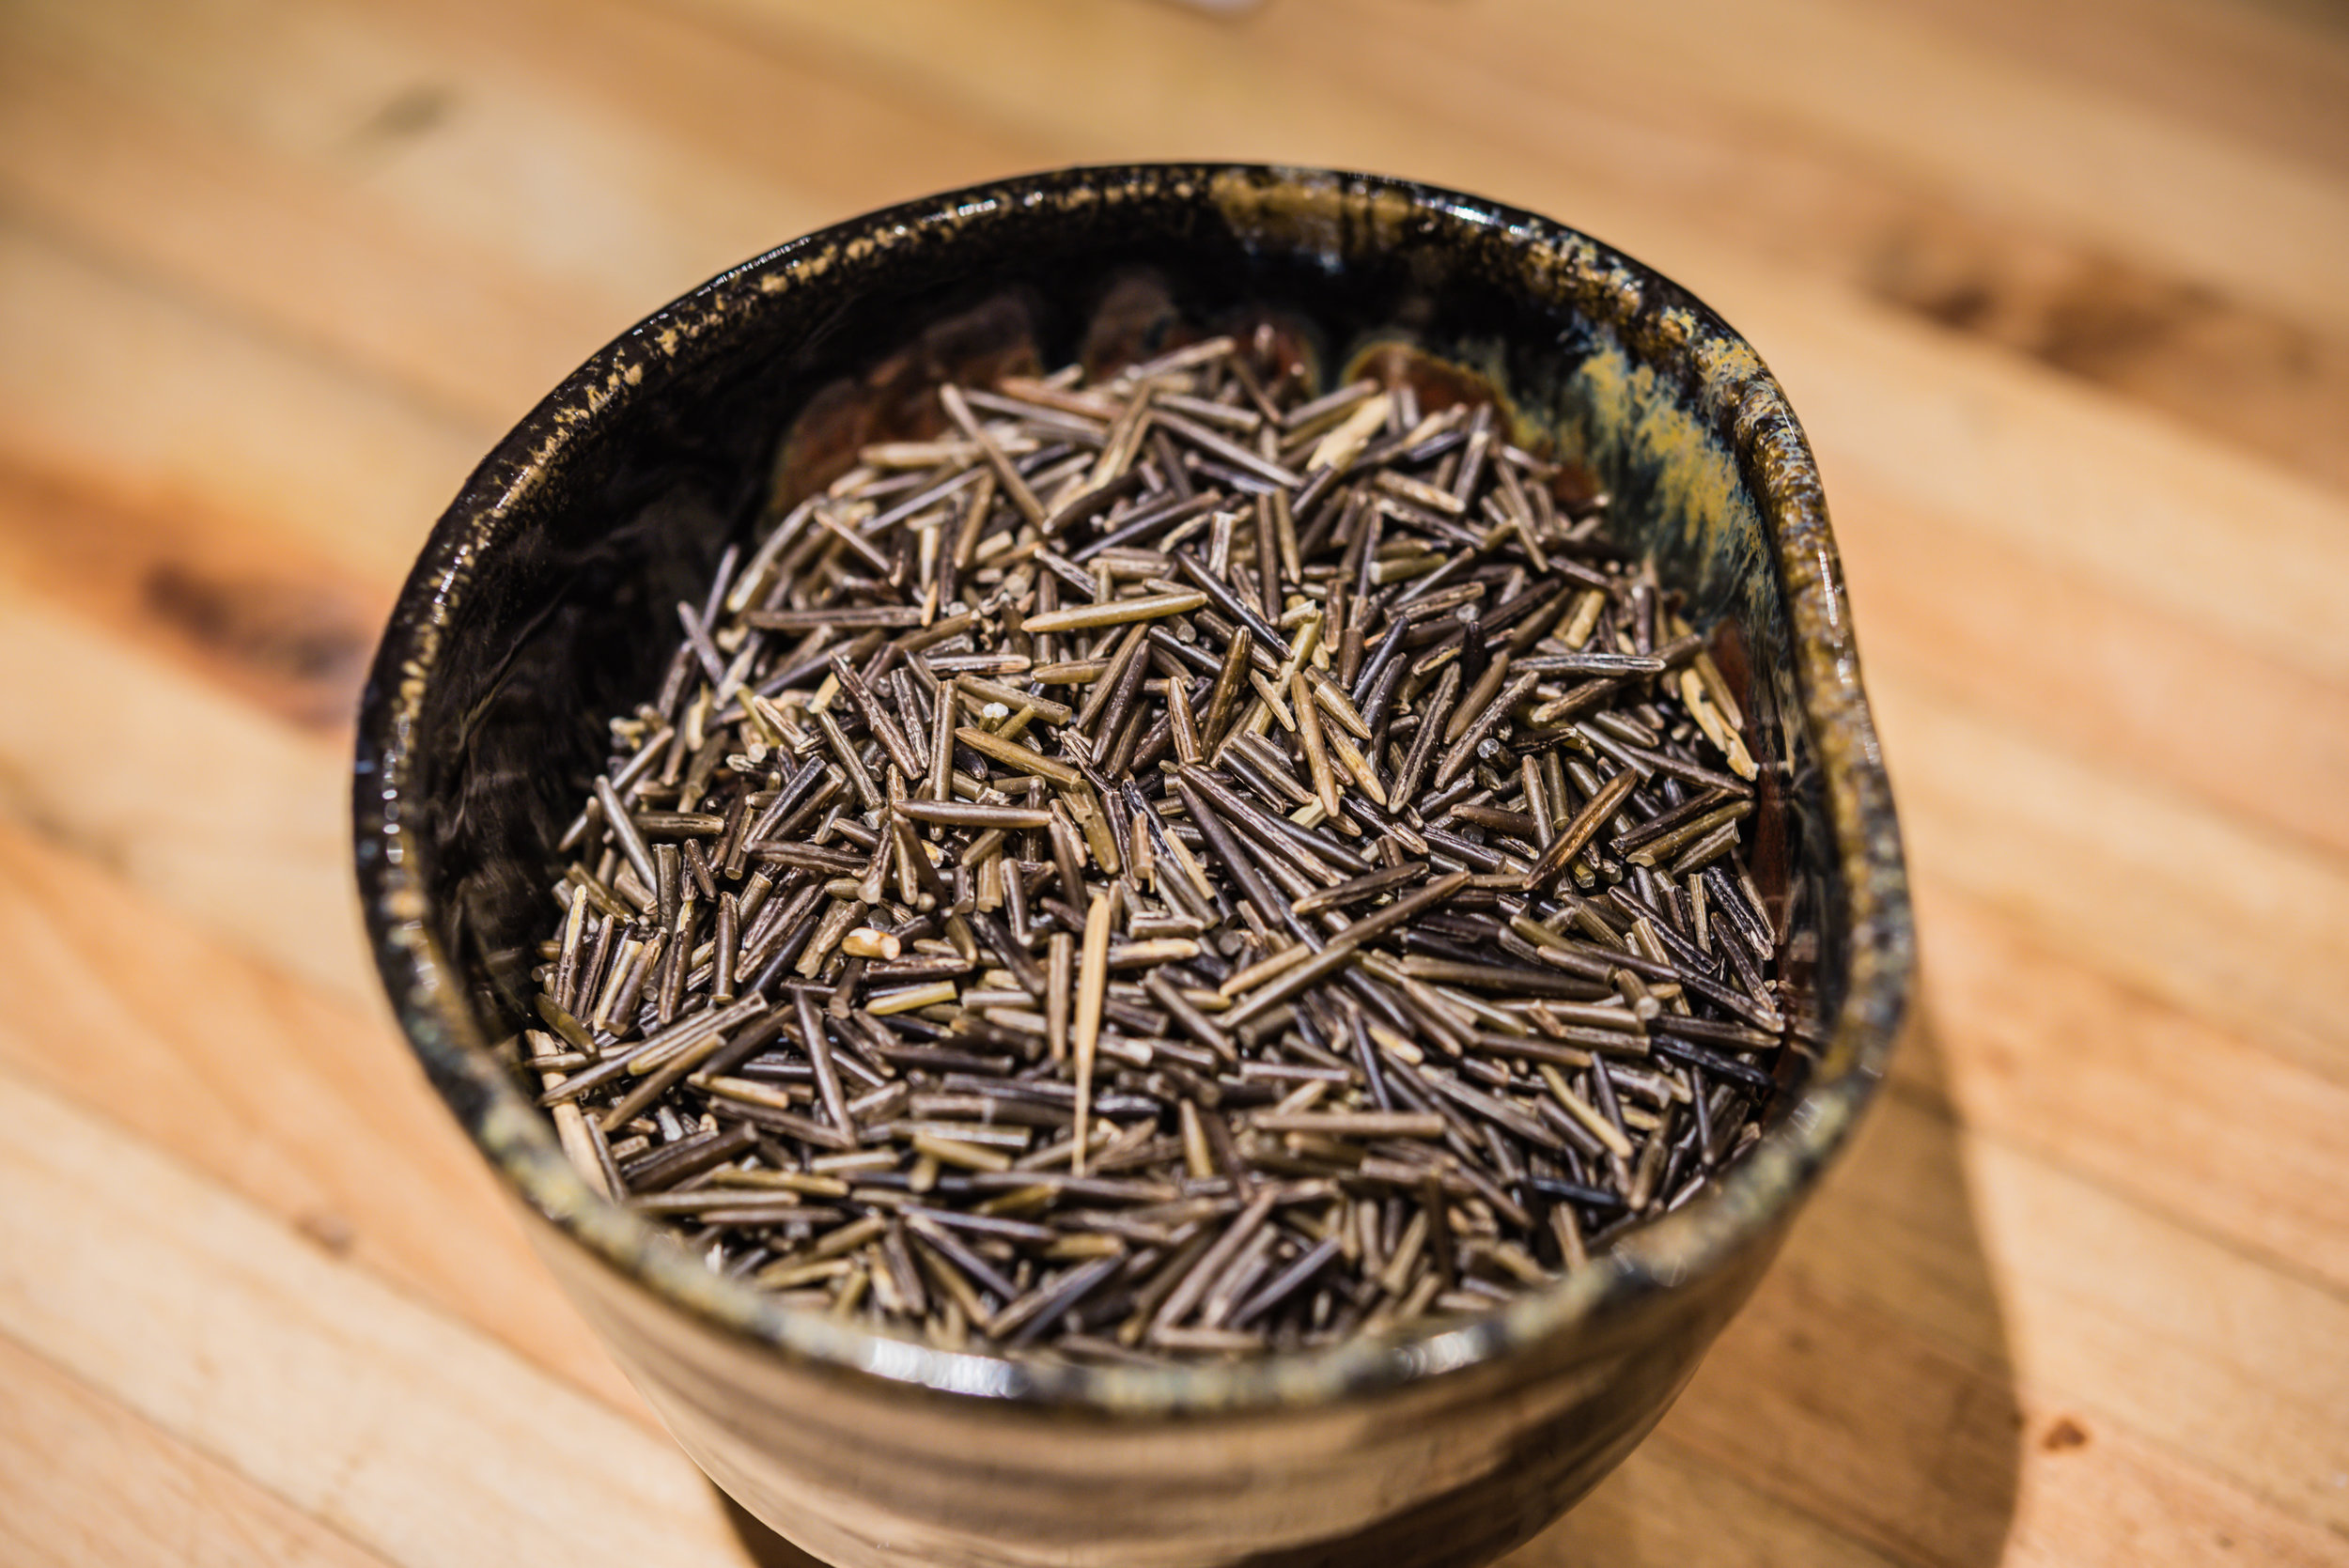
1 cup wild rice, rinsed well
3 cups of water
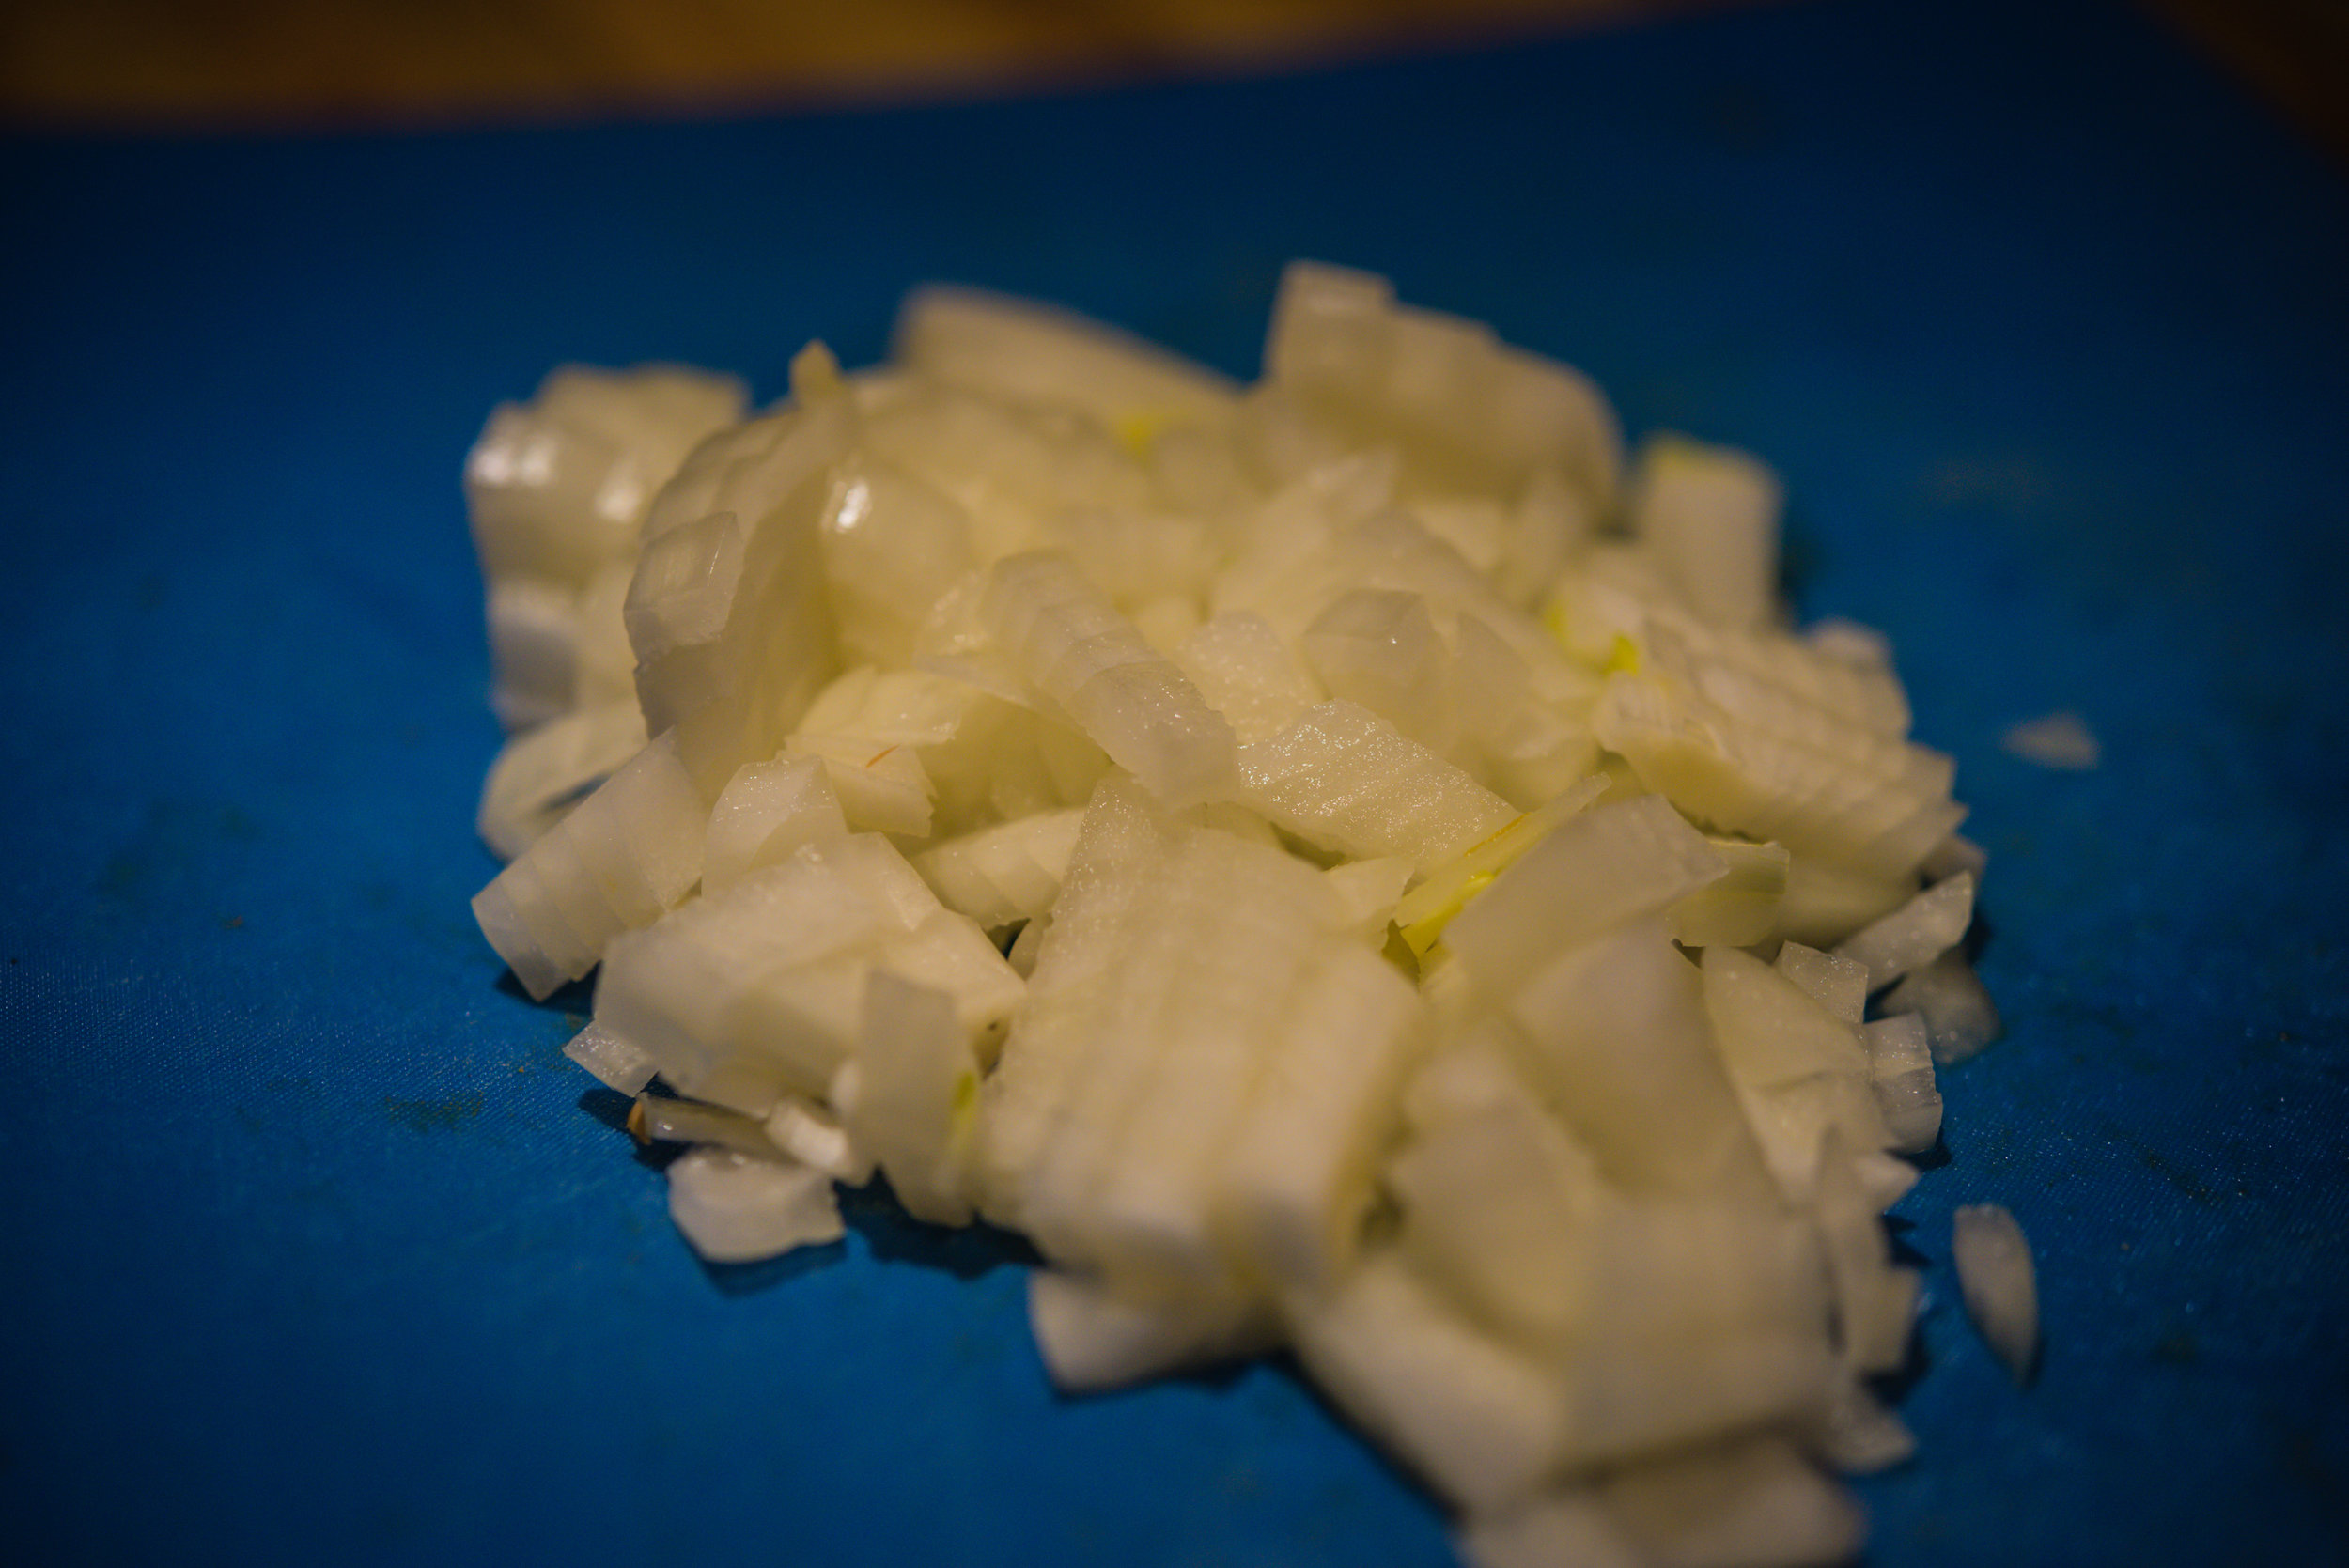
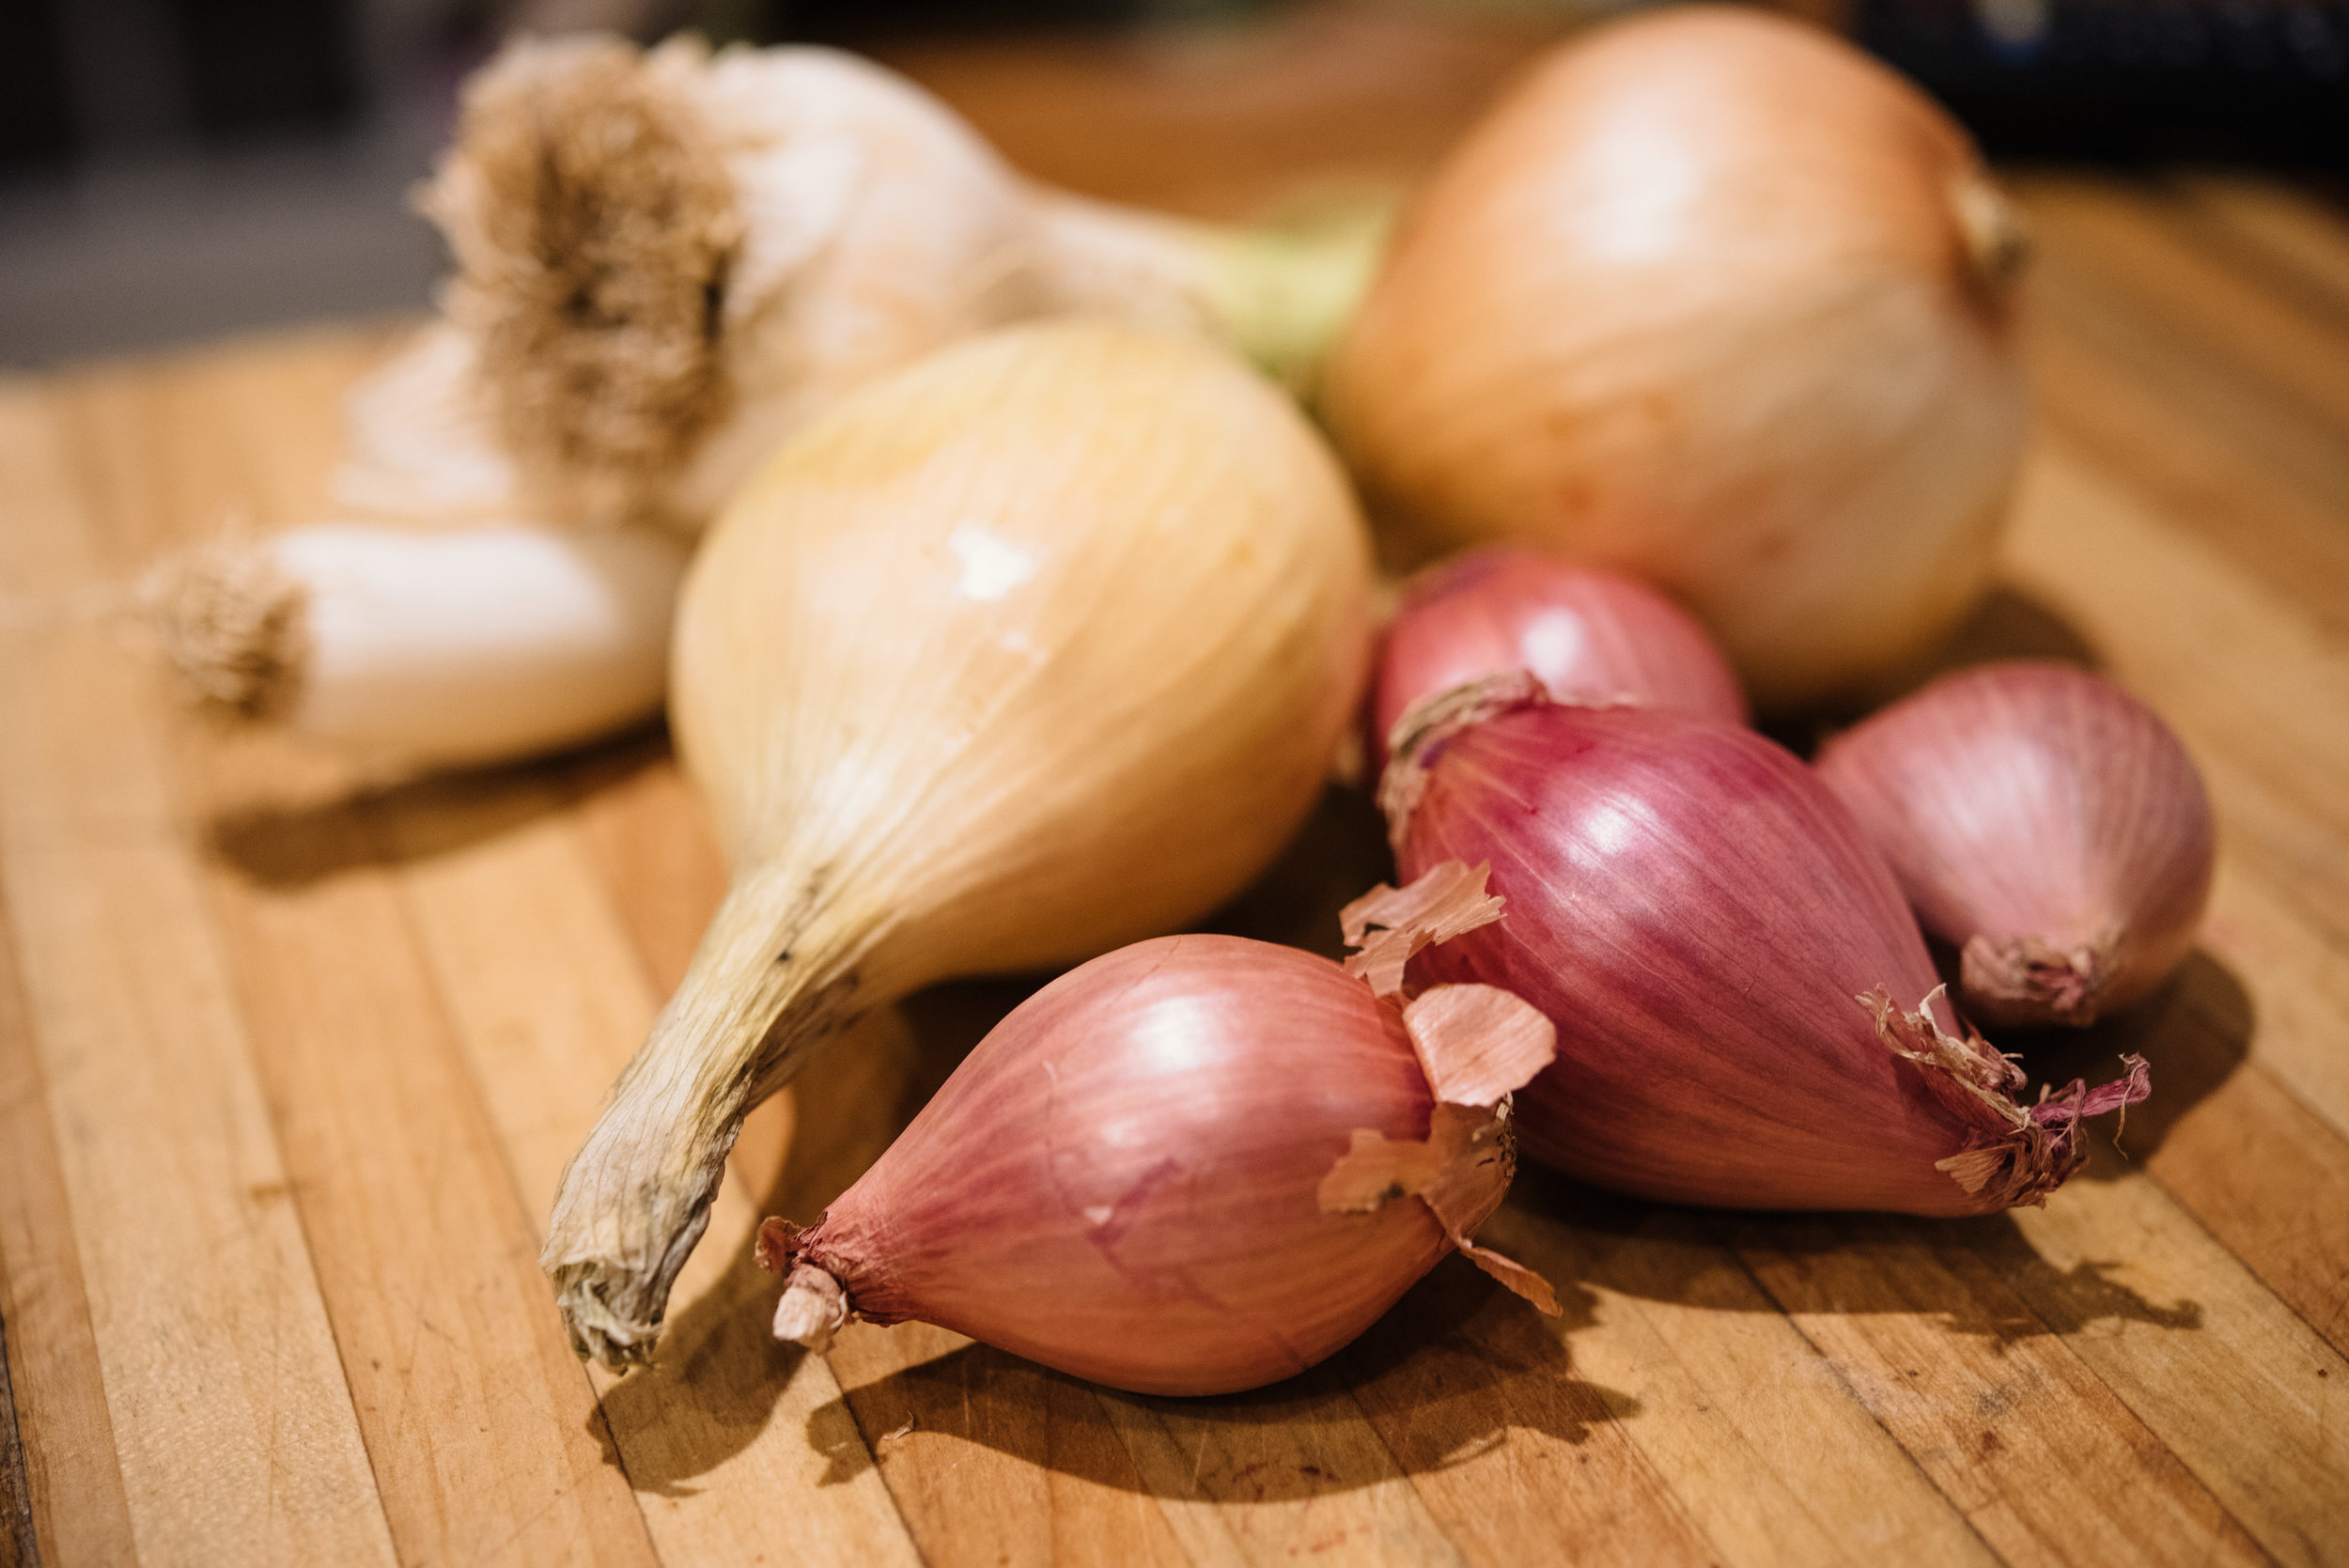
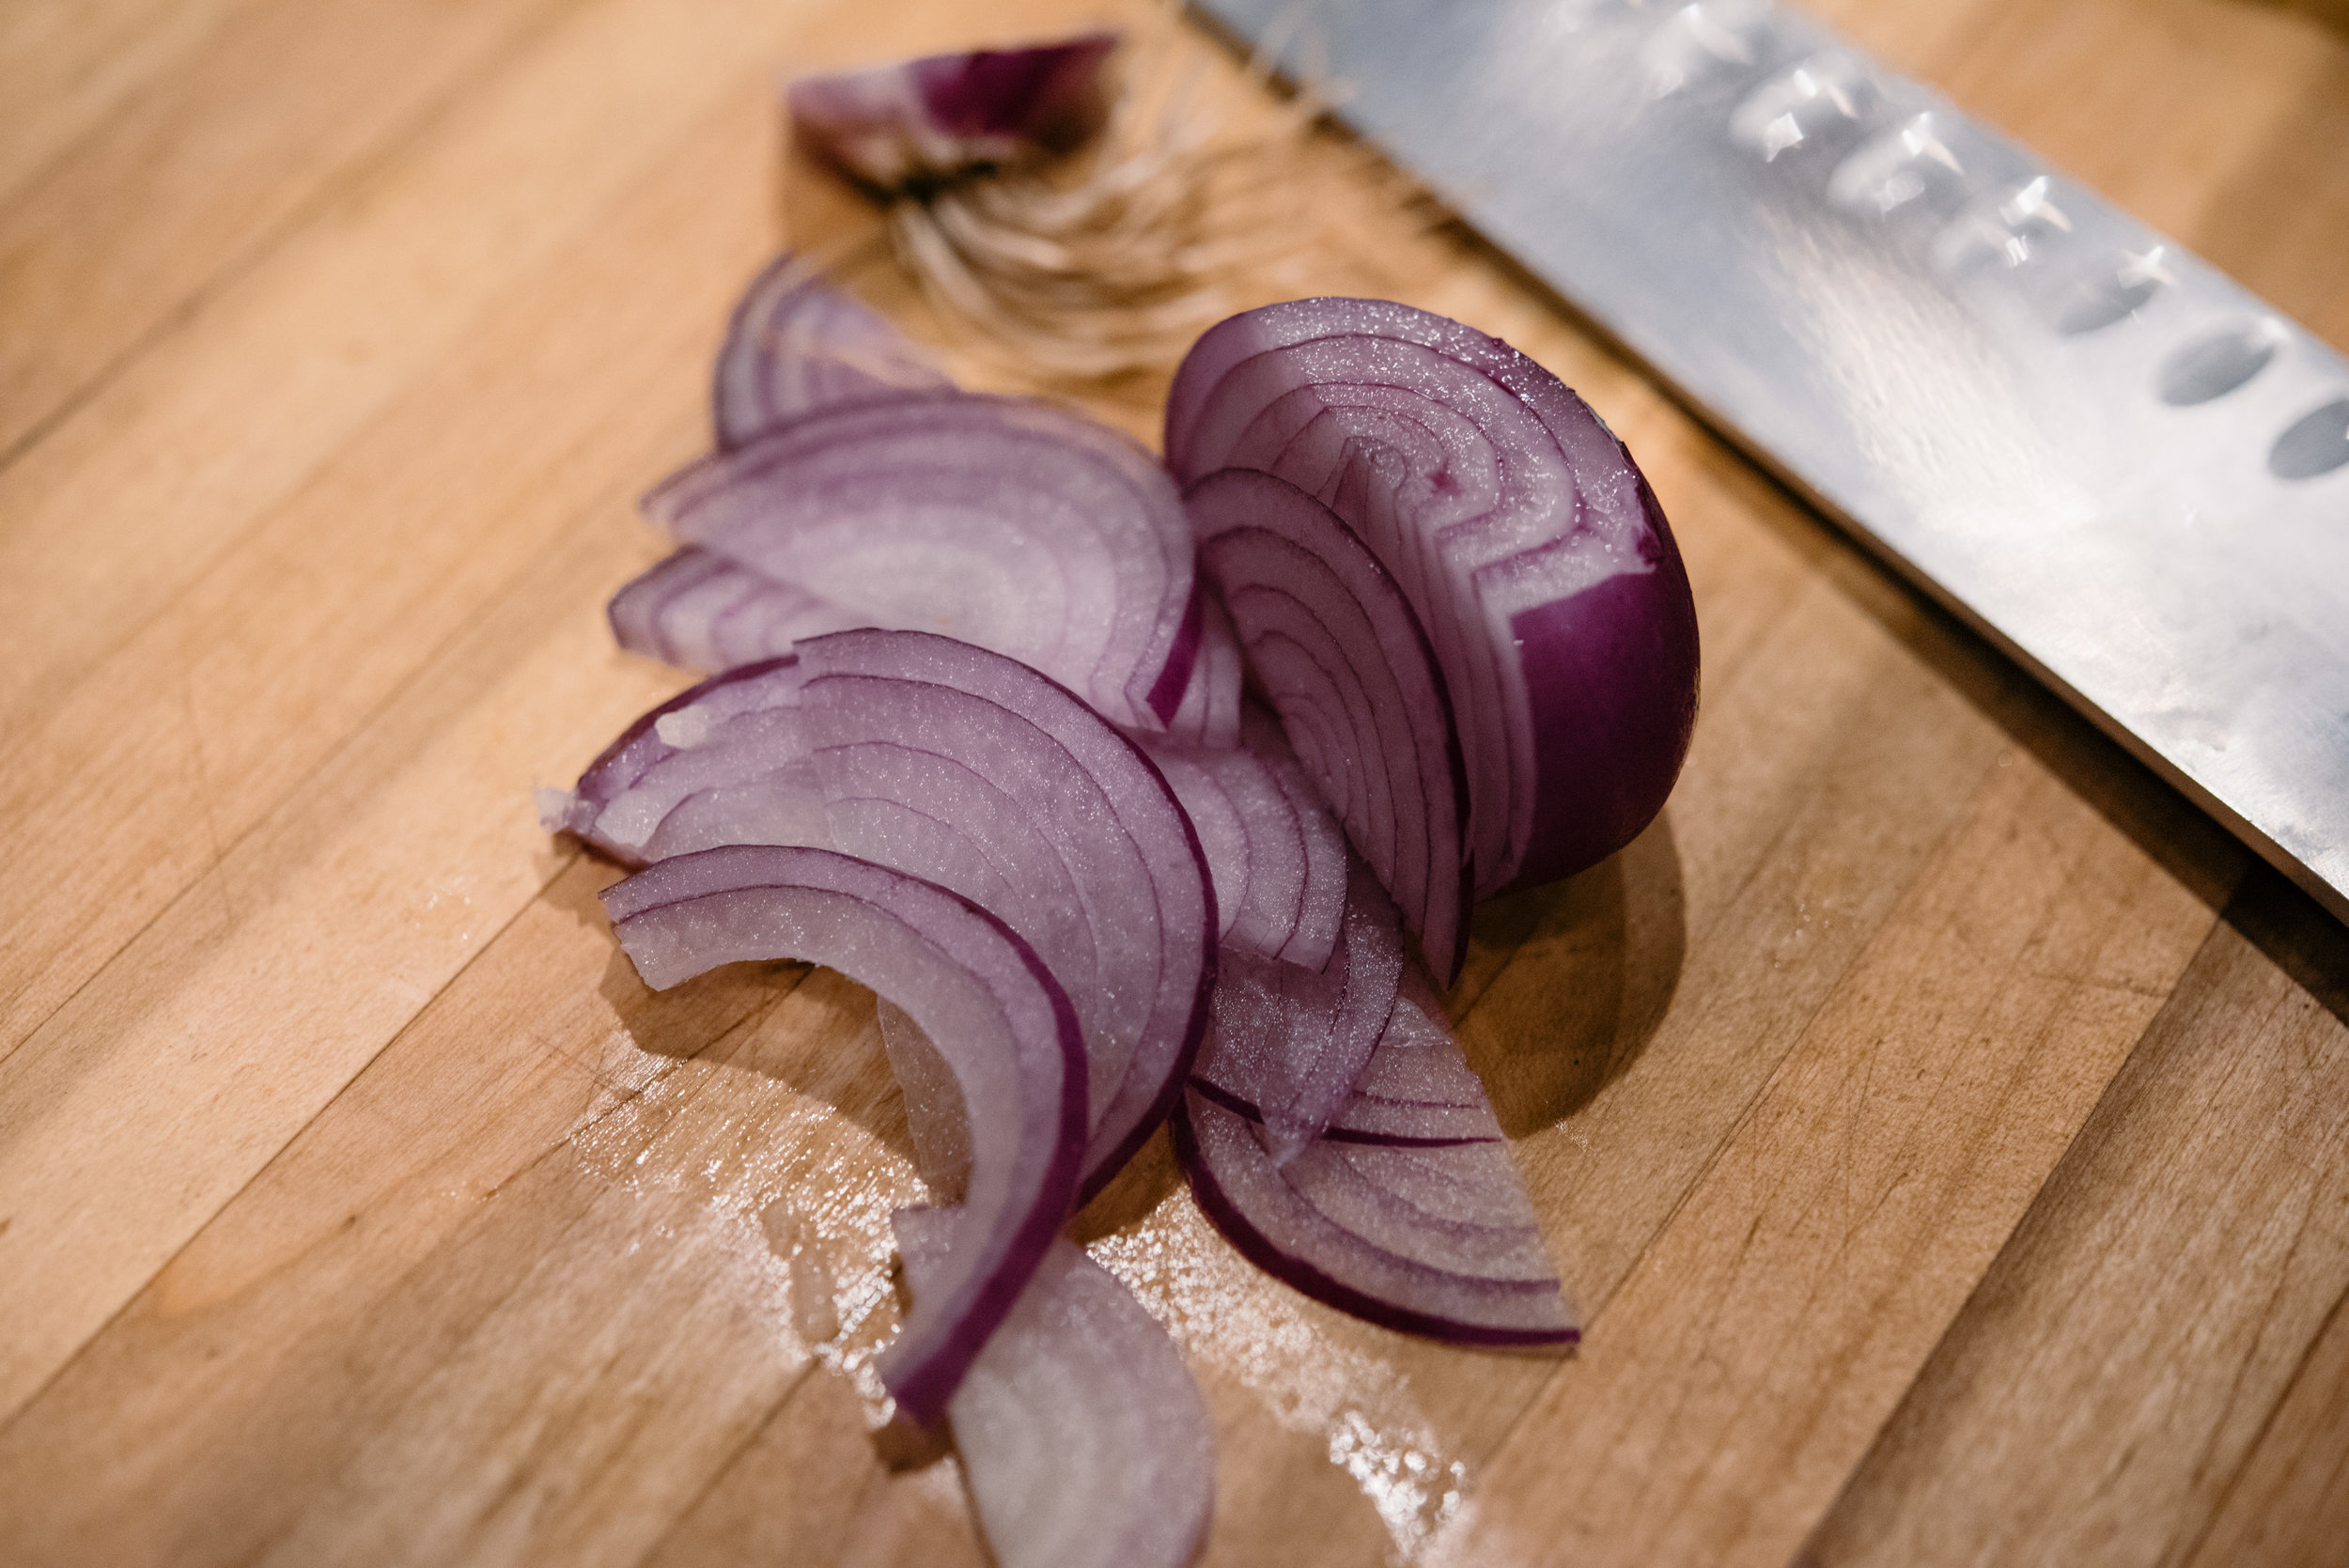
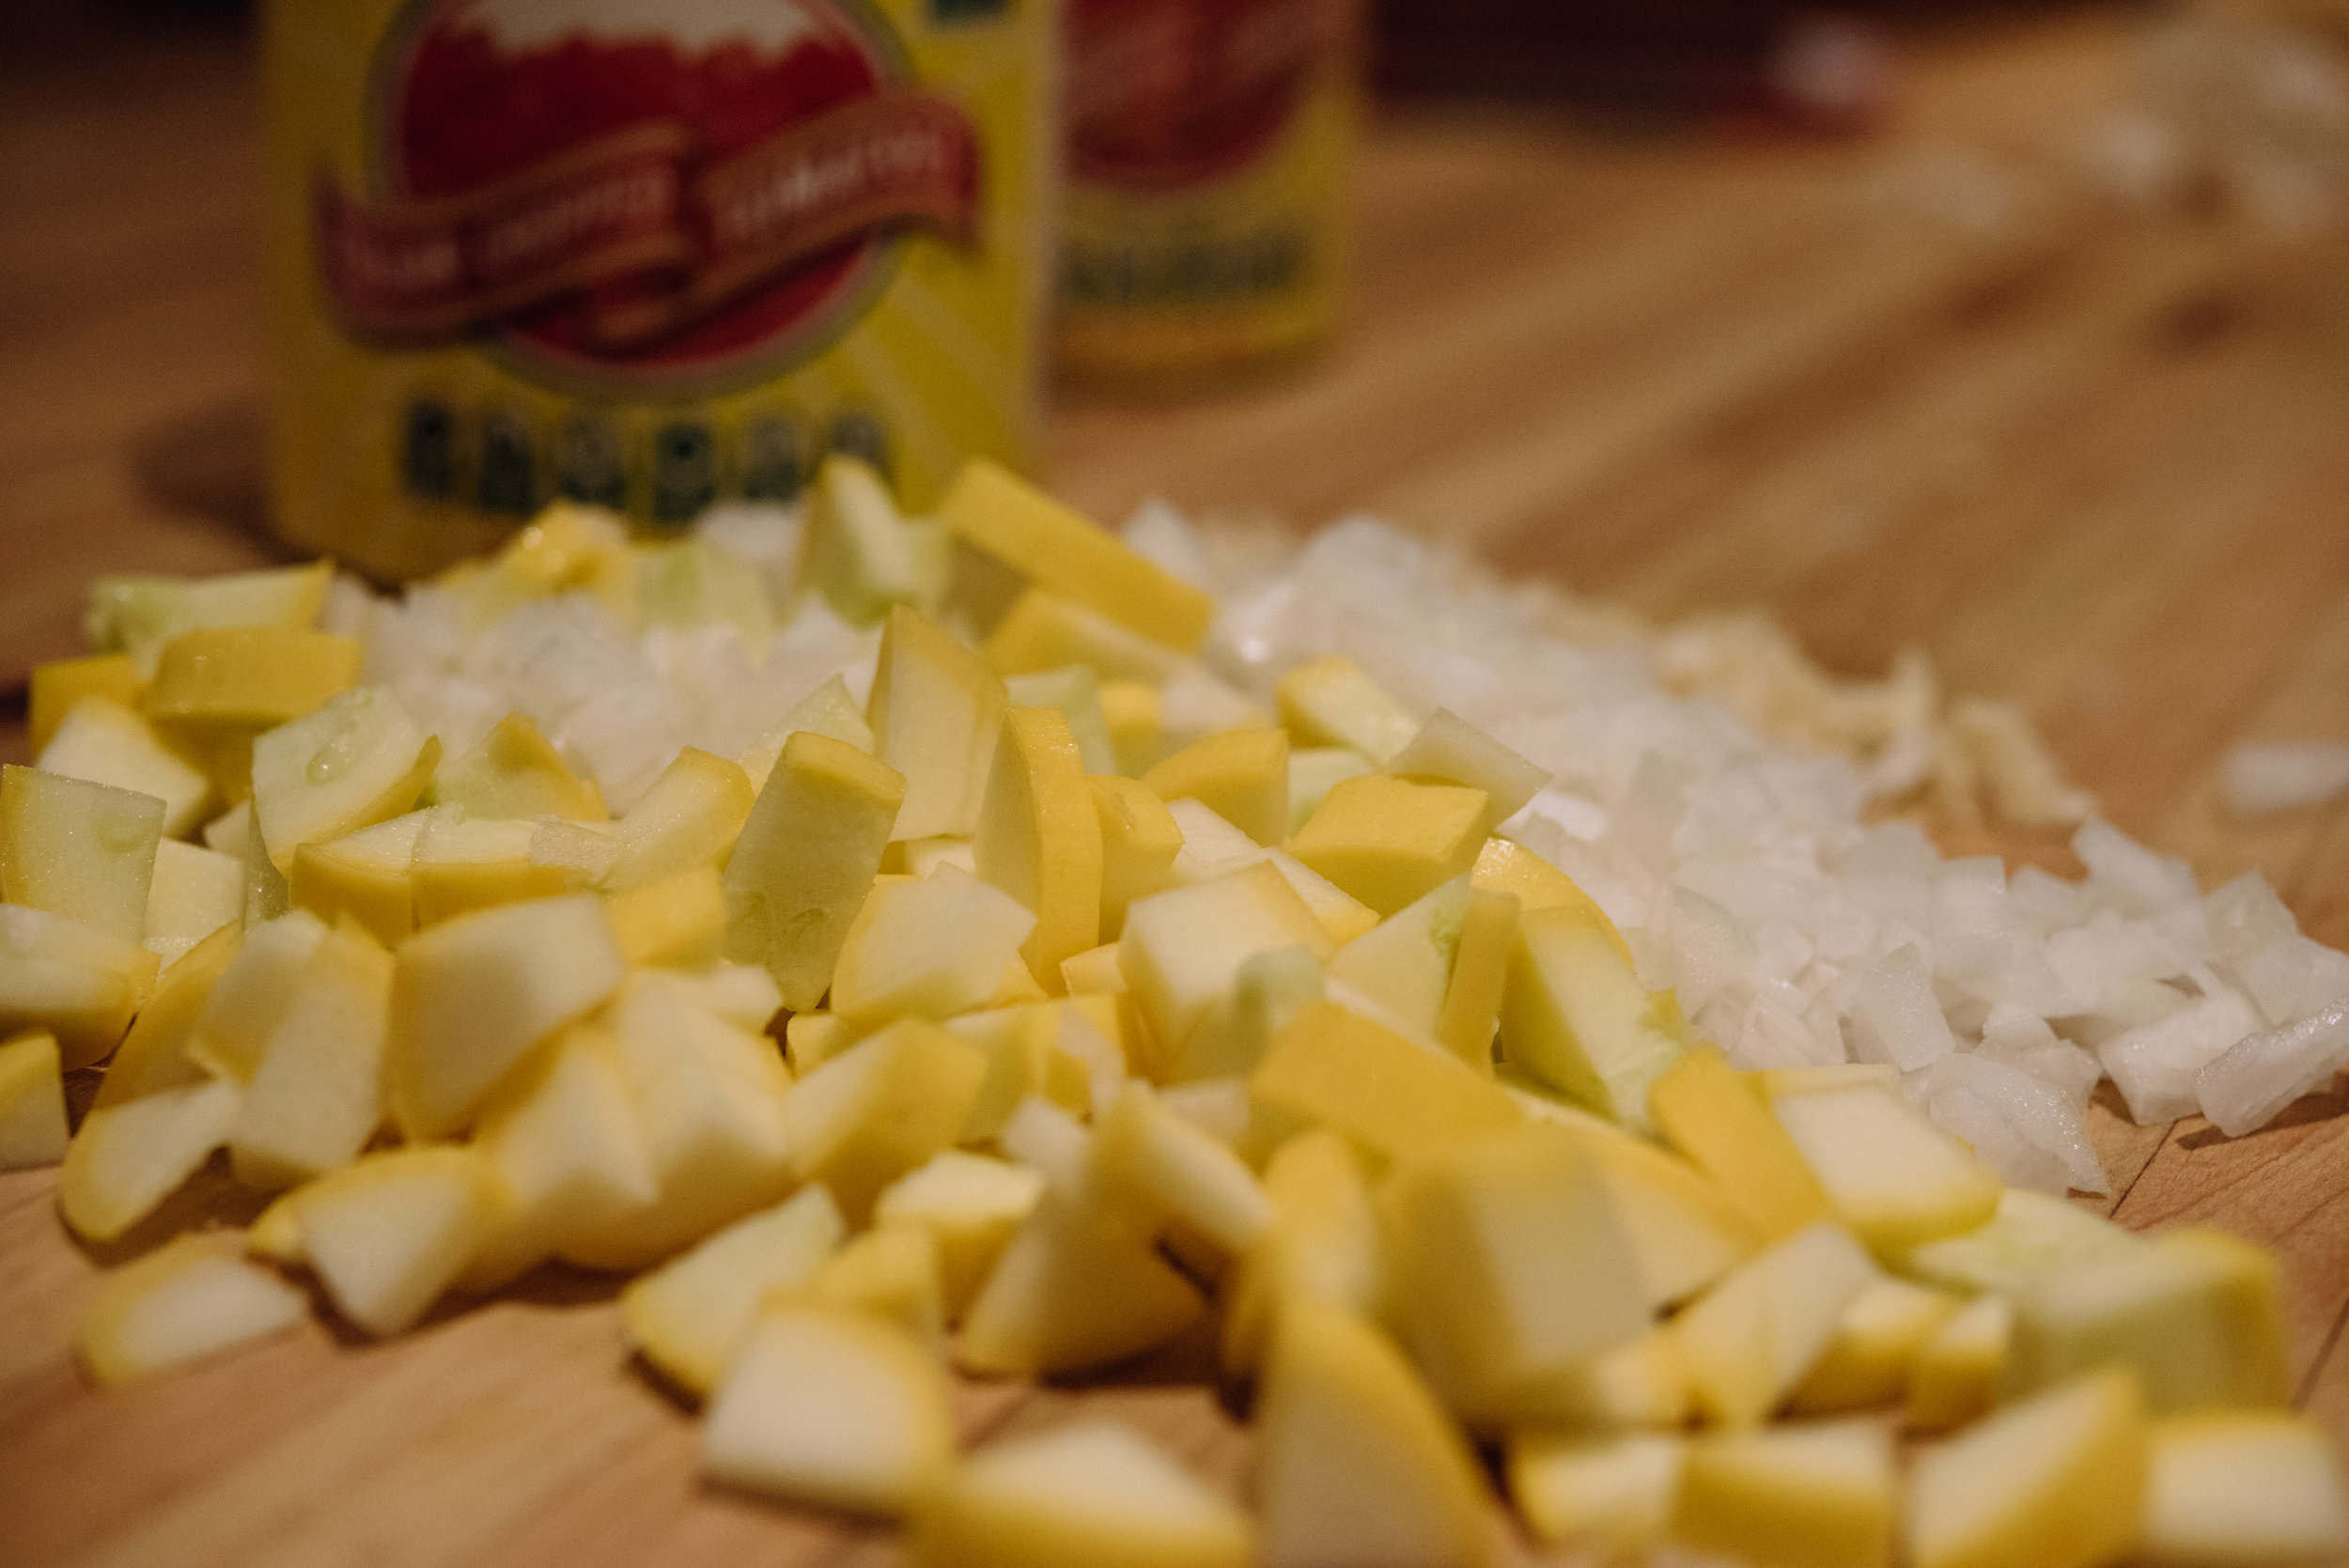
1 yellow onion, sliced
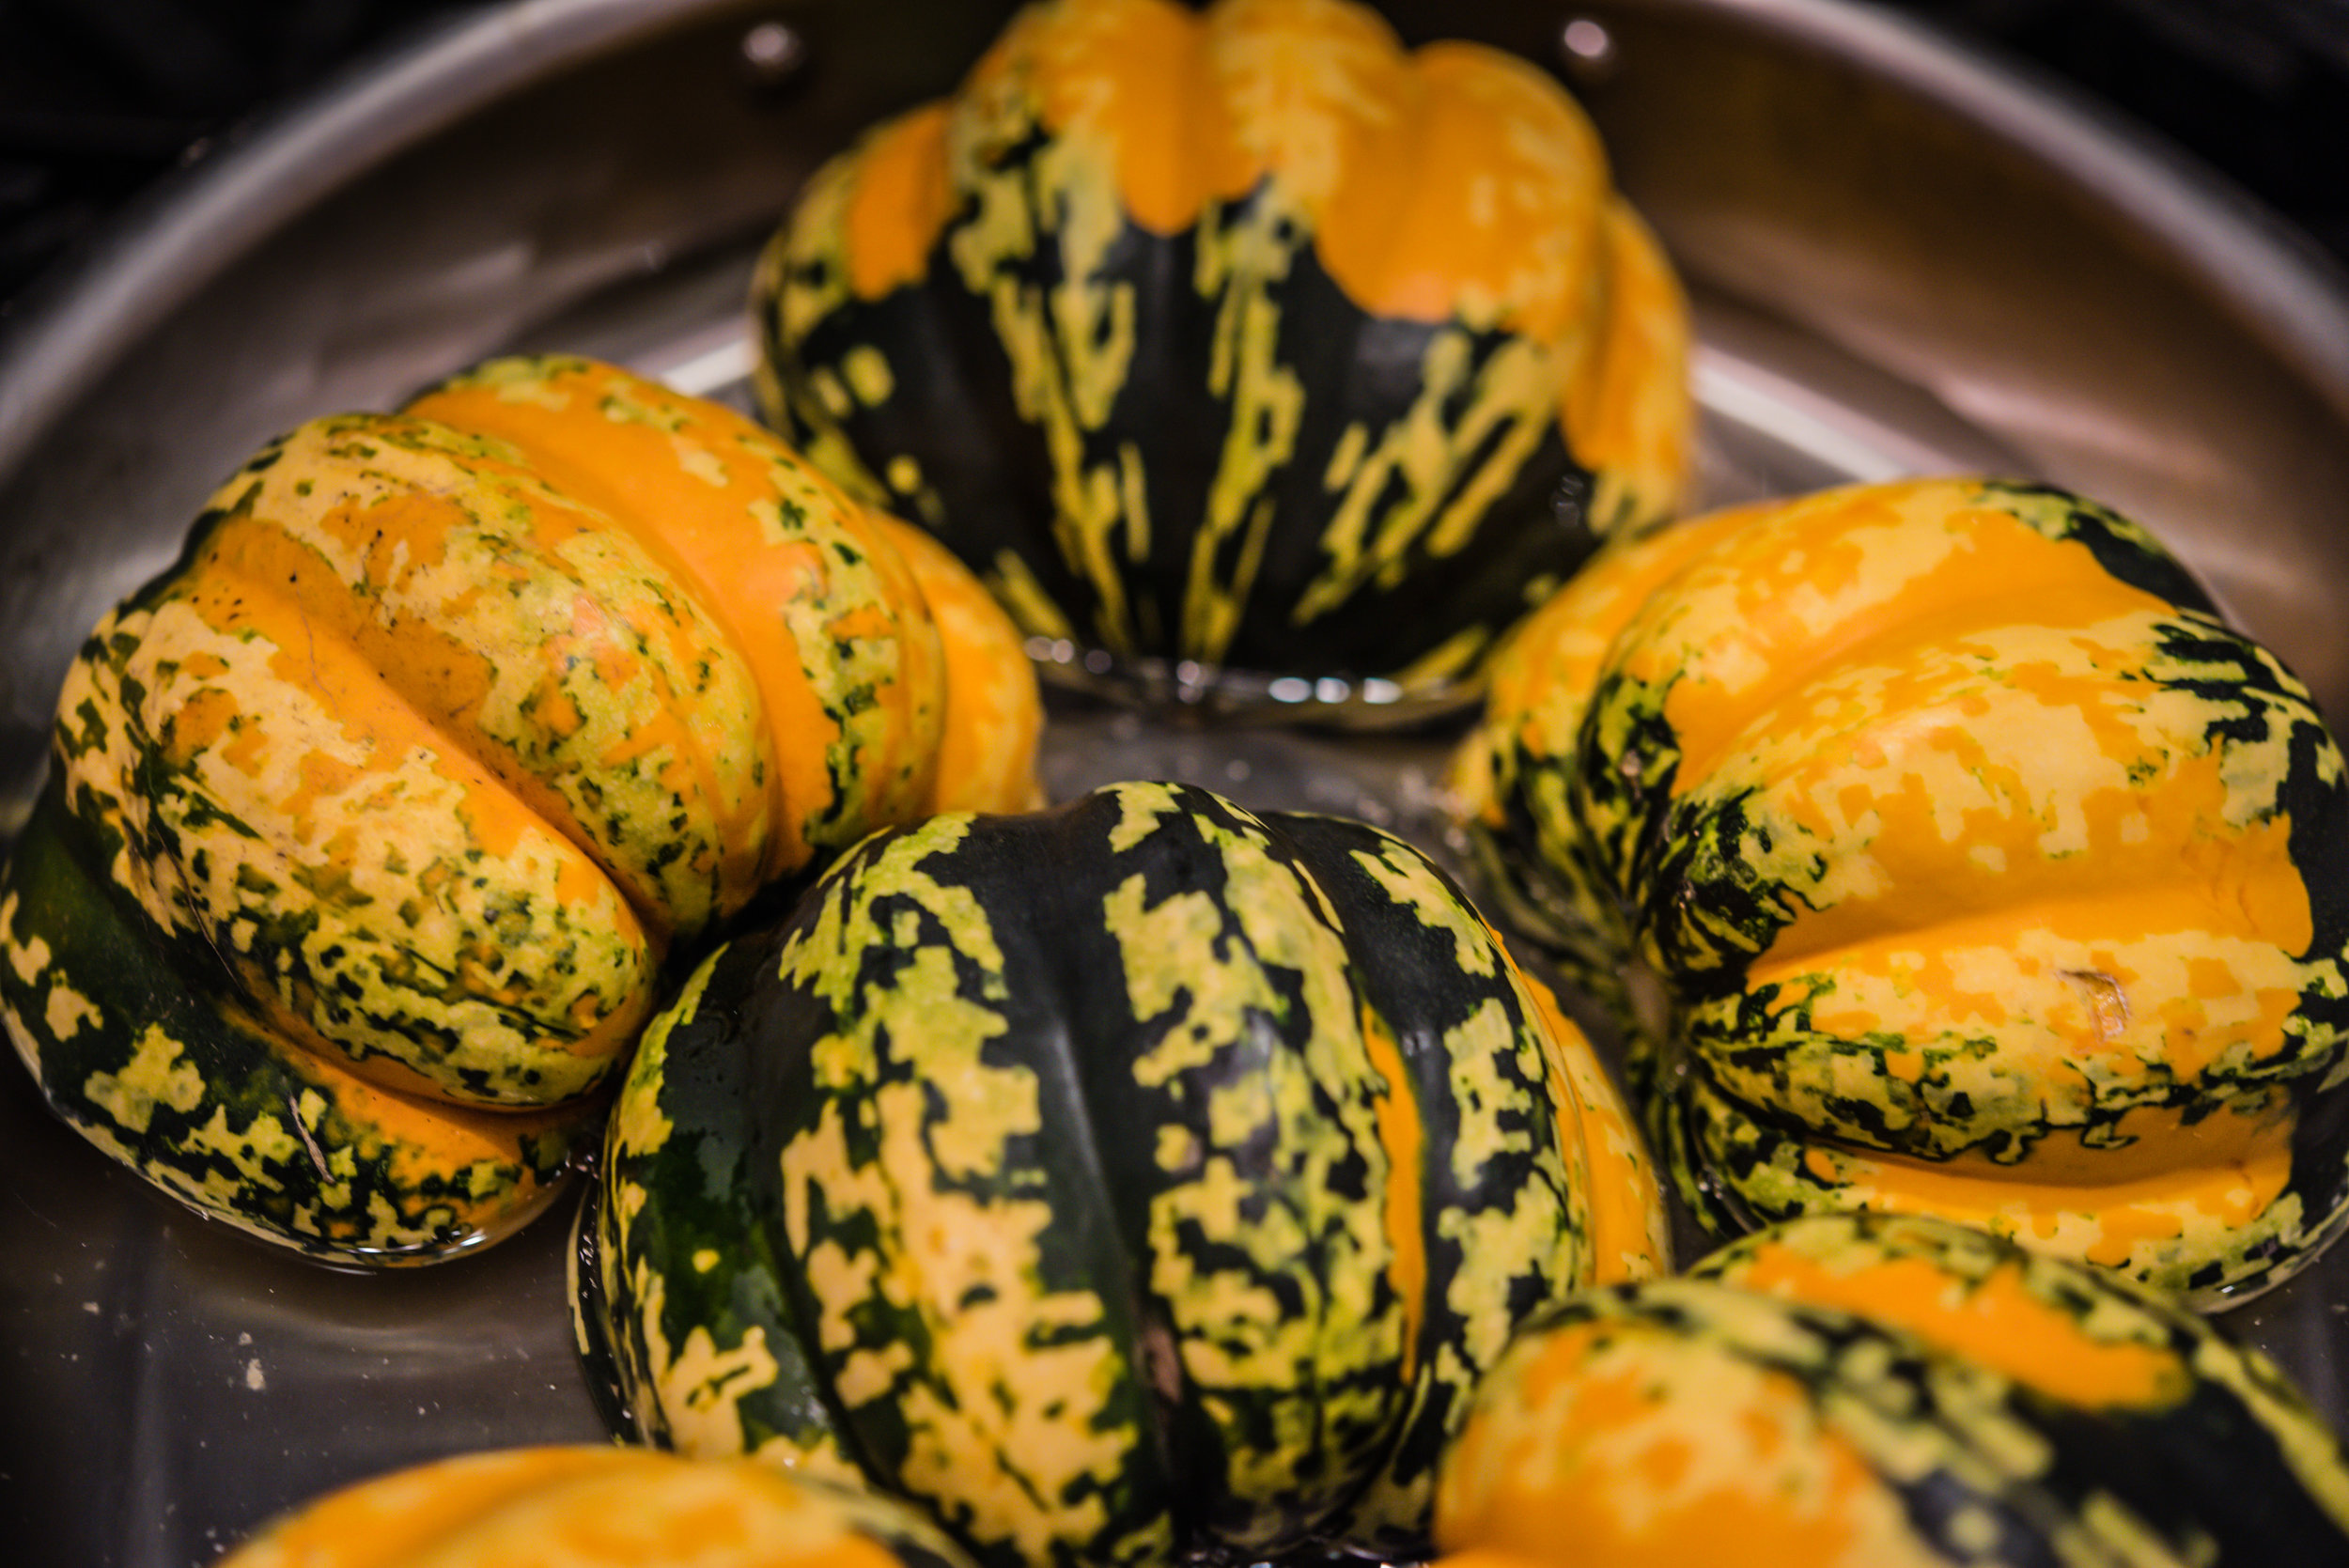
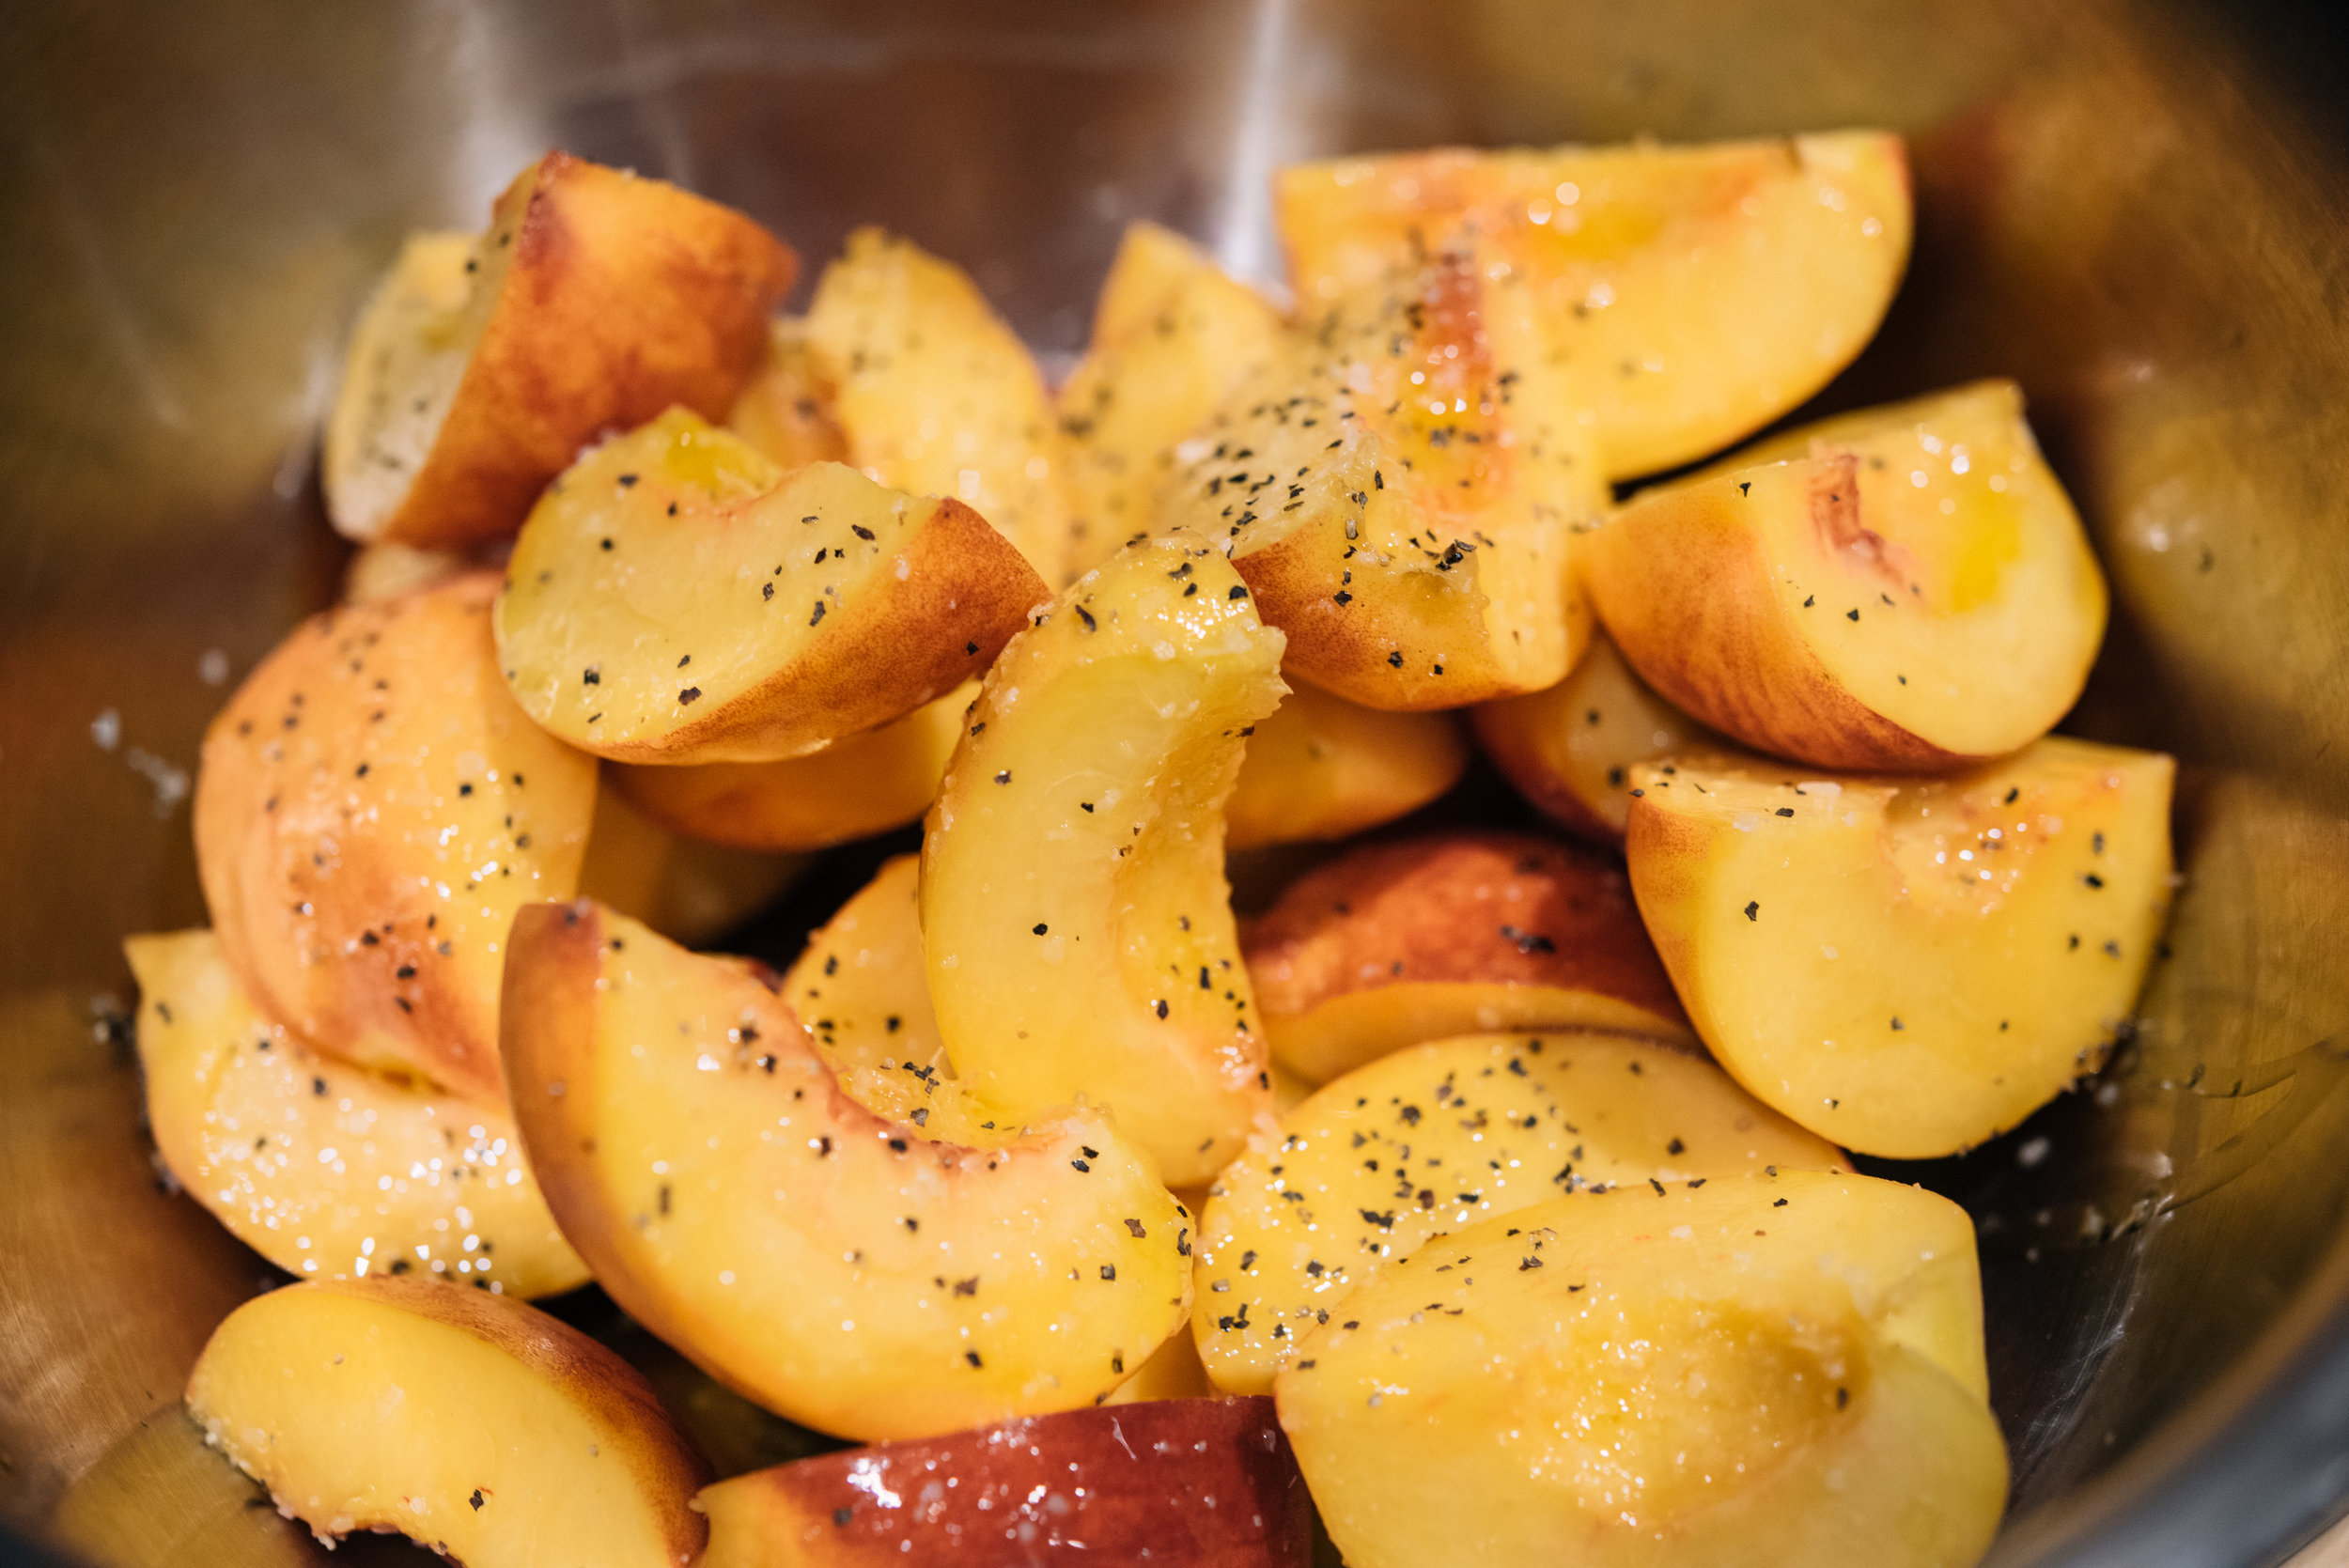
1 delicata squash, halved down the middle and seeds removed
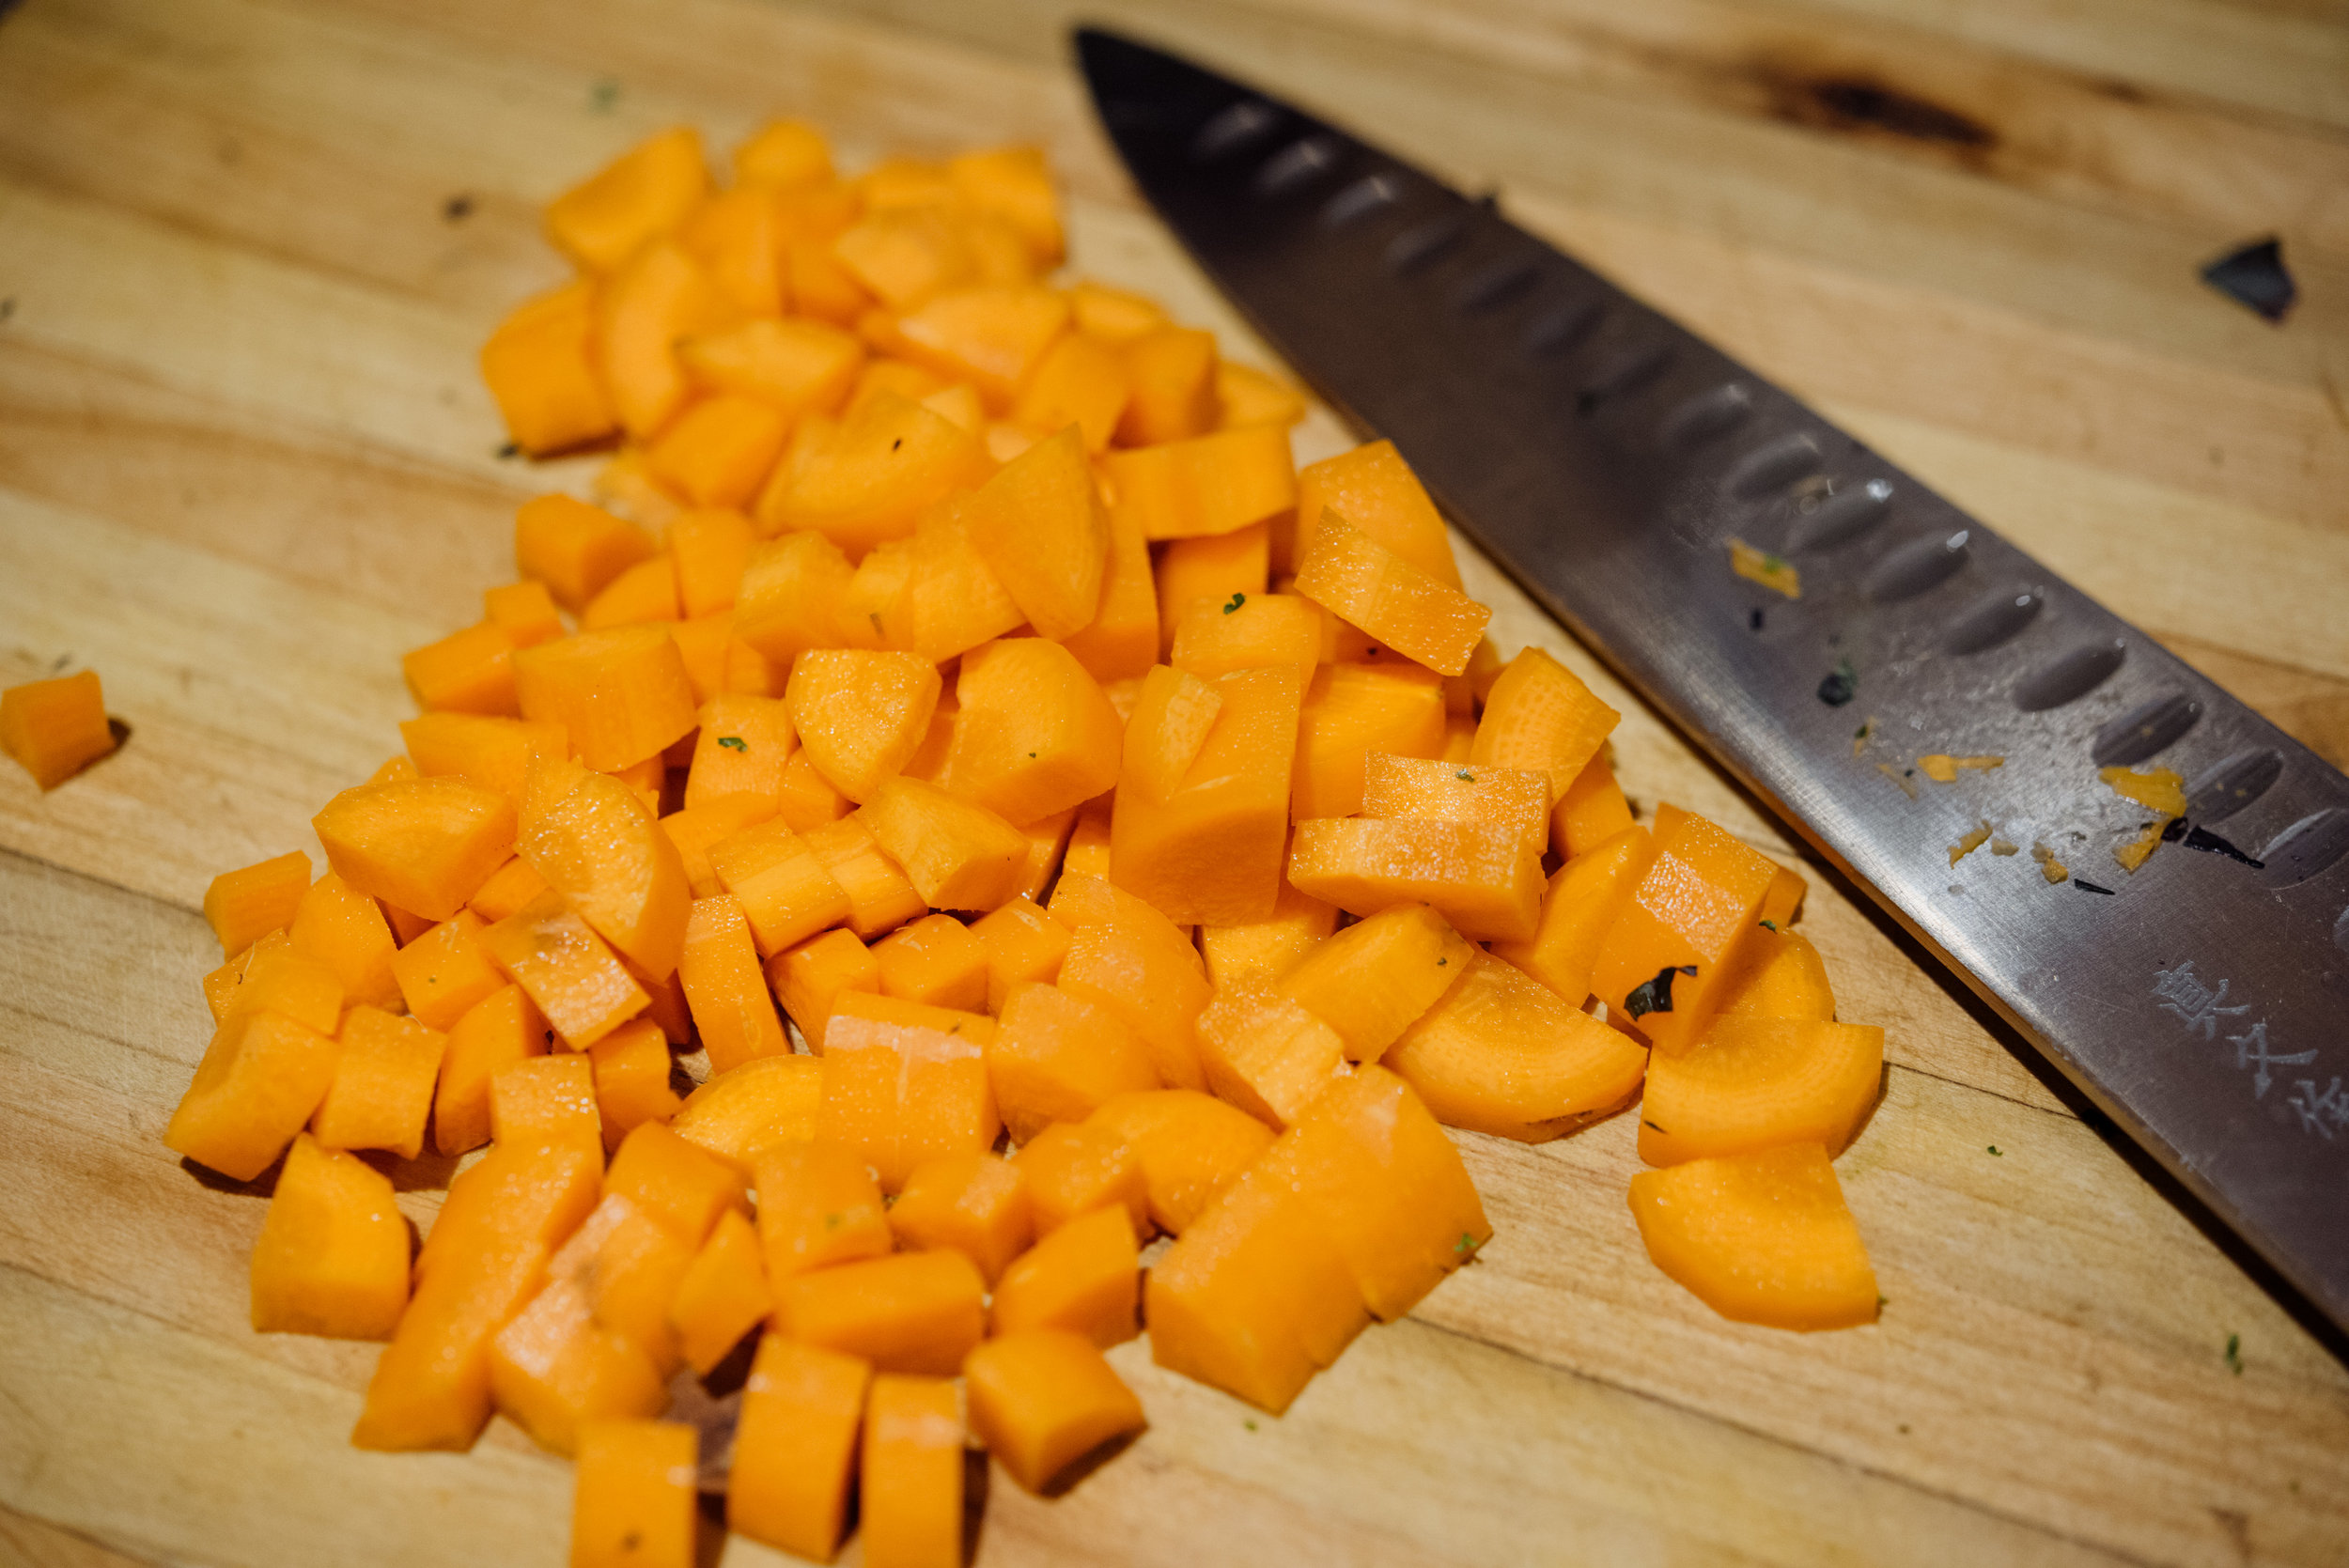
3 or 4 carrots, peeled and cut into 1-inch slices
1/2 cup dried cranberries
6 tablespoons butter
1/4 cup olive oil
1/4 cup pine nuts
3 tablespoons apple cider vinegar
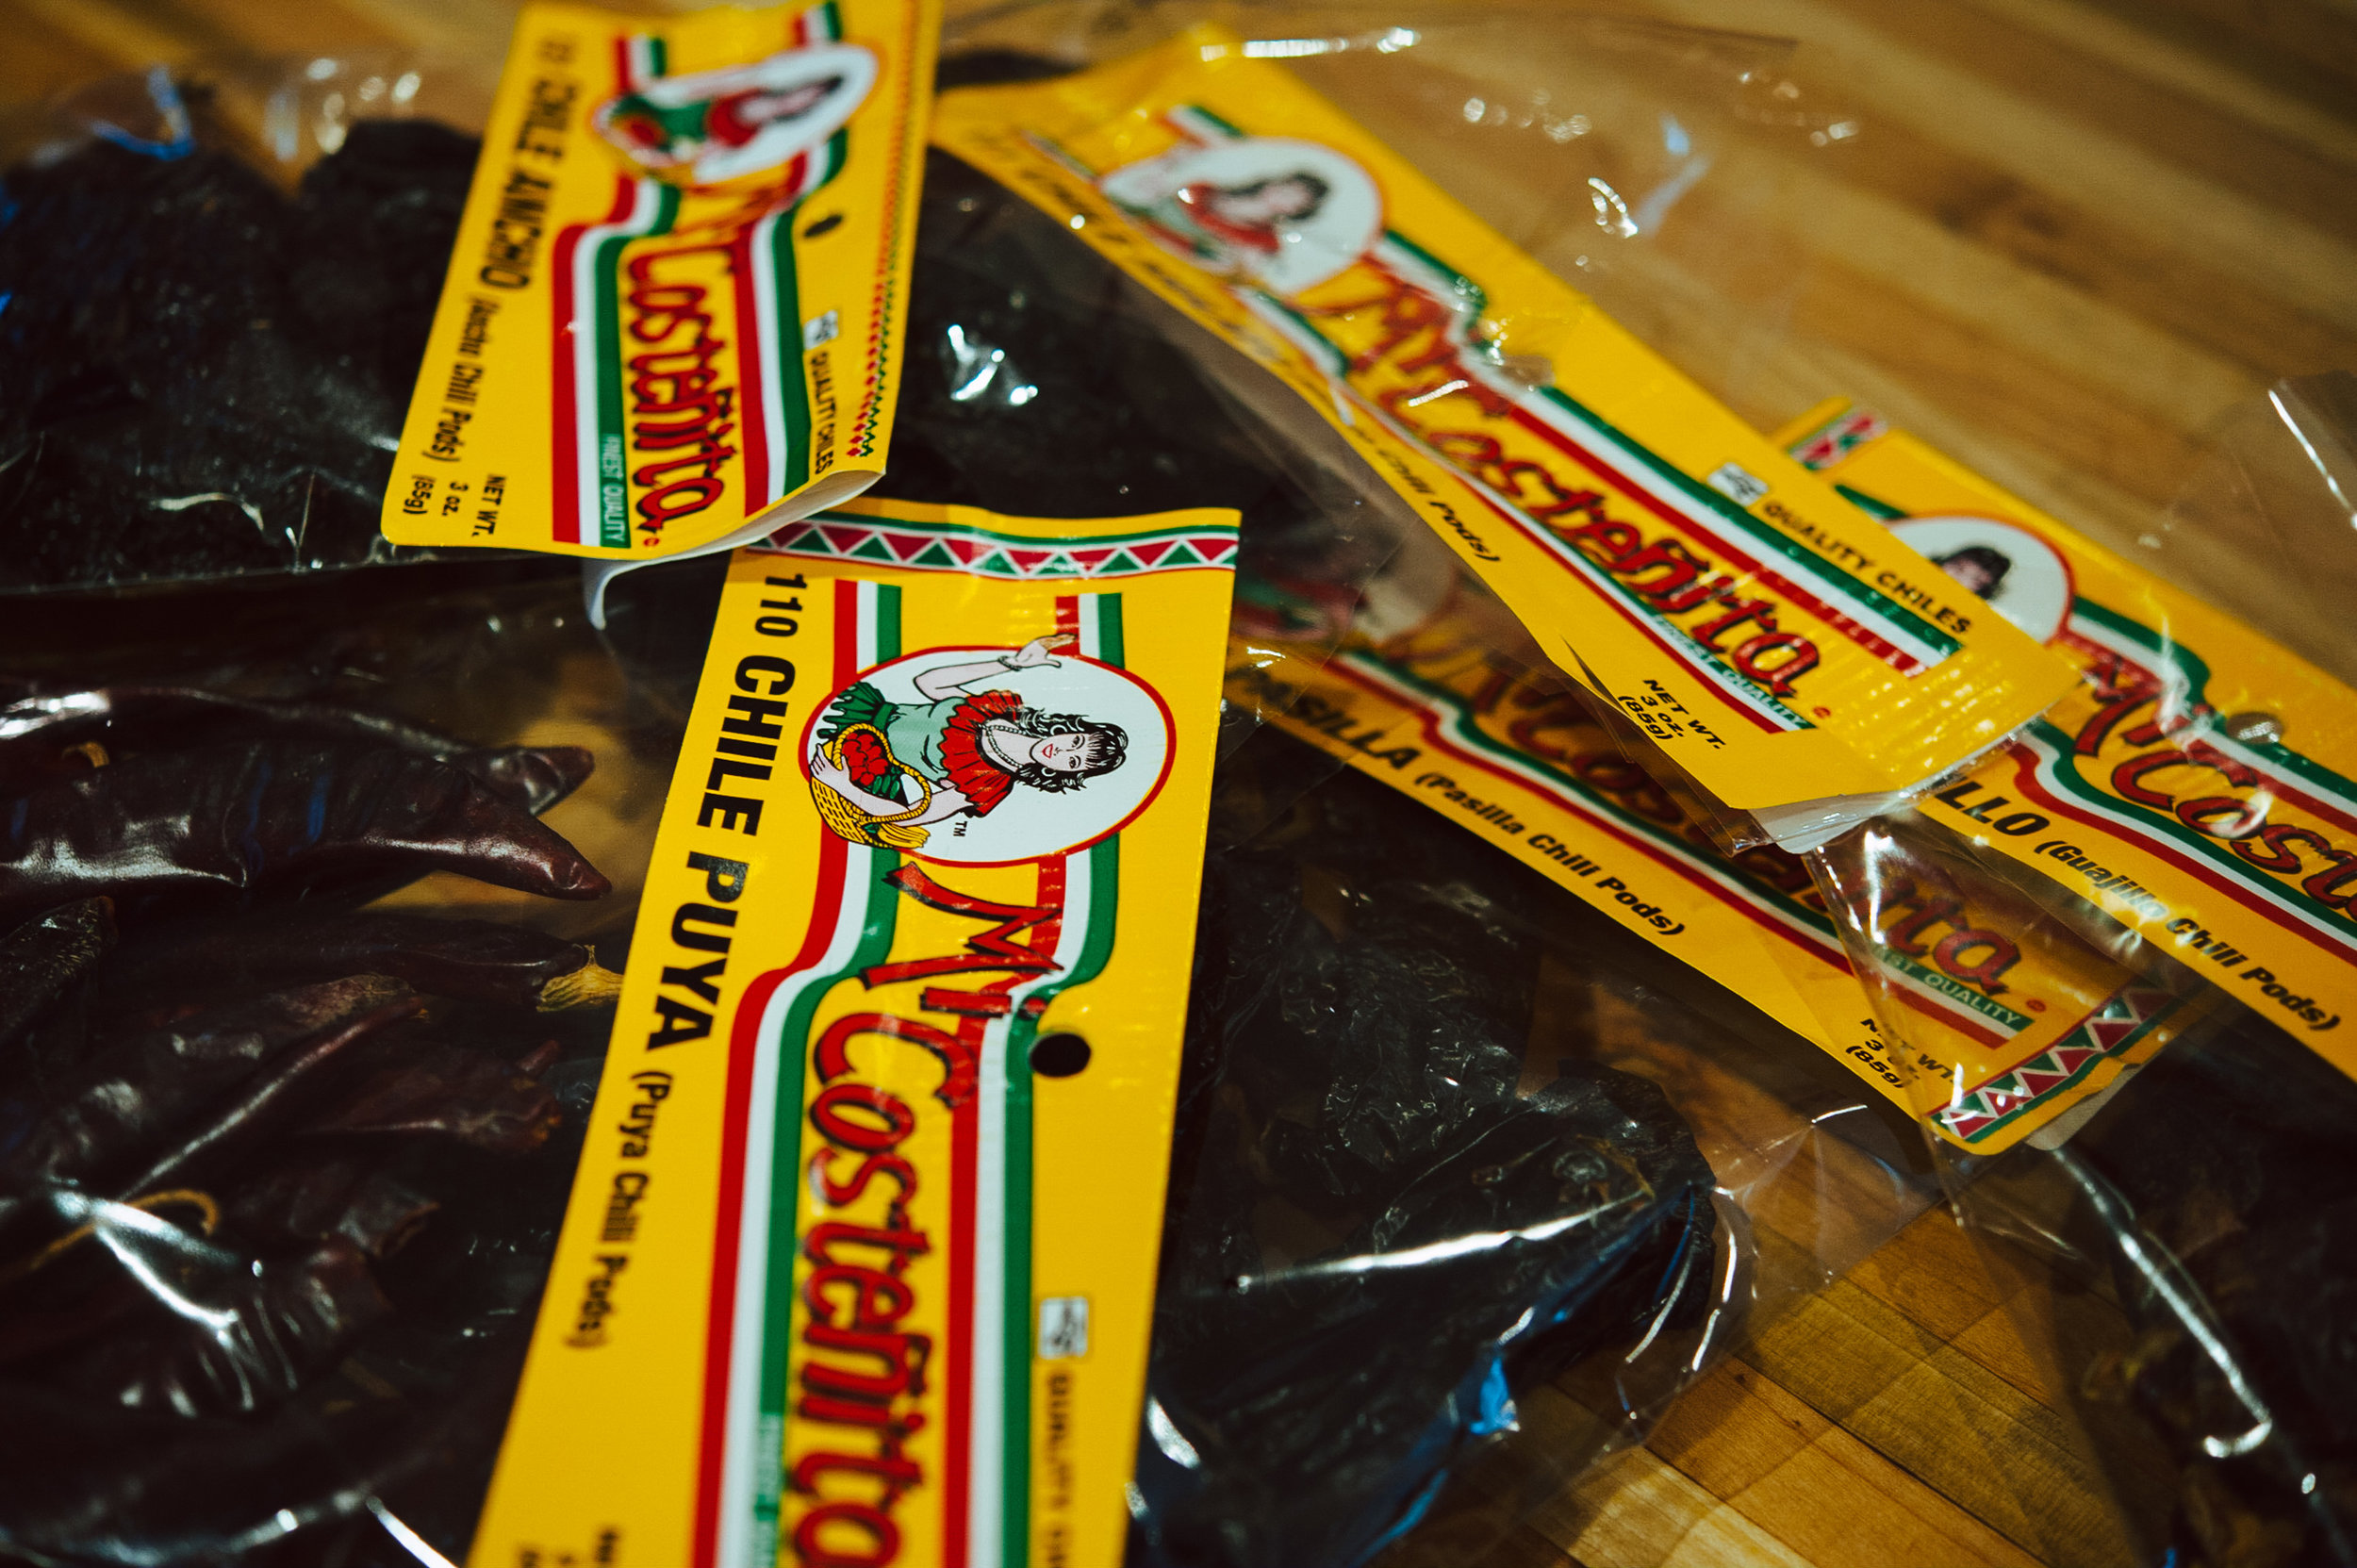
1/2 tablespoon harissa
1/2 tablespoon honey
2 teaspoons Dijon mustard
1 teaspoon maple syrup
1 teaspoon kosher salt, divided

Preparation
Preheat oven to 400 degrees.

Add water, 1/2 teaspoon salt, and wild rice to a medium saucepan. Bring to a boil, reduce to a simmer, and cover with a lid. Simmer until rice is cooked, about 45 minutes. Drain and set aside.

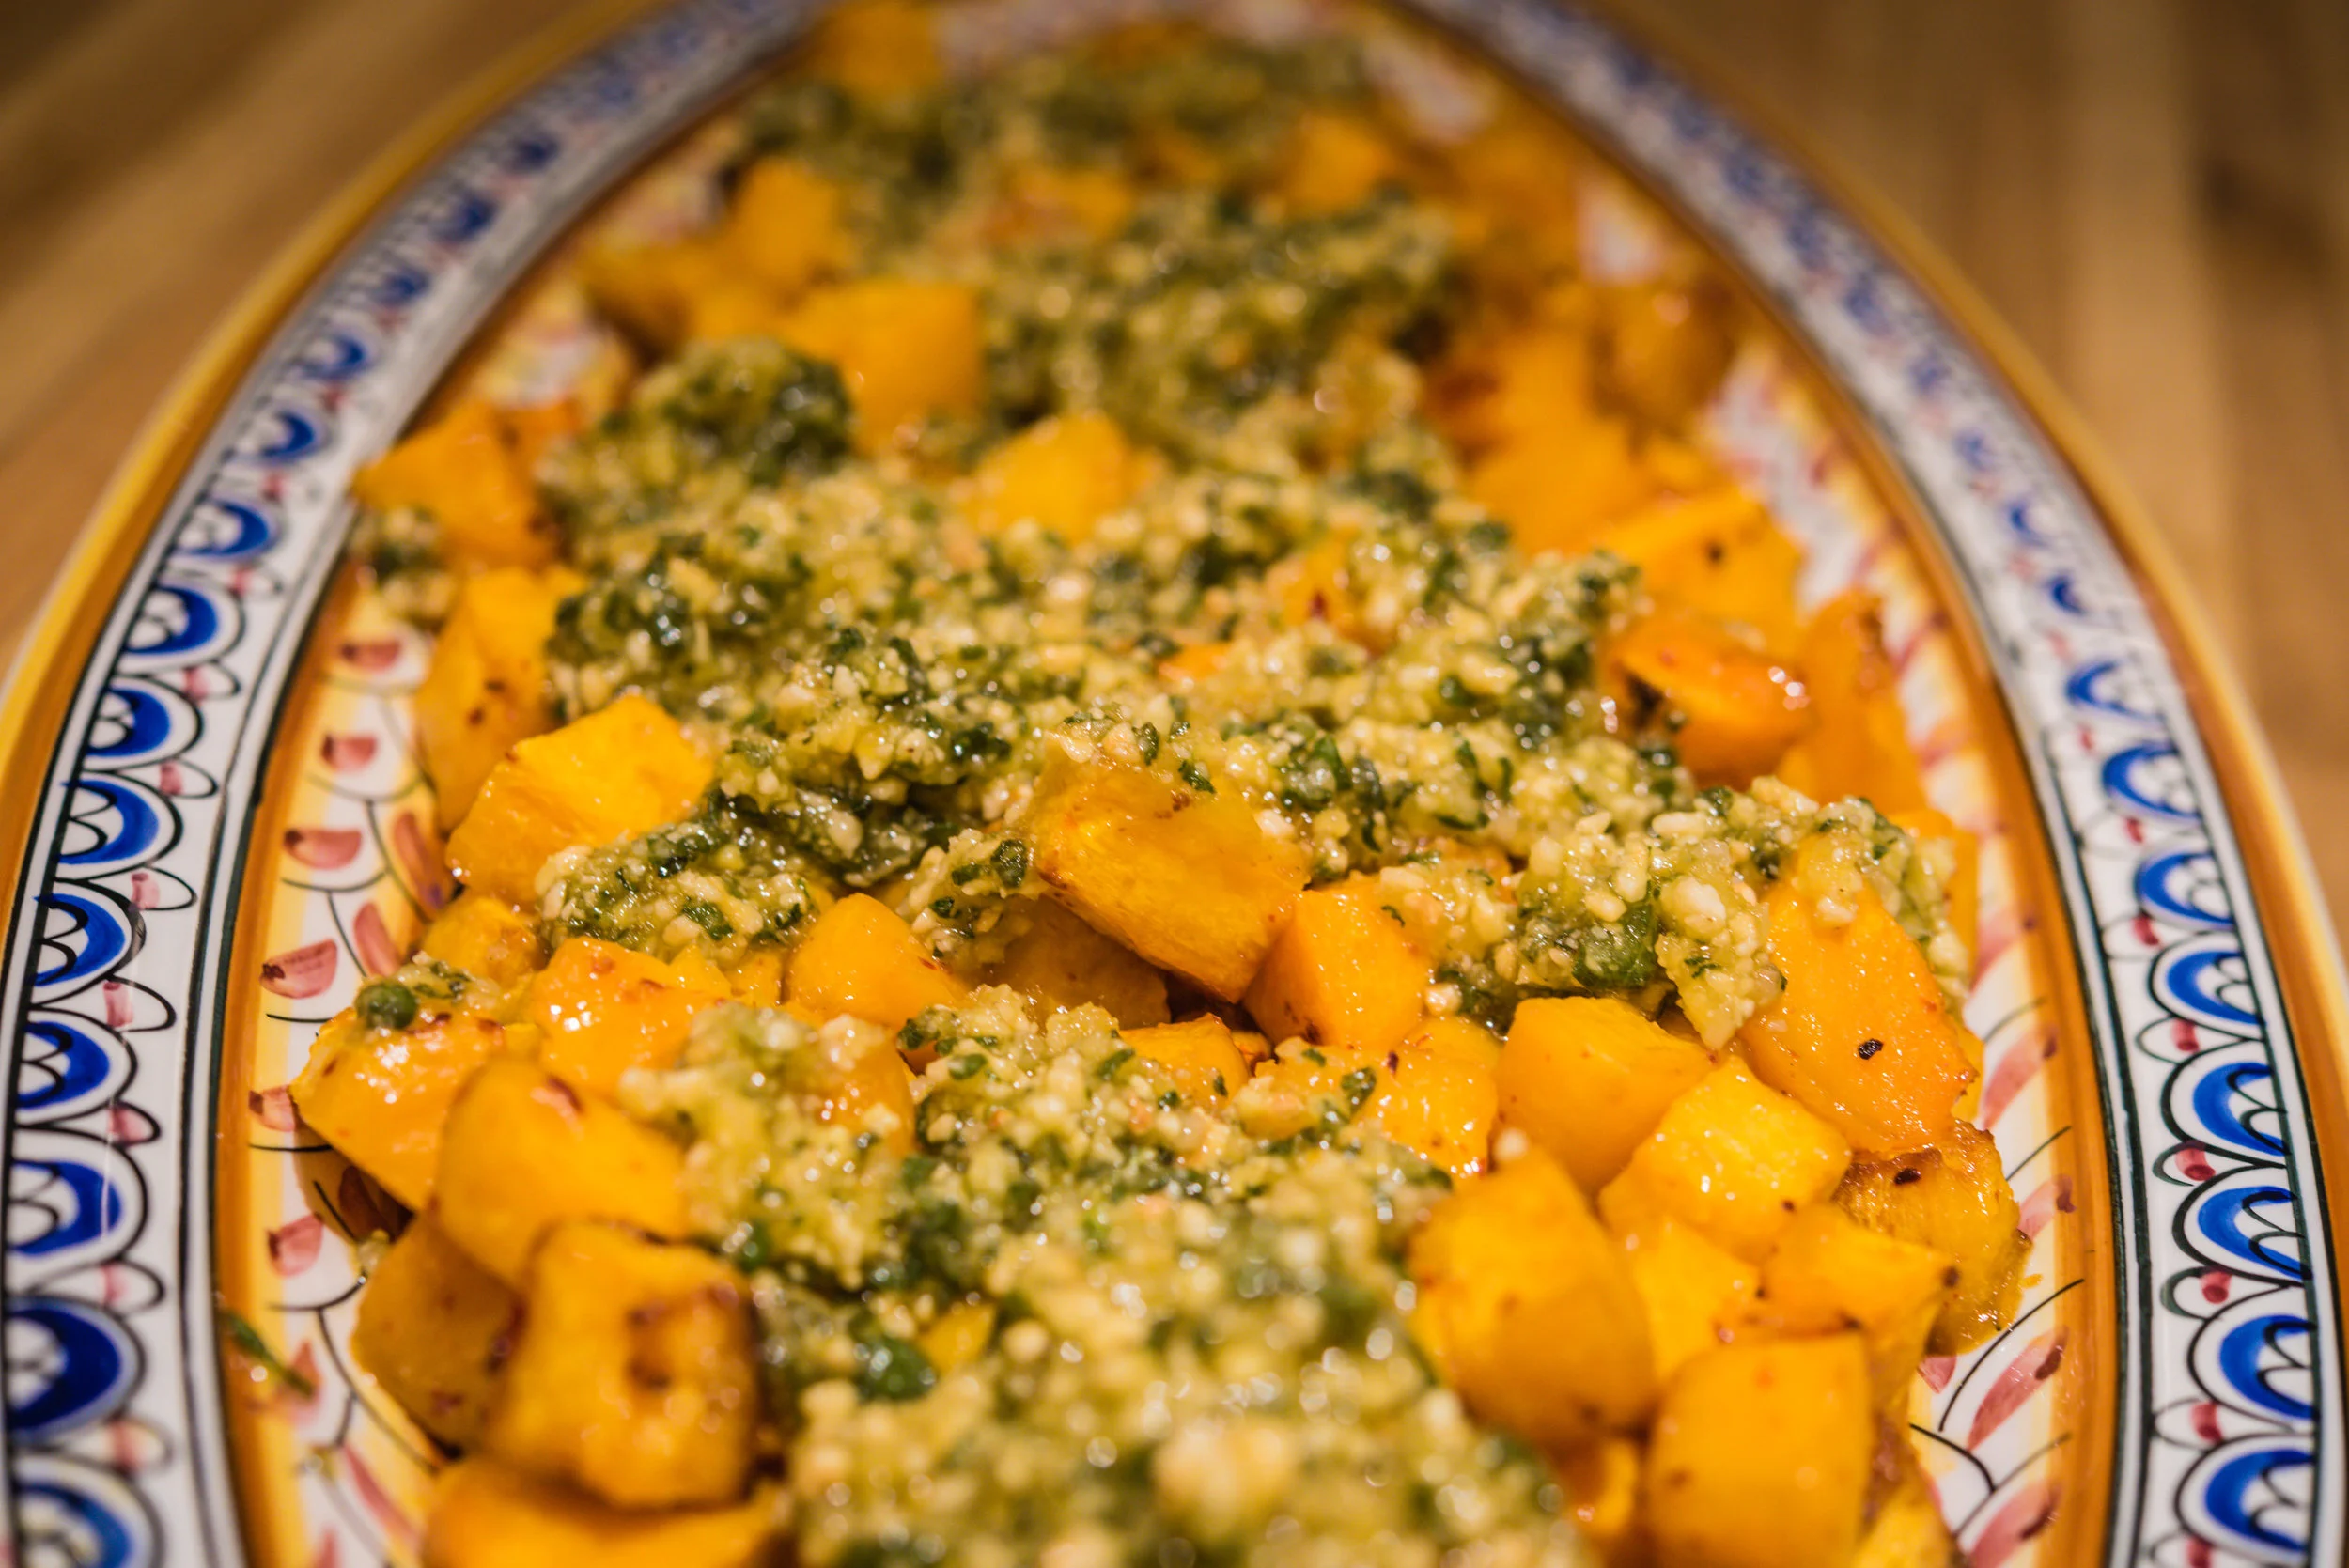
Combine the olive oil, honey, harissa, and 1/2 teaspoon of salt in a large bowl. Place the squash, carrots, and onions into the bowl with olive oil mixture and toss to coat completely. Place on a parchment lined sheet tray and roast for about 30 minutes or until golden brown and softened.

Add the pine nuts to a small skillet and toast over medium heat until they start to turn a light golden brown. Remove immediately and set aside — they burn easily so keep your eyes on them while they are cooking. Add the butter to the skillet you toasted the pine nuts in and melt the butter over medium-high heat. Once the butter begins to brown around the edges, swirl the pan until the butter turns a deep golden brown and it smells nutty — between 3 and 5 minutes. Take off the heat and let cool slightly.

Once the butter has cooled, add the vinegar, maple syrup, and Dijon mustard and whisk to combine. Season to taste with salt and pepper.

Place the rice, pine nuts, cranberries, and roasted vegetables into a bowl and toss with the vinaigrette. Taste for seasoning and serve warm or at room temperature.

_DSC6364.jpg
_DSC6378.jpg

There's a First Time for Everything -- Pork Braised in Milk

_DSC6092.jpg
_DSC6100.jpg

Well, this isn’t the prettiest dish to look at it and the sauce, before you blend it up a bit, looks pretty suspect with all the curds floating around in the braising liquid but man, that pork was tender. I knew I was on to something when Jack and Charlie started laughing when I told them what was for dinner and they looked at each other and said, at the same time, ‘milk steak’ and started laughing even harder. Turns out, they were referring to a scene from It’s Always Sunny in Philadelphia where Charlie is answering questions for his Match.com profile and ‘milk steak’ is his favorite meal. Honestly, I don’t really understand why they thought the milk steak thing was as funny as they did but I’ll take it. I mean, how often does your dinner cause uproarious laughter??

_DSC6108.jpg
_DSC6123.jpg
_DSC6129.jpg

Milk-Braised Pork
(adapted from Bon Appetit)

4 pounds of pork shoulder, cut into two 2-lb. pieces
6 cups whole milk
1 onion, chopped
2 heads of garlic, bottom cut off
3 tablespoons olive oil
4 bunches sage (about 20 leaves)
1 1/2 teaspoons Aleppo peppers, can substitute red pepper flakes
4 2" strips lemon peel
Kosher salt
Freshly ground black pepper

Preparation
Season pork generously with salt all over. Let sit at room temperature at least 1 hour, or preferably chill overnight, then let sit at room temperature 1 hour before cooking.

Preheat oven to 300°. Heat oil in a large Dutch oven over medium-high heat and add garlic, cut sides down. Cook until golden brown, about 1 minute. Transfer garlic to a plate. Add pork to pot and cook, undisturbed, until golden brown, 3–5 minutes. Turn and cook, reducing heat to medium if needed so it doesn't burn, until golden brown on all sides, another 3–5 minutes. Remove the pork and add the onion to the pan. Sauté the onions until they are softened and light brown, about 10 minutes.

Return pork and garlic to pot. Add milk, sage, chiles, and lemon peel. Transfer pot to oven and bake, uncovered, turning pork every 30 minutes, until meat is very tender and can easily be pierced with a paring knife and milk has reduced and formed curds, 2½–3 hours. Transfer meat to a cutting board, cover, and let rest.

While the meat is resting, remove the heads of garlic from the pot and set aside. Remove the lemon peels and half of the sage and discard. Remove as much the fat from the braising liquid as possible, using a spoon or a fat separator, and then carefully pour the braising liquid into a blender to combine (and incorporate the milk curds into the sauce). Place the sauce in a wide and shallow sauce pan and cook over medium heat for about 10 minutes, or until slightly thickened.

Slice pork and transfer to a platter. Arrange roasted garlic alongside pork, if desired. Spoon sauce over and season with salt and pepper.

_DSC6132.jpg
_DSC6155.jpg
_DSC6161.jpg
_DSC6170.jpg

Roasted Butternut Squash with Sage & Hazelnut Pesto

_DSC6105.jpg
_DSC6120.jpg
_DSC6137.jpg

I’ve made this squash about 5 or 6 times in the past month — and I’m not tired of it yet. It’s a nice mixture of earthy and sweet-ish squash with a little heat from the Aleppo peppers and a sage/hazelnut pesto. It’s not your traditional pesto — the nuts are the star of the show with the sage and Happy Hollow Haystack Jack playing second fiddle. If you have a Christmas ham or turkey in your future, this squash recipe is worth a place in the menu!

_DSC6143.jpg
_DSC6149.jpg
_DSC6153.jpg

Roasted Squash with Sage and Hazelnut Pesto

4 pounds of butternut squash, peeled and seeds removed
1/4 cup olive oil
1 teaspoon maple syrup
1 teaspoon kosher salt
1 teaspoon Aleppo peppers, can substitute red pepper flakes

Sage and Hazelnut Pesto

1/4 cup sage, chopped
3 tablespoons olive oil
3 tablespoons hazelnut oil
2 cloves garlic, peeled
1/3 cup hazelnuts, toasted
1/4 cup Happy Hollow Haystack Jack cheese, shredded
Pinch of salt

Preparation
Preheat the oven to 400 degrees and place a rack in the lowest slot in the oven. Line a baking sheet with parchment.

Peel the butternut squash, cut in half lengthwise and remove the seeds. Chop the squash into 2-inch pieces and place in a bowl.  Toss squash with olive oil, maple syrup, salt, and Aleppo peppers. Place in a single layer on baking sheet.

Roast for 25 to 30 minutes, until the squash is tender and caramelized, turning a couple times with a metal spatula.

While the squash is roasting, make the pesto. Place 3 tablespoons olive oil, sage, and garlic in a small pan and heat over very low heat just until the oil bubbles. Pour in a small bowl, add the hazelnut oil, and set the garlic cloves aside. Place the toasted hazelnuts in mini food processor along with the garlic cloves and process until a fine crumble.  Add the cheese to the bowl along and stir until combined and salt to taste (add additional olive oil if the pesto is too thick). Once the squash is roasted, place in a large bowl and toss with pesto to taste.

_DSC6164.jpg
_DSC6166.jpg

Pork Tamales -- No Small Endeavor But Oh-So Worth It

DSC_2989.jpg
DSC_3018.jpg

Fair warning, this recipe is a beast — it requires all sorts of dried chiles and is best done over two days but it’s worth every ounce of effort. I make the chile sauce and braise the pork shoulder on the first day and make the masa and wrap and steam the tamales on the second day — it makes the entire project a little more manageable. Of course, there are chiles and corn husks to buy (I buy mine at Woodman’s but any grocery store with a decent Mexican section should have most of them) and pork lard to render (or buy) — so maybe add another day onto your timeline if you don’t have these items in your kitchen.

DSC_3022.jpg
DSC_3043.jpg
DSC_3045.jpg

The first time I made tamales (blog post here) about six years ago, I remember thinking there is no way I’m going to attempt to make them by myself….the process seemed laborious and complicated. But a few years ago, I decided to give it a go and it was a marginal success (the rolling part is tricky and I had to start over a number of times). Every time I make them, it gets easier — I have a much better handle on the process from making the chile sauce to how to tell when the tamales are done. That old adage practice makes perfect has some truth to it!

So, if this is your first crack at making tamales, it may be a little frustrating at first but there are lots of YouTube videos that will fill in the blanks and provide some guidance. We make them a couple of times a year now (for special occasions and the holidays) and always make a huge batch because once the tamales are steamed, you can wrap them up tightly and freeze them. Because let’s be honest — a recipe that requires as much running around and preparation as this one should make enough for a couple of meals!

DSC_3055.jpg
DSC_3057.jpg
DSC_3073.jpg
DSC_3080.jpg

Pork Tamales with a Red Chile Sauce

Pork and Red Chile Sauce
6 pounds pork shoulder, fat trimmed and cut into large chunks
3 medium onions, chopped
7 pasilla chiles, seeded
6 dried ancho chiles, seeded
6 guajillo chiles, seeded
6 puya miles, seeded
5 mulato chiles, seeded
12 garlic cloves, peeled
7 cups chicken broth
1/3 cup lime juice
1/4 cup plus 2 tablespoons ground cumin
1/4 cup vegetable oil
1/4 cup apple cider vinegar
5 tablespoons kosher salt, divided
2 tablespoons ground coriander

Tamale Masa
4 cups instant corn masa (I used Maseca Corn Masa)
2 cups chicken stock
1 1/4 cup lard, melted, plus more if needed
1 tablespoon kosher salt
1 1/2 teaspoons baking powder

1 package of corn husks, soaked in water for at least an hour

Preparation
Heat the vegetable oil in a heavy-bottomed stockpot or Dutch oven over medium heat. Add the onion and 3 tablespoons of salt and cook, stirring occasionally, for about 10 minutes, or until the onions are beginning to brown. Add the cumin and coriander and cook for an additional couple of minutes, or until fragrant. Add the chiles and the chicken stock and bring to a boil. Cover and simmer over low heat, stirring occasionally, for about 30 minutes, or until the chiles are softened.

Carefully transfer the chile mixture (in multiple batches) to a blender. Add the garlic and lime juice and puree until smooth, about 2 minutes. You’ll have extra chile sauce and it freezes well for a couple of months.

Preheat the oven to 350 degrees. Place the pork shoulder pieces, 2 tablespoons kosher salt, and 4 cups of chile sauce in a Dutch oven. Place in the oven and cook until the pork is very tender and shreds easily, about 2 1/2 hours. Remove pork pieces from the sauce and set aside to cool for about 15 minutes. Skim the fat from the chile sauce and set the sauce aside.

Shred the pork, add the reserved chile sauce, and apple cider vinegar, stir to thoroughly combine, place in a covered container, and place in refrigerator for a few hours or until pork is cold. Filling can be made up to three days in advance and kept in refrigerator.

Soak the corn husks in a container large enough to cover the husks entirely in hot water (you may need to place something heavy on top of them to keep them submerged) for at least an hour.

Place the lard and chicken stock in a saucepan and heat over medium heat, until lard is melted. Place the masa flour, salt, and baking powder in a large bowl, mix to combine, and then add the lard/stock mixture and 1/3 cup of reserved chile mixture. Using a wooden spoon or sturdy spatula, mix the dough until it starts to come together. Place the dough on a masa-covered countertop and knead until the mixture looks smooth and shiny.

Take about a 1/4 cup of dough and flatten it into a patty. Place the patty between the palms of your hands and pull them apart; of the patty sticks, add a couple more tablespoons of lard and knead to incorporate. Repeat the test and if the dough doesn't stick, it’s ready. Cover the dough with an inverted bowl on the counter, and let sit for 30 minutes.

Drain the husks well; pat dry with paper towels. Take about 10 husks and tear them into 1/2 inch strips (you’ll use the strips to secure the tamales). Arrange husk so wide end is closest to you. Spoon 3 heaping tablespoons of masa onto husk a couple of inches from the bottom. Using a spatula or your hands, spread masa into a thin, even layer, covering the width of the husk and about 5" up the length of the husk; leave the narrow end uncovered. If you mess up, just scrape off masa and start over. Repeat with remaining husks and masa.

Keeping wide end closest to you, place about 3 tablespoons of the cold pork filling in the center of masa on each husk, forming a log that runs down the center. Fold 1 side of husk over filling, then fold other side over to cover. Holding tamale seam side up, fold narrow, pointed end of husk away from you and under tamale and tie with the corn husk strip. Set on a rimmed baking sheet seam side up. Repeat with remaining tamales. Check out this video at 2:20 for more info on rolling.

At this point, the tamales are ready to be steamed. Use a stock pot with wire lining or steamer insert. Add enough water as to keep it below the steamer. Add a few husks to prevent the tamales from getting wet. Tamales must be placed open side up along the inside perimeter of the stock pot. Place extra husks on top the tamales and cover the pot. Steam for about an hour and a half or until the husk peels away from the masa easily.

Makes about 30 tamales.

DSC_3088.jpg
DSC_3100.jpg
DSC_3109.jpg

Potato Chowder with an Allium Trifecta -- Leeks, Onions, and Shallots

_DSC6046.jpg
_DSC6047.jpg
_DSC6049.jpg
_DSC6053.jpg

Potatoes and onions are the backbone of my winter dinner repertoire — they make an appearance at nearly every meal, in one form or another. They are typically a supporting character but in the case of this chowder, they take center stage and it’s definitely a two thumbs up kind of chowder. It’s hearty, full of flavor, and freezes well — an all-around good recipe for all those winter nights we have to look forward to!

_DSC6057.jpg
_DSC6064.jpg
_DSC6065.jpg
_DSC6067.jpg
_DSC6072.jpg

Potato Chowder with Leeks, Onions, and Shallots

4 ounces of pancetta or bacon, diced
2 pounds of russet potatoes, peeled and chopped
2 cups onions, peeled and sliced
2 leeks, rinsed and sliced (white and light green parts only)
4 shallots, peeled and sliced
5 stalks of celery, sliced
3 garlic cloves, peeled and chopped
1 bay leaf
4 cups chicken broth
2 cups half-and-half
1 cup white wine
1/4 cup butter
1 tablespoon Italian parsley, chopped
1/2 tablespoon fresh thyme, chopped
1/2 teaspoon fresh rosemary, chopped/
1/2 teaspoon fresh sage, chopped
Kosher salt and pepper

Preparation
Sauté the pancetta or bacon over medium-high heat in a large Dutch oven or stock pot until browned and crispy. Remove the cooked pancetta/bacon from the pot and set aside. Remove the grease from the pan (leave any leftover brown bits in the pan) and melt the butter over medium heat. Add the onions, shallots, and celery and sauté until they are softened and just beginning to turn brown. Add the leeks, garlic, and the herbs. Cook until the leeks are softened. Add the wine and simmer, uncovered, until the wine is reduced by half.

Add the bay leaf and chicken broth and bring to a boil over high heat. Add the potatoes and half-and-half, return to a boil, cover, and reduce the heat to a simmer. Cook for about 30 minutes, or until the potatoes are cooked. Add the pancetta or bacon and serve.

_DSC6074.jpg
_DSC6076.jpg
_DSC6079.jpg

Veggie Pot Pies in Dede's Pie Plates

_DSC5992.jpg
_DSC5973.jpg
_DSC5972.jpg

I’m an autumn…..as in an autumn from the Color Me Beautiful craze from the 80’s. Little did I know, when I was a 14-year-old girl analyzing my hair and skin tones, that my autumn color palette extended, now that I am a nearly 50-year-old woman, to my favorite foods and recipes. Summer has plenty of reasons to celebrate — I mean, what would we do without tomatoes fresh from the garden?? But autumn has a vibe all its own, and the braises, pot pies, and stews are nothing short of good, old-fashioned comfort food — a little culinary ‘hey, everything is going to be okay’ pat on the back as the days begin to shorten and the temperatures begin to fall.

_DSC5976.jpg
_DSC5966.jpg
_DSC5980.jpg
_DSC5994.jpg

I have a thing for dishes and pottery (something not explained by my autumn Color Me Beautiful analysis) and when I ran into Dede Eckels, owner and potter extraordinaire at Eckels Pottery, a few weeks ago, it was no surprise when the conversation quickly turned to these sweet little individual pie plates. I love individual serving dishes, especially for pot pies/quiche/chicken b’stillas, and when I saw these beauties, I knew I had to add them to my growing collection local pottery. There’s something about serving good, local food in cool, local pottery that really seems to work. And I’m glad it’s working in my kitchen, even if the blue plates are in the winter color palette — I don’t remember Carol Jackson’s color guidelines extending to crockery and dishes!

_DSC6012.jpg
_DSC5997.jpg
_DSC6001.jpg
_DSC6004.jpg
_DSC6006.jpg
_DSC6014.jpg

Individual Vegetable Pot Pies
(makes 4 decent-sized pot pies)

1/2 cup butter, divided
4 medium red potatoes, sliced 1/8 inch thick
1 large red onion, chopped
2 large carrots, peeled and chopped
2 small sweet potatoes, peeled and diced
1 package mushrooms, cleaned and sliced
1 large leek, cleaned and sliced
3 garlic cloves, chopped
2 cups chicken or vegetable broth
1 cup cream or half-and-half
1 cup kale, chopped
1 cup frozen peas
1/4 cup flour
1/4 cup shredded Parmesan
1/2 tablespoon fresh thyme, chopped
1/2 tablespoon fresh rosemary, chopped
1 1/2 teaspoon kosher salt, divided
1 1/2 teaspoon pepper, divided

Preparation
Preheat oven to 400 degrees.

Heat 1/4 cup of butter over medium heat in a large sauté pan or Dutch oven. Once hot, add onion and 1 teaspoon salt and 1 teaspoon pepper. Cook for 3 minutes, then add the leeks and cook for another 3 minutes, and then add the mushrooms and garlic and cook for 5 minutes. Add the flour and cook for 2 or 3 minutes, stirring occasionally. Slowly add the broth, stirring constantly, until thoroughly incorporated and then add the cream, carrots, sweet potatoes, kale, peas, and herbs. Reduce heat to low, cover, and cook for 20 minutes.

While the vegetables are cooking, slice the red potatoes into 1/8 inch rounds (I used a mandolin). Melt the remaining butter in a saucepan over medium heat and then toss with the sliced potatoes, the remaining salt and pepper, and the parmesan. Set aside until it’s time to assemble the pot pies.

Divide the vegetable filling between the pie plates (depending on the size of your pie plates, you may have leftover filling) and then layer the potato slices over the top of the vegetable filling. Place on a sheet tray and bake in the oven for 30 — 40 minutes, or until the tops are crispy and golden brown. Remove from oven and let sit, uncovered, for about 10 minutes and then serve.

_DSC6018.jpg
_DSC6024.jpg
_DSC6026.jpg

Green Lentil Salad with Sirloin, Gorgonzola, and a Hazelnut Vinaigrette

_DSC5878.jpg
_DSC5882.jpg
_DSC5887.jpg

It’s really no surprise to anyone who knows me that I think about food, a lot. So, when Meghan wanted to have a volleyball team dinner at our house, I figured it was the perfect excuse to make some Turkish food (Meg has a teammate from Turkey). In my research, I noticed that Aleppo peppers made frequent appearances in the Turkish recipes — so I ordered a big bag, only to find out that Meg wanted burritos. Lesson learned — check with your daughter before planning a meal for her volleyball team and always, and I mean always, have Aleppo peppers in the kitchen, they are incredibly good.

_DSC5892.jpg
_DSC5897.jpg

Between the Aleppo peppers, the turkey stock I made earlier this week, the South Shore Meats sirloin I had in my freezer, and the hazelnut oil we got in our CSA boxes a few weeks ago, I knew I had the beginnings of something good for dinner….but what?? I initially was thinking about a salad (I knew I wanted to make a hazelnut vinaigrette) but salad greens soaked in turkey broth is less than appetizing. Then I remembered the lentils I purchased at the Chequamegon Co-op a few months ago and figured why not make a salad with lentils, instead of lettuce?? Lentils, soaked in a hazelnut vinaigrette, and sirloin are only appetizing but make for a hearty dinner with these damp days we’ve been experiencing lately.

_DSC5903.jpg
_DSC5906.jpg
_DSC5910.jpg
_DSC5916.jpg

Green Lentil Salad with Sirloin, Gorgonzola, and a Hazelnut Vinaigrette

2 South Shore Meats sirloin steaks (about 2 pounds), seasoned with equal parts steak seasoning and Aleppo peppers
4 medium-sized sweet potatoes, peeled and diced
2/3 cup diced carrots, about 1 large, 2 medium or 4 small-sized carrots
1 medium onion, chopped
2 garlic cloves, minced
1 medium shallot, peeled and sliced
4 cups chicken or turkey broth
1 1/2 cups green lentils
1/2 cup gorgonzola, crumbled
1/4 cup butter
1/4 cup plus 2 tablespoons olive oil, divided
1/4 cup plus 2 tablespoons hazelnut oil
1/2 tablespoon Aleppo pepper, can substitute hot paprika or crushed red pepper flakes
1 teaspoon maple syrup
1 teaspoon Dijon mustard
1/2 teaspoon kosher salt
1/2 teaspoon pepper
1/2 teaspoon fresh rosemary, minced
1/2 teaspoon fresh thyme, minced
Kosher salt and pepper, to taste (for hazelnut vinaigrette)

Preparation
Preheat oven to 400 degrees and take steaks out of the refrigerator (you want them to be room temperature when you cook them).

Place the sweet potatoes in a bowl and add 2 tablespoons olive oil, Aleppo peppers, salt and pepper. Toss to combine and place on a parchment-lined sheet tray. Roast for about 30 minutes, turning frequently, until the potatoes are soft and golden brown. Set aside.

Make the hazelnut vinaigrette. Combine the hazelnut oil, sherry vinegar, maple syrup, Dijon, salt, and pepper in a covered container. Shake to thoroughly combine and set aside.

Heat 1/4 cup of olive oil in a large saucepan over medium heat and add the carrots and onion and cook for about 5 minutes, or until softened. Add the garlic, rosemary, and thyme and sauté for another 2 or 3 minutes, or until the garlic and herbs are fragrant. Add the broth and lentils, mix to combine, lower the heat, cover, and simmer until the lentils are tender, about 30 minutes. Once the lentils are tender, drain them, add the sweet potatoes, and toss with hazelnut vinaigrette.

While the lentils are cooking, place a cast iron pan over high heat (you want the pan to be very hot). Melt 2 tablespoons of butter in the pan and swirl to coat. Add steaks to pan and cook 5 minutes on each side or until browned. Reduce heat to medium-low; add remaining butter to pan. Carefully grasp pan handle using an oven mitt or folded dish towel. Tilt pan toward you so butter pools; cook another 2 or 3 minutes, basting steaks with butter constantly. Remove steaks from pan; cover loosely with foil. Let stand 10 minutes .

Slice the steak and place on top of the lentils. Sprinkle the gorgonzola on top and serve immediately.

_DSC5918.jpg
_DSC5922.jpg

Fall is Here and That Means Stuffed Squash

_DSC5780.jpg
_DSC5782.jpg
_DSC5789.jpg

I remember buying Dorie Greenspan’s cookbook, Around My French Table, and thinking — a) this woman really knows how to cook and b) I really need to got to France. Since a trip to France wasn’t in the cards, nearly every meal we ate, for weeks after, were Dorie recipes and my northern Wisconsin table had a decidedly French flavor in that winter of 2010. One of my favorites to this day is her Pumpkin Stuffed with Everything Good so, when I walked into the Chequamegon Co-op on Tuesday and spied a pile of exuberantly speckled Carnival squash — I knew exactly what I was going to make for dinner.

_DSC5791.jpg
_DSC5799.jpg

I had been wondering what to make with South Shore Meat’s polish sausage and figured using it in the squash stuffing, along with a Yoman Farms leeks, a Hauser’s apple, and a Great Oak Farm’s onion, would be a good idea. And it was. Everyone, even Meghan (not an enthusiastic squash eater), gave this recipe rave reviews. Plus, it’s an easy and filling dinner — a welcome thing on a busy weeknight!

_DSC5803.jpg
_DSC5808.jpg
_DSC5813.jpg

Squash Stuffed with All Sorts of Good Things

3 Carnival squash, cut in half and seeds removed
1 pound South Shore Meats polish sausage
1 cup wild rice, uncooked
2 stalks celery, chopped
1 red onion, chopped
1 medium leek, white and light green parts sliced
4 cloves of garlic, chopped
1 apple, peeled and chopped
1/3 cup pecans, chopped
1 cup cream
3 tablespoons olive oil
2 tablespoons maple syrup
1 tablespoon sherry vinegar
1 teaspoon fresh thyme, minced
Salt and pepper, to taste

Preparation
Preheat oven to 400 degrees. Place squash halves, cut side down, in a roasting pan filled with a couple of inches of water and place in oven. Roast for 45 minutes, or until the squash is tender (a skewer or fork can easily be inserted) but is still holding its shape. Set aside.

Place 3 cups of water and 1/2 teaspoon of salt in a saucepan with a lid and bring to a boil. Add the wild rice, bring back to a boil, and then reduce to a steady simmer, cover the pan, and cook until kernels are tender — about 45 minutes. Drain and set aside.

In a large saute pan, brown the polish sausage until cooked thoroughly. Remove from pan and set aside. In the same pan, add the olive oil and onion, cook over medium heat for about 10 minutes, stirring occasionally, until softened and translucent. Add the leek, celery, and apple and cook for another 5 minutes. Add the garlic, thyme, and pecans and cook for a couple of minutes, or until the garlic is fragrant. Add the cream, maple syrup, sherry vinegar, polish sausage, and wild rice. Mix thoroughly and scoop the filling into the cavity of each squash half, piling it into a mountain so that it holds as much as possible. Place in oven and roast for another 15 minutes. Serve immediately.

_DSC5816.jpg
_DSC5818.jpg

Braised Chicken with Champagne Grapes

_DSC5608.jpg
_DSC5611.jpg
_DSC5613.jpg

A few weeks ago, I was at the Chequamegon Co-op and saw a package of Champagne grapes in the produce section — I placed them in my basket, not knowing what I’d do with them when I got home. They seemed too special to just eat raw or throw into a chicken salad, they are Champagne grapes after all, but I was at a loss for ideas….until I remembered David Lebovitz’s blog post about roasting grapes and chicken. Thankfully it’s cooled down and turning on the oven is back to being a reasonable option, as opposed to an insane idea that results in turning our 100-plus year old home into a sauna, so I got started recreating his Parisian recipe in my northern Wisconsin kitchen. This is a solid recipe — pretty easy to put together and definitely well-suited to the fall evenings we have in front of us!

_DSC5625.jpg
_DSC5633.jpg
_DSC5636.jpg
_DSC5639.jpg

Braised Chicken with Champagne Grapes

1 whole chicken, spatchcocked (instructions here
1/2 cup thick-cut bacon, diced
1 small onion, chopped
8 - 10 whole cloves garlic, peeled
1 cup white wine
1 cup chicken broth
1/4 cup sherry vinegar
2 tablespoons olive oil
1 1/2 teaspoon kosher salt
1/2 teaspoon coarse ground black pepper
Handful of fresh thyme sprigs
Three or four small bunches of red grapes

Preparation
Preheat oven to 350 degrees.

Spatchcock (instructions here) the chicken, season it with salt and pepper, and set aside.

Heat 2 tablespoons of olive oil over medium heat in a Dutch oven or roasting pan with a lid. Place the chicken, skin side down, in the pan and sear until its golden brown, about 5 - 8 minutes. Flip the chicken and sear for another 5 - 8 minutes. Remove from the pan and set aside.

Sauté the bacon until it’s mostly cooked and then add the onions, salt, and pepper. Cook until the onions are softened and translucent, add the garlic cloves, stir to incorporate, and cook for another two minutes.

Add the wine, chicken broth, and vinegar to the Dutch oven or roasting pan and bring to a boil. Remove from the heat and add the chicken, skin side up, and the thyme sprigs. Cover and place in oven for 30 minutes.

Remove the pot from the oven and tuck the grape bunches alongside the chicken. Place back in oven, uncovered, and cook for another 30 - 45 minutes, or until the chicken reaches an internal temperature of 165 degrees and the sauce is thickened.
 

_DSC5643.jpg
_DSC5646.jpg
_DSC5648.jpg

Elote Pizza -- A Good Use for Corn

_DSC5525.jpg
_DSC5533.jpg
_DSC5557.jpg

I'm not the biggest fan of large crowds but when we lived in the Twin Cities, I looked forward to the Minnesota State Fair for two reasons -- the animal barns and the food. And in particular, I always beelined to the grilled corn on the cob booth (and the fried pickles but that's another blog post). There's nothing quite like sweet corn, hot off the grill, and dripping with butter....until I encountered Elote, or Mexican street corn. That was a game-changer.  

Imagine this -- grilled sweet corn, basted with Crema Mexicana, and then rolled in crumbled quesco fresco, Tajin, and cilantro. While good-old corn on the cob with butter and salt will always have a place in my heart, its South-of-the-Border cousin has become a main-stage player in our summer dinner rotation.

_DSC5558.jpg
_DSC5566.jpg
_DSC5570.jpg
_DSC5601.jpg

We've had corn in our CSA boxes for the past few weeks and I had 3 lonely ears of corn in my fridge, looking for a job (yes, I have CSA veggie orphans in my fridge as well!). It was pizza night and I figured why not introduce Mexican street corn to Italian pizza?? I had a recipe for cilantro pesto that didn't make the cut for the cookbook -- turned out it was the perfect substitute for a tomato-based pizza sauce (if you have any leftovers, it really adds a little something-something to a fried egg sandwich with avocado). The pesto recipe, combined with the lonely ears of corn and the leftover Crema from our tamale dinner provided just the right amount of inspiration for this Elote pizza . 

If you don't have Crema Mexicana in your fridge, you can substitute creme fraiche thinned with a little buttermilk, but the Tajin and quesco fresco are key to getting the flavors 'right' for this pizza. You can find Tajin at Hansen's IGA in Washburn and the Chequamegon Food Co-op in Ashland has quesco fresco. If you don't live in the Chequamegon Bay area, check out Cub foods or a Hispanic grocery store -- they'll be able to set you up. I've made all sorts of pizzas and while it's hard to pick a favorite, this pizza was seriously good....and it'll be on the menu again before corn season is over!  

_DSC5575.jpg
_DSC5577.jpg
_DSC5579.jpg
_DSC5584.jpg

Elote Pizza
(makes 3 or 4 pizzas)

Pizza dough (recipe here) or use your favorite recipe

Cilantro Pesto 
2 cups packed cilantro, leaves and tender stems, plus more for serving
1/2 cup olive oil
3/4 cup roasted pistachios, shelled
1/2 cup Parmesan, shredded
2 tablespoons lime juice, freshly squeezed
2 medium garlic cloves
1 teaspoon kosher salt (less if you are using salted pistachios)
1/4 teaspoon crushed red pepper

Pizza Toppings
1 red onion, thinly sliced and divided
1 jalapeño (if you like it less spicy) or serrano (if you like it hot), seeded, sliced, and divided
3 ears of corn, husks and silk removed, and divided
1 1/2 cups of quesco fresco, crumbled and divided
1 cup Crema Mexicana
1/4 cup cilantro, chopped
2 garlic cloves, minced or grated with a Microplane grater
Cilantro, rough chopped, and Tajin seasoning for serving. 

Preparation
Make the pesto. Combine all the pesto ingredients in the bowl of a food processor, except the olive oil, and pulse until mixture is coarse and combined. With the machine running, add the olive oil in a steady stream until the pesto is smooth and thoroughly combined. Set aside. 

Make the sauce. In a small bowl, combine the Crema Mexicana, 1/4 cup cilantro, and minced garlic cloves and stir to mix thoroughly. Set aside. 

Place the corn in boiling and salted water and cook for about 5 minutes. Remove from the water and allow to cool slightly. Once it's cool enough to handle, remove the kernels from the cob and set them aside. 

When ready to assemble the pizzas, preheat the oven to 450°F and place a pizza stone in the oven. Heavily flour a work surface. Remove a tennis ball–sized piece of dough from the larger ball and roll it out into a 12-inch round on work surface. Using a fork, poke holes in the crust. Transfer the crust onto a pizza peel or a parchment-lined baking sheet without a lip. 

Spread the pesto (about 1/3 cup) on the pizza dough and place a handful of sliced red onions, corn, serrano or jalapeño, and Queso Fresco on the pizza and then carefully place the pizza on the pizza stone and bake until the edges of the crust are brown and the onions and cheese are beginning to brown, about 10 minutes. 

When the pizza is done, remove from oven and drizzle the Crema Mexicana, sprinkle the Tajin seasoning, and a toss a tablespoon or so of chopped cilantro on top and serve immediately. 

_DSC5587.jpg
_DSC5592.jpg
_DSC5595.jpg

Grilled Peach, Burrata, and Prosciutto Salad

_DSC5419.jpg
_DSC5426.jpg

The peaches from my latest Lake Superior CSA's fruit share were at their peak of ripeness -- sweet with a nice firm texture. They were perfect for grilling because they wouldn't turn to mush and, while I've never grilled a peach before, I figured the non-mushy factor was key. Other than that, the components of the salad were pulled from the fridge -- I had burrata and prosciutto on hand from the Chequamegon Food Co-op and there were red onions from Great Oak Farm in the vegetable box. 

_DSC5434.jpg
_DSC5438.jpg

I never keep the markers for what's planted in my garden so I have no idea what variety of basil this is but man, it's a serious producer and seems to thrive with my benign-neglect gardening style. You can substitute another herb in the salad, if you aren't a fan of basil -- thyme or oregano would be good stand-ins. 

_DSC5442.jpg
_DSC5451.jpg
_DSC5455.jpg

Grilled Peaches with Burrata, Proscuitto, and Arugula  

2 pounds of peaches, pit removed and sliced
1/4 red onion, sliced
1 8-ounce ball of burrata, sliced and rough chopped
5 ounces arugula
6 slices proscuitto, torn into pieces
1/4 cup olive oil, plus extra for the peaches
2 tablespoons lemon juice, freshly squeezed
2 tablespoons balsamic vinegar
Handful of basil, chopped
Maldon sea salt and coarse ground pepper

Preparation
Light the grill or preheat a grill pan on the stovetop. Place the cut peaches in a bowl, drizzle olive oil over top, and sprinkle with salt and pepper. Grill, cut side down, for about 5 minutes, or until lightly charred, and then flip and grill for another 5 minutes. Remove from grill and let cool. 

Whisk the lemon juice and olive oil in a bowl, add the arugula, toss to evenly distribute the dressing, and place on a platter. Place the peaches, red onion, prosciutto, burrata, and basil leaves on top, sprinkle with balsamic vinegar, Maldon sea salt, and pepper, Serve immediately. 

_DSC5456.jpg
_DSC5460.jpg

It's Tomato Season -- Want to Make Salsa??

_DSC5473.jpg
_DSC5470.jpg
_DSC5479.jpg

It's no secret that I'm not the biggest fan of summer but there are a couple of things that keep me coming back for more: my flower garden is a cacophony of color, it's still light out for our usual 8:30 dinner time, and my all-time favorite -- fresh from the farm tomatoes and garlic. I like tomatoes in all their incarnations -- sliced with Maldon sea salt on top, in a sandwich with bacon and avocado, in a quiche with corn, and on a tart with gorgonzola and pancetta. Seriously, they make an appearance at nearly every dinner when the tomato season is in full swing and homemade salsa is a great way to harness that summer tomato goodness.  

_DSC5480.jpg
_DSC5486.jpg
_DSC5488.jpg

Lake Superior CSA has a plan to make you a salsa-making master -- it's as easy as visiting their website (link here) and then using my recipes for Pico de Gallo and a blender restaurant-style salsa (which is my favorite and the recipe featured in these photos)....or use your own favorite salsa recipe! These two salsas are pretty different in taste and texture -- the pico is fresh and chunky (well-suited for chips) and the blender salsa is smoother, in both texture and flavor (perfect for tacos and tamales). They are super easy to put together and are a definite step-up from grocery store salsas! 

_DSC5494.jpg
_DSC5497.jpg
_DSC5493.jpg

Blender Restaurant-Style Salsa

2 pounds vine-ripened tomatoes
2/3 cup onion, rough chopped
2 garlic cloves, crushed
2 jalapeños, rough chopped, seeds removed if you prefer a less spicy salsa (can substitute your favorite peppers, adjust amount based on how spicy you want the salsa)
1/2 cup cilantro
1 1/2 teaspoon cumin
1 teaspoon kosher salt
2 tablespoons vegetable oil 

Preparation 
Rough chop the tomatoes, onion, peppers, garlic, and cilantro and add them to your blender. Add the cumin and salt, pulse it a few times and then blend the salsa for 30 -- 45 seconds. 

Preheat the oil in a medium sized pan, add the salsa, and bring to a boil. Reduce the heat and then simmer for about 30 minutes (if you use plum tomatoes, reduce the time to about 15 minutes as the tomatoes will have less liquid), or until the salsa is a deep red color and has reduced down a bit. Taste and add more salt, if needed. This is not a canning salsa but will keep in your refrigerator for two weeks. 

Pico de Gallo

2 pounds vine-ripened tomatoes, chopped
2 fresh jalapeño chiles, chopped and seeds removed, if you prefer a less spicy salsa
1/2 medium red onion, chopped
1/2 cup cilantro, chopped
2 garlic cloves, minced
2 tablespoons fresh lime juice
Kosher salt, to taste

Preparation
Place all ingredients in a non-reactive bowl, taste for salt, and let it sit for about 30 minutes before serving. One note about the tomatoes -- if you are using slicing or beef-steak tomatoes, remove the seeds and place in a colander for about 30 minutes to remove as much as the juice as possible. Pico is best served on the day it's made but will keep for a couple of days in the fridge. 

_DSC5498.jpg

Pizza with Balsamic Roasted Blueberries, Arugula, and Avocado

_DSC5177.jpg
_DSC5181.jpg
_DSC5185.jpg

Blueberry pizza?? Sounds pretty strange but it's good, trust me. Blueberries, because they aren't terribly sweet, are well-suited to more savory applications and this pizza was inspired by a blueberry-balsamic chutney (recipe here) I made in 2012 (and make every year because it's really good on brie or sharp cheddar). Sunday night is pizza night around here and since it's been so hot lately, topping this pizza with arugula and avocado seemed like a 'summery' addition to our repitoire. 

_DSC5187.jpg
_DSC5196.jpg
_DSC5200.jpg
_DSC5205.jpg

Summer is not my favorite season, I'm more of a fire in the wood stove/snowstorm/dark at 5 PM kind of woman, but I love being able to walk outside to the garden and grab a handful of fresh herbs, a few tomatoes, or a yellow squash. And to be truthful, my gardening skills are pretty meager -- I'm a Darwinian gardener, which means if it can't survive with a fair amount of benign neglect, it's probably going to have a rough go of it in my garden. Which is why I stick to herbs and squash -- they are resilient and are perfect examples of the old adage,  bloom where you're planted. And it's also why I love picking up my weekly box from the Lake Superior CSA folks -- we get all sorts of good food in our kitchen, in spite of my lackluster gardening/food-growing skills!

_DSC5209.jpg
_DSC5212.jpg
_DSC5216.jpg

Pizza with Balsamic Roasted Blueberries, Arugula, and Avocado
Makes 2 pizzas

Pizza Dough (you'll have extra pizza dough leftover, this recipe makes enough for about 7 or 8 pizzas)
3 cups warm water
1/3 cup olive oil
1½ tablespoon yeast (I use SAF red instant yeast)
1½ tablespoon kosher salt
1 tablespoon sugar (white or raw)
7 cups bread flour

Pizza Topping
1 cup blueberries
1/4 cup balsamic vinegar, divided
1/4 cup olive oil, plus extra for the pizza dough
1/2 red onion, sliced
1/2 avocado. peeled and sliced
1/2 cup Sassy Nanny chèvre, divided
2 cups of arugula, divided
1 tablespoon lemon thyme, leaves removed from stem but not chopped (can substitute regular thyme)
1 tablespoon basil, chopped
Kosher salt and pepper

 Preparation 

To make the dough, combine the water, oil, yeast, salt, and sugar in a large bowl or the bowl of a stand mixer. Add the flour and mix until it comes together, about 3 minutes using the dough hook of the stand mixer, longer if mixing by hand. Knead for 5 minutes (with stand mixer or by hand); cover loosely and allow to rest at room temperature until the dough doubles in volume, about 2 hours.

When ready to assemble the pizzas, preheat the oven to 400°F and line a sheet tray with parchment paper. Toss the blueberries with 2 tablespoons balsamic vinegar and 1 tablespoon of olive oil, sprinkle with a little kosher salt, and place on the tray. Roast until just tender and starting to burst, about 10 minutes. Set aside (the blueberries can be prepared in advance and stored in the refrigerator until ready to use).

Raise the oven temperature to 450°F and place a pizza stone in the oven. Heavily flour a work surface. Remove a tennis ball–sized piece of dough from the larger ball and roll it out into a 12-inch round on work surface. Using a fork, poke holes in the crust. Transfer the crust onto a pizza peel or a parchment-lined baking sheet without a lip. 

Sprinkle olive oil on the pizza dough and spread to cover the entire pizza. Place 1/2 of the sliced red onions, chèvre and roasted blueberries on the pizza and then carefully place the pizza on the pizza stone and bake until the edges of the crust are brown and the onions are beginning to brown, about 10 minutes. While the pizza is in the oven, place the arugula and the remaining balsamic vinegar and olive oil in a bowl, season with salt and pepper toss to combine. Set aside. 

When the pizza is done, remove from oven and place half of the arugula on top, followed by the half of the avocado, and serve immediately.  

_DSC5219.jpg
_DSC5224.jpg
_DSC5231.jpg

One-Sheet Sesame Beef, Broccoli, and Green Beans

_DSC5382.jpg
_DSC5386.jpg

August has always been an incredibly busy month -- sports practices starts, friends and families come to visit, and there are all sorts of fun things to do nearly every night. And that means dinner needs to be quick and easy. This one-sheet Asian inspired dinner fits the bill -- it's easy, takes less than 45 minutes from prep to plate, and uses some of the fresh vegetables we're getting each week in our CSA boxes!

_DSC5393.jpg
_DSC5395.jpg

One-Sheet Beef, Broccoli, and Green Beans

2 or 2 1/2 pounds of South Shore Meats sirloin, cut into 2-inch pieces
3 cups broccoli florets
1/2 pound of green beans, trimmed
1/2 onion, sliced
1 8-ounce package of mushrooms
2 garlic cloves, minced
3 tablespoons sesame oil
3 tablespoons soy sauce, divided
2 tablespoons vegetable oil
2 tablespoons lime juice
2 tablespoons chile-garlic sauce
2 tablespoons rice vinegar
2 tablespoons brown sugar, divided
1/2 teaspoon ginger powder
Peanuts and chopped cilantro, for garnish

Preparation 
Heat over to 425 degrees. 

Line a sheet ray with parchment paper, or spray with cooking spray, and set aside. In a large bowl, mix the garlic, sesame oil, 1 tablespoon of soy sauce, vegetable oil, lime juice, chile-garlic sauce, rice vinegar, 1 tablespoon of brown sugar, and ginger powder. Add the broccoli, green beans, onion, and mushrooms, mix thoroughly, and place on the sheet tray. In the same bowl, add the remaining soy sauce and brown sugar, mix to combine, add the sirloin pieces, and stir coat. 

Add the beef to the pan with the vegetables. Roast for 10 - 14 minutes, or until beef is cooked to desired doneness (145 degrees for medium-rare) and vegetables are tender. Sprinkle with cilantro and peanuts. Serve with white rice. 

_DSC5405.jpg
_DSC5414.jpg

Blast from the Past -- Lemony Green Bean Salad

_DSC5317.jpg
_DSC5318.jpg

Looking back, there are two distinct events that ignited my love of cooking when I was 18 -- I made fajitas (complete with McCormicks seasoning) for Ted and I bought Susan Branch's Heart of the Home cookbook. Her cookbook introduced me to pesto, eggs in tomatoes, pasta with smoked salmon and peas (recipe here), and this recipe for a green bean salad. 

_DSC5321.jpg
_DSC5325.jpg

Ted and I used to l live in Lowertown in St Paul and every Saturday morning during the summer started with a trip to the Farmer's Market. This green bean salad was in heavy rotation during those days and even now, when I make it, I think of our little kitchen in apartment 306, listening to  Everything But The Girl's Come on Home with our Basset Hound Lucy underfoot. It never ceases to amaze me how food can conjure feelings, smells, and memories from the past -- even something as simple as a green bean salad. 

_DSC5330.jpg
_DSC5332.jpg

Lemony Green Bean Salad
(adapted from Heart of the Home by Susan Branch)

1 pound of fresh green beans, ends trimmed
3 tablespoons olive oil
3 tablespoons lemon juice, freshly squeezed
2 cloves garlic, chopped
1 small red onion, chopped
1/2 yellow or red pepper, chopped
1 tablespoon basil, chopped
1/8 teaspoon dry mustard
1/2 teaspoon kosher salt
1/4 teaspoon black pepper

Preparation
Cook the beans in boiling water for 3-5 minutes, until crisp-tender. Drain and immediately place in a bowl with ice-cold water, to stop the cooking. Set aside, Combine all remaining ingredients and mix well. Pour over beans, mix to combine, and place in refrigerator for about an hour. Serve cool, but not cold. 

_DSC5337.jpg
_DSC5338.jpg
_DSC5341.jpg

Chorizo and Beef Meatballs Stuffed with Goat Cheese

_DSC5062.jpg
_DSC5068.jpg
_DSC5075.jpg

About 3 years ago, I went though a major meatball phase -- everything from good old Italian with pasta to Rueben with sauerkraut to Swedish and lefse. It was a good run and spanned quite a few countries but for some reason, I never stuffed one. Until last week. My sister Liz and her family were visiting and I wanted to make something special that would appeal to both adults and kids -- and pasta and fancy meatballs seemed like an appropriate welcome-to-Bayfield dinner. 

_DSC5083.jpg
_DSC5088.jpg
_DSC5094.jpg
_DSC5098.jpg

I had a couple of pounds of South Shore Meats chorizo in the freezer and figured that would be a good stand-in for plain old pork sausage in the meatballs and that turned out to be a seriously good call. The meatballs had just the right amount of seasoning and were a nice compliment to the simple tomato sauce. 

_DSC5100.jpg
_DSC5105.jpg
_DSC5107.jpg
_DSC5111.jpg

If there is anything tricky about this recipe, it's the process of wrapping the meat around the cheese. Having a semi-frozen ball of cheese makes the whole process a lot easier because you can be a little more assertive in your sealing because the cheese keeps it shape. Try and get a good seal, otherwise the cheese will seep out and you'll be left with an empty, but still delicious, meatball. 

_DSC5121.jpg
_DSC5123.jpg
_DSC5130.jpg
_DSC5134.jpg

Homer, my sister's Pug, came to visit and immediately remembered that the treat jar is near the door, Aldo is an overly enthusiastic host, and the best place to hang out is at my feet when I'm cooking because sous-chef/pup types are first in line for taste-testing. He didn't get a meatball though -- those were reserved for the two-legged family members!

_DSC5139.jpg

Chorizo and Beef Meatballs Stuffed with Goat Cheese

1 pound South Shore Meats ground beef
1 pound South Shore Meats chorizo
1 cup breadcrumbs
2/3 cup whole milk ricotta
1/3 cup heavy cream
1 egg, beaten
1/2 medium Vidalia onion, chopped
2 garlic cloves, chopped
1 tablespoon fresh basil, chopped
1 tablespoon fresh oregano, chopped
1 teaspoon kosher salt
1 teaspoon black pepper
1 8-ounce container of Sassy Nanny Lake Effect goat cheese

Tomato Sauce
2 28-ounce cans of chopped tomatoes
1 Yoman Farms yellow squash, chopped
1/2 medium Vidalia onion, chopped
4 tablespoons butter
2 garlic cloves, chopped
1/2 teaspoon red pepper flakes
Kosher salt and pepper, to taste

Preparation
Combine the chorizo and ground beef in a large bowl and thoroughly combine (I use my hands) and then add all the remaining ingredients, except the goat cheese, and using your hands again, mix until thoroughly combined. Set aside. 

Scoop out 10 large gumball-sized pieces of goat cheese and roll into a balls. Place on a parchment lined sheet tray and place in freezer, uncovered, for 15 minutes.  

While the goat cheese is in the freezer, combine all the ingredients for the tomato sauce in a Dutch oven or large sauté pan and cook over medium-high heat until the sauce starts to bubble. Reduce to a simmer. 

Remove the goat cheese balls from the freezer. Divide the meatball mixture into 10 equally-sized patties and set aside. Place a goat cheese ball in the middle of the meatball patty and then wrap the meat around the cheese, taking care to seal the meat completely around the cheese. Set aside and repeat with the remaining meatball patties and goat cheese balls. 

Place the meatballs in the tomato sauce and cover. Cook over low heat (you want to sauce to be at barely a simmer, just a few bubbles breaking the surface) for about 40 minutes, or until the meatballs reach an internal temperature of 165 degrees. 

Serve immediately over pasta with freshly grated Parmesan. 

_DSC5145.jpg
_DSC5147.jpg
_DSC5159.jpg

Roasted Cherry and Chèvre Tart with Onion Confit

_DSC5031.jpg
_DSC5036.jpg
_DSC5040.jpg

I'm a big believer in having a stash of frozen puff pastry at the ready at all times. What's not love about a flaky, buttery pastry dough that can wear savory or sweet toppings with ease? When I saw the tart cherries in last week's CSA box, I wanted to avoid the obvious (pie) and strike out on a different path but wasn't sure what direction to go. I was cleaning out the freezer and spied the onion confit that's been sitting in there since last Thanksgiving. It was the perfect base for the roasted cherries and chèvre -- just sweet enough to compliment the cherries but savory enough to balance everything out. Since cherry season is still going, this tart will be on the table a couple more times until the season runs its course! 

_DSC5047.jpg
_DSC5051.jpg
_DSC5055.jpg

Roasted Cherry and Chèvre Tart with Onion Confit

1 sheet puff pastry, thawed and rolled into a 10 x 16 rectangle
2 cups tart or sweet cherries, halved and pitted
1/2 cup onion confit (recipe here, see note at the end of the recipe)
1/2 cup Sassy Nanny chèvre, crumbled
2 tablespoons balsamic vinegar
2 tablespoons lemon thyme, leaves removed from the stem but not chopped
1 tablespoon olive oil
Kosher salt and pepper

Preparation
Preheat oven to 400 degrees.

Line a sheet tray with parchment and place the puff pastry on the sheet tray. Place in oven and cook for 10 minutes. Remove from oven and cut a rectangle (leaving about 1 1/2 inch border) in the middle of the puff pastry. For tips on how to cook with puff pastry, check out this link. Set aside. 

Place the cherries, balsamic vinegar, olive oil, 3/4 teaspoon of kosher salt, and 1/2 teaspoon of black pepper in a bowl and stir to combine. Place on a parchment lined sheet tray and roast for 10 minutes, or until softened. Set aside. 

Place the onion confit, roasted cherries, and chèvre evenly along the puff pastry and then sprinkle the thyme leaves over the tart. Place in oven and bake, rotating once, for 20 - 25 minutes, or until golden brown and puffy around the edges. Serve immediately or at room temperature. 

***I changed the onion confit recipe a little -- I chopped the cippollini onions (you can substitute Vidalia onions) and I substituted 1/2 cup golden raisins and 1/2 cup currants for the 1 cup raisins. 

_DSC5056.jpg
_DSC5058.jpg

Pea Pancakes with Bodin's Smoked Salmon

_DSC4671.jpg

Sundays are all about pancakes around here. I have a sourdough starter in the fridge that needs a reboot once a week and while sourdough bread is good, sourdough pancakes are even better (and easier). Sometimes though, I want to shake it up and make savory/non-sourdough pancakes and these pancakes fit the bill. They are a hybrid of a crepe and a pancake so cook them thoroughly on one side before gingerly flipping them to finish cooking. 

_DSC4675-2.jpg
_DSC4680.jpg
_DSC4683.jpg

A few weeks ago, I happened upon a farmstead outside of Stevens Point that had fresh peas for sale and since fresh peas are one of my favorite things in the world, I bought 10 pounds (which is, in case you're wondering, a lot of peas). Peas were the inspiration for quite a few meals and these pancakes were no exception -- peas, dill, and smoked salmon are the foundation for one of my  favorite pasta dishes (recipe here) and they are now the foundation for one of my favorite savory pancake recipes. 

_DSC4687-2.jpg
_DSC4690.jpg

The good news about a) living in northern WI where our growing season is later than most points south and b) I travel south frequently is that I get to enjoy pea/tomato/garlic season a little earlier and a little later than most folks. Peas should be just coming into season up here -- keep your peeled for them (you can also use frozen peas) and make these pancakes with some Sassy Nanny feta, Bodin's smoked salmon, and River Road Farm's garlic scapes on a Sunday morning. You won't regret it! 

_DSC4693.jpg

Pea Pancakes with Bodin's Smoked Salmon

1 cup fresh or frozen peas
3 large eggs
1 cup cottage cheese
4 green onions, chopped
1/2 cup Sassy Nanny feta, crumbled
1/2 cup all-purpose flour
1/4 cup buttermilk
2 tablespoons dill, chopped, plus extra for garnish
1 teaspoon kosher salt
1/4 teaspoon cayenne
6 tablespoons butter, divided
1/4 pound of Bodin's smoked salmon

Garlic Scape Butter

1/2 cup butter
1 teaspoon garlic scapes, minced
1/2 teaspoon lemon juice, freshly squeezed
1/2 teaspoon dill
Salt and pepper, to taste

Preparation
Place the butter, garlic scapes, lemon juice, and dill in a small saucepan and heat over medium heat until melted. Set aside. 

If using fresh peas, cook in a small saucepan of boiling salted water until tender, about 3 minutes (if using frozen peas, do not cook). Drain.

Purée eggs, green onions, cottage cheese, buttermilk, feta, flour, 2 tablespoons butter, dill, salt, and cayenne in a blender until smooth. Transfer batter to a medium bowl and stir in peas. (Batter should be thick but pourable; stir in water by tablespoonfuls if too thick).

Heat 2 tablespoons of butter in a large skillet over medium heat. Working in batches, add batter to skillet by 1/4-cupfuls. Cook pancakes until bubbles form on top, about 3 minutes. Carefully flip and cook until pancakes are browned on bottom and the centers are just cooked through, about 2 minutes longer.

Serve pancakes drizzled with scape butter and topped with smoked salmon and fresh dill. 

_DSC4709.jpg
_DSC4716.jpg

Prosciutto Wrapped Whitefish with Preserved Lemon and Garlic Scape Butter

_DSC4825.jpg
_DSC4829.jpg
_DSC4831.jpg

It's been bananas around here lately and sometimes a good and quick dinner is just what the doctor ordered. We were headed out to meet friends for drinks on the deck at the Bayfield Inn last week and I had about 30 minutes to pull dinner out of my hat. A magic trick made considerably easier thanks to my CSA box from Bayfield Foods.

I went to the freezer, pulled out a whitefish fillet from Bodin Fisheries, quickly thawed it in a bowl of cold water (in the original wrapper), wrapped it in some prosciutto with red onion, and tossed a handful of scapes and preserved lemons in a small saucepan with some melted butter. The fillets cook up in less than 10 minutes and the crispy prosciutto is a nice compliment to the flaky whitefish. Quick, easy, and delicious -- the unicorn of meal-planning -- but who's to say unicorns don't come to dinner every now and then??!!

_DSC4835.jpg
_DSC4842.jpg

Prosciutto Wrapped Whitefish with a Preserved Lemon and Scape Butter

1 fillet of Bodin Fisheries whitefish
2 slices of prosciutto
2 or 3 slices of red onion, thinly sliced
Salt and pepper, to taste
1/2 cup (1 stick) butter, divided
3 garlic scapes, minced
1 tablespoon preserved lemon, minced (substitute 1 teaspoon lemon zest)
1 1/2 teaspoon freshly squeezed lemon juice
2 or three slices of lemon, for serving

Preparation
Place 6 tablespoons of butter in a small saucepan with the garlic scapes, lemon juice, and preserved lemon/lemon zest and heat over medium heat until melted. Set aside. 

Rinse and dry the whitefish fillet, cut in half. Sprinkle salt and pepper over each fillet and place red onion slices on top. Wrap each fillet in prosciutto and set aside. 

Melt 2 tablespoons of butter in a cast iron skillet over medium-high heat until melted and foamy.  Add prosciutto-wrapped fish fillets and cook for 3-4 minutes per side, until prosciutto is crispy and fish is starting to brown. Reduce heat to medium after a few minutes if the prosciutto starts to crisp up too quickly.  Remove from heat, spoon scape butter over top, and serve immediately with lemon slices on the side. 

_DSC4854.jpg

South Shore Meat's Meatloaf

_DSC4966.jpg

We live in an old house without air conditioning and that means when the temperature goes above 80 degrees -- the oven goes on hiatus and we eat salad, cereal, or use the grill. Last week was beastly, as in 'I want to move into my refrigerator and shut the door' beastly hot, so when I picked up my CSA box and spied the frozen meatloaf last week, I tucked it in the freezer in hopes of cooler days ahead. So, when Monday rolled around and the temperatures and humidity were at a far more civilized level, I know what was for dinner. Meatloaf.

_DSC4970.jpg

As it turns out, frozen meatloaf was just what I needed yesterday -- it was a Monday that really, really lived up to its name. Thankfully, I had the forethought to pull the meatloaf out of the freezer in the morning because by the time I wrapped up my work day, it was 6:30PM and I was hungry, tired, and wasn't in the mood to cook. And that's where a South Shore Meats meatloaf comes in handy -- defrost it, slather it with ketchup, place in an 350 degree oven, and cook for 45 -- 60 minutes, or until the internal temperature reaches 160 degrees. 

It was an all-around win -- it was cool outside, the oven was back on, and we had a seriously good meatloaf, made the good folks at South Shore Meats, for dinner!

_DSC4973.jpg