Cookery Maven Blog

Try A Little Thai On The Grill

Since I live many, many miles from the closest Thai restaurant, I have honed my Thai cooking skills. Not that I mind, I love the smell of lime, garlic, cilantro, nam pla and soy sauce. I made this chicken in 2003 for Charlie's birthday (my first foray into Thai cookery) and have made it ever since. That birthday party was also the first time I made mojitos for a crowd (before I had to develop and hone my bartending skills). I made pitchers of mojitos and forgot to mention to my guests that they needed to add soda water to mitigate the massive amounts of Bacardi Limon, sugar, lime and mint in the pitchers. Needless to say, it was a lively party and everyone needed to eat by the time dinner was served.

I love my grill. It is a Primo ceramic grill/smoker and in my opinion, it's perfect. In typical Maven fashion, I researched the grill question endlessly and it paid off. I can smoke ribs at 200 degrees, grill chicken at 400 degrees or sear a steak at 600 degrees. I am a big believer in hardwood lump charcoal because it free of any funky stuff and it burns steady and hot. I used to use Royal Oak Steakhouse blend charcoal (I bought it at Menard's) but switched to Cowboy because my local hardware store carries it. The charcoal chimney starter never lasts long around here, I always forget to watch it and the handle catches fire. Which begs the question— why do they use a wooden handle on a charcoal starter, planned obsolescence??

Thai Grilled Chicken (from Fine Cooking)

15 cloves garlic

1/4 tsp kosher salt

1 tsp coriander seeds, toasted and ground

1 tbsp peppercorns, toasted and ground

3/4 cup minced cilantro stems (from about 1 large bunch)

1/4 cup soy sauce

2 tbsp vegetable oil

1 chicken, 3-1/2 to 4 pounds, fat trimmed and discarded, chicken rinsed and thoroughly patted dry

Make the marinade

In a food processor, mince the garlic with the salt. Add the ground coriander seeds, ground peppercorns, cilantro stems, soy sauce, and oil; purée until completely blended, 1 to 2 minutes. You'll have about 1 cup marinade. Transfer to a bowl, cover, and set aside (refrigerate it if you're working ahead).

Prepare and grill the chicken

Butterfly the chicken. Rinse the chicken and dry it with paper towels.

To butterfly a chicken, position the chicken breast side down. With poultry shears or a sharp chef's knife, cut along one side of the backbone and then down the other. Discard the backbone.

Turn the chicken over and press firmly on the center of the breast. You'll need to break the sternum and some ribs for it to lie flat.

Gently separate the breast and thigh skin from the flesh and slip a bit of the marinade under the skin. Then put the chicken and the rest of the marinade in a large zip-top bag, seal the bag, and massage it to distribute the marinade all over the chicken. Marinate the chicken refrigerated, for at least 1 hour and up to 8 hours. Half an hour or so before grilling, take the chicken out of the refrigerator, remove it from the bag, and put it on a platter.

Prepare a medium-hot charcoal fire with the coals banked to one side or heat a gas grill to high on one side and medium-low on the other.

Spray the chicken generously with the vegetable oil spray and set it, breast side down, on the hottest part of the grill. Cook the chicken uncovered, turning once, until the skin has deep golden grill marks, 7 to 10 minutes. Move the chicken to the cooler side of the grill. Cover the grill and grill the chicken indirectly, turning every 5 minutes or so, until the juices run clear when the spot between the thigh and breast is pricked and an instant-read thermometer inserted in the thickest part of the thigh registers at least 165°F, another 25 to 30 minutes. Transfer the chicken to a serving platter and tent with foil. Let rest for 5 to 10 minutes. Serve with Sweet and Sour Sauce and Jasmine rice.

Sweet and Sour Sauce

1 tbsp crushed red pepper flakes

1/2 tsp kosher salt

3/4 cup granulated sugar

1/4 cup plus 2 tbsp rice vinegar

7 cloves garlic, minced

In a small, dry saucepan, toast the red pepper flakes over high heat until fragrant, 1 to 2 minutes. Add the salt, sugar, and rice vinegar; cook over medium-low heat until the salt and sugar are dissolved. Stir in the garlic. Remove the sauce from the heat and let cool completely. Makes 1/2 cup


A Puff Pastry Package

I think about food a lot. I collect cookbooks, research recipes on the internet and invariably, most of my conversations end up in food land. I had a meeting last week and somewhere between how many servers and what to do if it rains, brie en croute with mascarpone and truffle oil popped up.  As luck would have it, there was a large wheel of sheep's milk brie in my refrigerator. Looks like I had a lovely puff pastry package in my future.

If the phrase, 'process until mixture resembles coarse meal' strikes terror in your heart, head over to the frozen food aisle in the grocery store and check out the puff pastry. I use Pepperidge Farms and it has never failed me, light and flaky every time. On my way to the frozen food aisle, I spied a package of mixed exotic mushrooms. Sautéed mushrooms would be the pièce de résistance in my flaky bundle of cheesy love.

There was something missing and I couldn't put my finger on it. It needed a little zip to highlight the earthy flavors of the brie and mushrooms. Back to the refrigerator for a sherry vinegar glaze. I am a firm believer in vinegar; it's bright acidity plays beautifully against a variety of different flavors— savory and sweet. I figured with the rich puff pastry, cheese and mushrooms, a tangy sherry vinegar glaze would be a tasty counterpoint. Plus, it looked gorgeous.

I sealed the puff pastry, applied an egg wash and popped it in the oven. I forgot to take a picture of the finished product. I was blinded by the gooey, mushroomy goodness and started to eat before I remembered to take a picture. Some of the cheese had seeped out, I think I may have rolled the dough out a little too thin, but it was delicious. This is going into the 'make this again' pile but it seems better suited to a cool fall evening. Next time, I am going to pair it with a green salad and a glass of champagne— a perfect light dinner.

Brie en Croute with Mascarpone, Wild Mushrooms & Truffle Oil

1/2 pound wild mushrooms

2 tbsp butter

1 frozen puff pastry sheet, thawed according to package directions (I use Pepperidge Farms)

1/2 cup mascarpone cheese
1 tbsp truffle oil

2 - 3 tbsp of sherry vinegar glaze (I use Columela)

One 14 - 17 ounce wheel of brie, chilled

1 egg

Preheat oven to 425 degrees. Melt butter in a sauté pan and add mushrooms. Saute until softened and set aside.

On a lightly floured surface roll out 1 sheet of pastry into a 13-inch square.

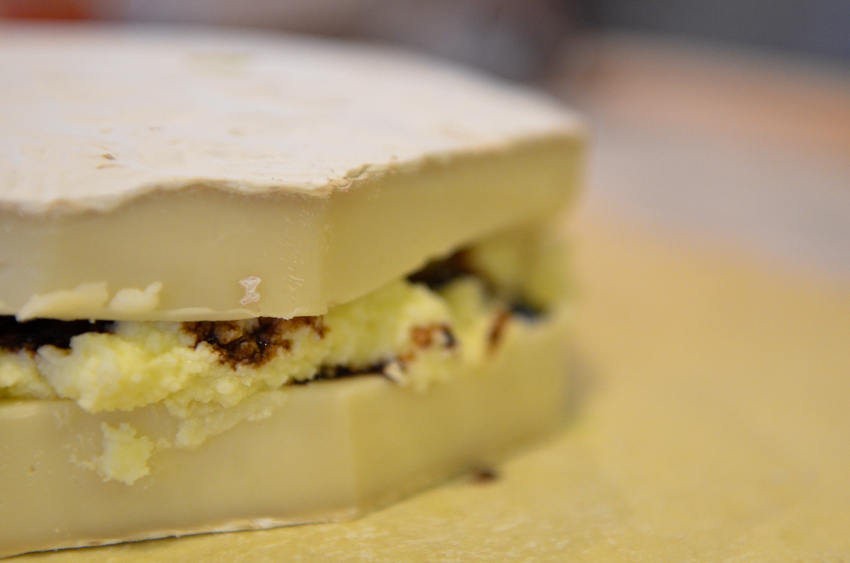
Cut off the sides of the brie and horizontally halve it. Mix the mascarpone and truffle oil together and place on top of the bottom half of the brie round. Cover with the mushroom mixture, drizzle sherry vinegar glaze on top and place the remaining half of Brie, cut side down, on top of it.

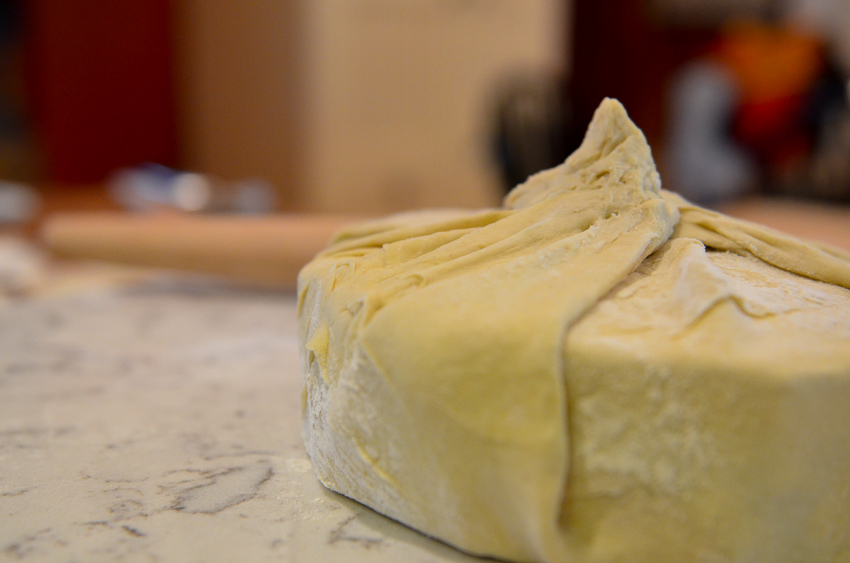
Without over-stretching the pastry, wrap it snugly up over brie and press the edges together to seal. In a small bowl lightly beat egg and brush over the pastry covered brie. Place brie on a parchment covered sheet tray and chill, uncovered, for 30 minutes. Brie may be made up to  this point 1 day ahead and chilled, loosely covered.

Bake Brie in middle of oven until pastry is puffed and golden, about 20 minutes. Let brie stand in pan on a rack 15 minutes and  transfer with a spatula to a serving plate.


Cheesy Bread Done Right

I had some of Michael's Sassy Nanny feta sitting in my refrigerator, the tail end of a hunk of sheep's milk pecorino, mascarpone, half a loaf of nearly stale ciabatta and a handful of grape tomatoes. All the components for one of my favorite things— garlic cheese bread. Except this was going to a fancy pants kind of cheese bread, full of tangy cheese, fresh herbs and tomatoes. Good and tasty things happen when you clean out the refrigerator.

What's In The Fridge Garlic Cheese Bread

1/2 loaf day old ciabatta, cut in half lengthwise

1/2 cup mascarpone
1/4 cup butter, softened

1/3 cup feta (I used Sassy Nanny)

1/4 cup pecorino

3 - 4 garlic cloves, minced

3 tbsp chives, minced

12 - 14 grape tomatoes, halved

salt and pepper

Preheat oven to 425 degrees. Add butter, feta, pecorino and mascarpone to a mixing bowl and mix until combined. Fold garlic, chives and tomatoes into cheese mixture and spread on ciabatta. Sprinkle coarse salt (I use Maldon's sea salt) and pepper on top. Bake in 425 degree oven for 10 minutes or until brown and bubbly. Perfect lunch with a green salad with a tangy vinaigrette.


A Taste Of Summer

I am not the biggest fan of dessert, I would much rather have another glass of wine. However, my family loves ice cream with a passion similar to George's affection for his Chuck-it. I decided to make another run at Mother Of The Year and what better way than with frozen cream, eggs and chocolate? The leap into the land of homemade ice cream was surprisingly easy and there is no looking back, it is so good. Meghan loved it so much, she brought it to school for snack. Not that second and third graders are a tough audience (when it comes to ice cream) but I was secretly proud of my new-found frozen dessert prowess when Meg said her classmates loved it.

I tried two different paths to ice cream heaven: no cook chocolate and a cook and cool vanilla bean. Both were good but I preferred the vanilla bean, the creamy texture was transcendent. I have an ice cream bowl attachment for my Kitchen Aid mixer and it worked very well. However, it is very important to freeze it at least a day in advance. I got a bit impatient, the bowl was not completely frozen and one of my batches had a lot of ice crystals. It was still good but the point of homemade ice cream is the rich and creamy texture (in my opinion).

I am working my way into gelato land. Now that is a place where I might have to take up permanent residence.

No Cook Chocolate Ice Cream

1 (14-ounce) can sweetened condensed milk

1 (5-ounce) can evaporated milk

2 cups whole chocolate milk

2/3 cup chocolate syrup

Whisk all ingredients in a 2-quart pitcher or large bowl until blended. Cover and chill 30 minutes.

Pour milk mixture into freezer container of a 1-quart electric ice-cream maker, and freeze according to manufacturer's instructions. (Instructions and times will vary.)

Remove container with ice cream from ice-cream maker, and place in freezer 15 minutes. Transfer to an airtight container; freeze until firm, about 1 to 1 1/2 hours.

Vanilla Bean Ice Cream

3/4 cup sugar

2 tablespoons cornstarch

1/8 teaspoon salt

2 cups milk

1 cup heavy whipping cream

1 egg yolk

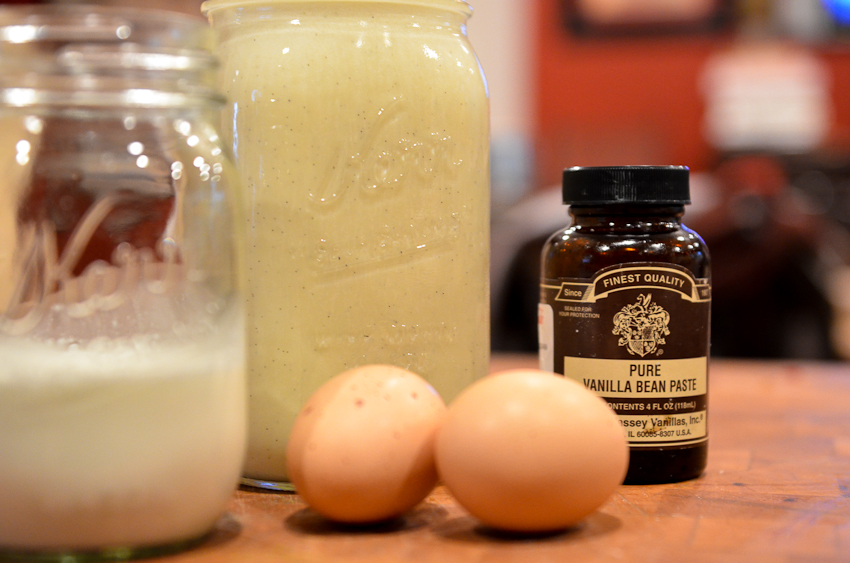
1 1/2 teaspoons vanilla bean paste

Whisk together first 3 ingredients in a large heavy saucepan. Gradually whisk in milk and cream. Cook over medium heat, stirring constantly, 10 to 12 minutes or until mixture thickens slightly. Remove from heat.

Whisk egg yolk until slightly thickened. Gradually whisk about 1 cup hot cream mixture into yolk. Add yolk mixture to remaining cream mixture, whisking constantly. Whisk in vanilla bean paste. Cool 1 hour, stirring occasionally.

Place plastic wrap directly on cream mixture, and chill 8 to 24 hours.

Pour milk mixture into freezer container of a 1-quart electric ice-cream maker, and freeze according to manufacturer's instructions. (Instructions and times will vary.)

Remove container with ice cream from ice-cream maker, and place in freezer 15 minutes. Transfer to an airtight container; freeze until firm, about 1 to 1 1/2 hours.

Both recipes are from Southern Living.

A Cake For Ted's Birthday

Happy Birthday to Teddy. I remember the first birthday I spent with him. We had an afternoon picnic at Fort Snelling along the Mississippi and ate chicken salad from the Byerly's deli. He was turning 21 and had big plans to celebrate his ability to legally imbibe. I was a fresh-faced 19 year old girl without a fake id, thus the birthday lunch. Lots of years, birthday cakes and celebrations later, I finally made Ted his all time favorite cake— Black Forest Torte.

I have been on this earth for 42 years and have yet to make a cake from scratch and I didn't think a birthday cake for a dinner in six hours was the time to start. I bought a Duncan Hines chocolate cake mix and started my baking project. If you remember, following directions is not my forte and as a result, my baking adventures can be fraught with disaster. However, I am a good bartender and I had a couple of secret weapons to mitigate my boxed cake mix: Luxardo Maraschino cherry liqueur and Luxardo Maraschino cherries. I am telling you, these cherries will change your life. They will make you realize the fire engine red 'maraschino' cherries in a Shirley Temple or on top of an ice cream sundae are an abomination. Okay, maybe not an abomination but certainly ordinary and sickly sweet.  I put 2 or 3 tablespoons of the liqueur on each cake round, frosted the cakes with whipped cream, layered the cherries between the layers and on top and shaved good dark chocolate all over (it seemed like a pastry chef thing to do).

It was a little lopsided, the unflavored gelatin I put in the whipped cream to stabilize it did not dissolve properly and I couldn't find birthday candles but it was perfect. Perfect because we were in the kitchen— eating and laughing at the table. A birthday cake ablaze (in Ted's case) with candles reminds me to recognize the beauty of getting older and celebrate how far we have come together.

Cinco de Mayo Tamales

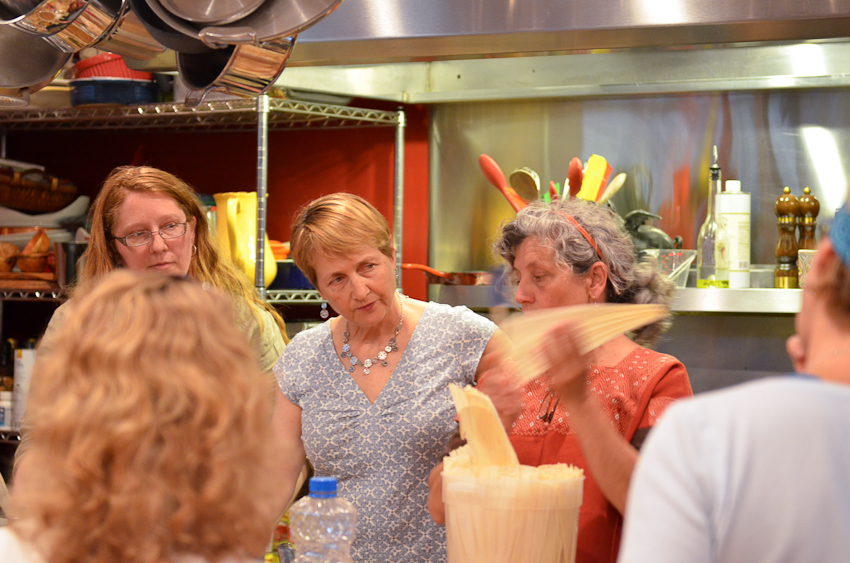
Pat and Ann agreed to share their tamale knowledge with us a week ago. Perfect timing because it was almost Cinco de Mayo and that means tequila. Gail brought some hibiscus syrup from Mexico and made the best margarita I have had (except Kathy's jalapeño margarita with the best salt I have put in my mouth, Tajin ). Tamales are little package of meat or vegetables, masa and cheese and there are quite a few steps to make sure those precious packages taste good. I took one look at the recipe and knew two things— 1) Pat and Ann did a lot of work before they set foot in the kitchen that night and 2) good food takes time.

I had my first tamale at El Burrito Mercado in West St Paul. I was about 15 months pregnant with Jack, big as a house and a little testy. Ted and his dad, Frank, thought Mexican food might encourage Jack to relocate. It didn't work, Jack decided to hang out for another week but my mood improved with each bite of tamale. It was after another lunch a week later with Ted and Frank at Pasquals in Uptown, I ate a bunch of jalapeño poppers, that Jack decided to become the first-born Dougherty. Needless to say, I have a special spot in my heart for Mexican food.

My favorite part of the evening is when we sit down at the table— kids drifting in and out, dogs circling hopefully and laughter filling the room. I can't think of anywhere I would rather be than in the company of these amazing women.

Tamales with Pork and Chicken

6 - 8 pounds pork shoulder

Large fryer chicken (about 5 pounds)

Salt and pepper to taste

Corn husks

Soak corn husks in warm water for about two hours.

Cut pork roast into fist size chunks, place in a pan and cover with water. Bring to a boil and then reduce to a simmer and cook for about 2 1/2 hours or until very tender. Remove the meat from broth to cool. Once the meat is cool, shred it with your fingers and set aside. Save the broth, you will need it for the masa.

Cover the chicken with water in a large pot, Bring to a boil and then simmer for 2 hours or until the chicken is tender. Remove the chicken from the broth to cool. Remove and discard the skin, take the meat off the bones and shred into small pieces. Save the broth, you will need it for the masa.

1/2 cup corn oil

6 tbsp chili powder

3 tbsp garlic powder

1 tbsp black pepper

2 tbsp salt

Combine the pork and chicken in a large pan. Mix the oil and seasonings listed above in a small sauce pan and gently warm on stove top. Pour over meat and chicken and mix until thoroughly combined. At this point, the meat and broth can be refrigerated until ready to use.

2 pounds masa flour

3 tbsp paprika

3 tbsp salt

1 tbsp cumin seeds

3 tbsp chili powder

3 tbsp garlic powder

2 cups corn oil

Warm broth on stove top. Combine the masa, paprika, salt, cumin seeds, chili powder and garlic powder and then add the corn oil. Slowly begin to add 2 quarts of warm broth, about a cup at a time. Work with hands to make a dough with the consistency of thick peanut butter, add more masa or broth to achieve this consistency.

After the husks are soft, shake off excess water and lay on countertop on a damp towel. Pick up a husk, lay it across the palm of your hand with the small end towards your fingers. Scoop up about a 1/2 cup of masa with spatula and smear on husk. Cover the bottom and left 2/3 of corn husk with masa (this will make the folding easier). Add about 1 - 2 tbsp of meat on top of the masa. Starting from the left, roll tamale all the way to the right edge and then fold down the top of the husk. Tie a thin piece of corn husk around the tamale.
Bring a large pot of water with an insert set above the water line to boil. Stack tamales tightly on end, envelope end down, open end up in the insert. Cover pot and reduce heat to medium low and cook for at least two hours. Check water level often to make sure the pot does not boil dry. Let tamales set for 5 minutes, unwrap and eat. The tamales can be frozen after they have cooled.

A Taste Of Thailand From A Crock Pot

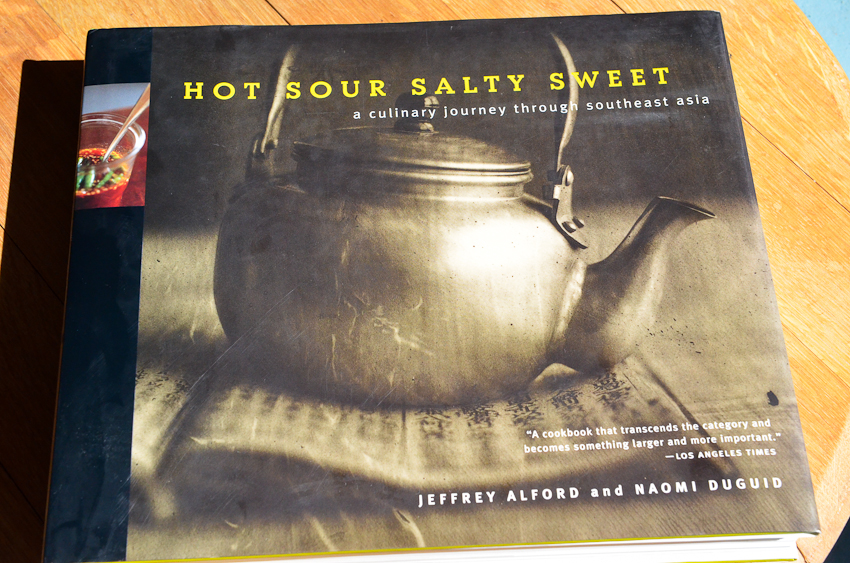
I was in dire need of inspiration for dinner. There were two pieces of frozen pork on the counter and I was fresh out of ideas. My newest cookbook, Hot Sour Salty Sweet, caught my eye. I wasn't in the mood to make a huge effort for dinner, just something simple in the crock pot. I had a lot of gardening to do and knew if I didn't get dinner started early in the day, the combination of hungry kids and a dirty Mom was a recipe for disaster. What if I braised pork in Thai peanut sauce in the crock pot?? Sounded easy and it gave me an excuse to make a Thai cucumber salad, one of my favorites.

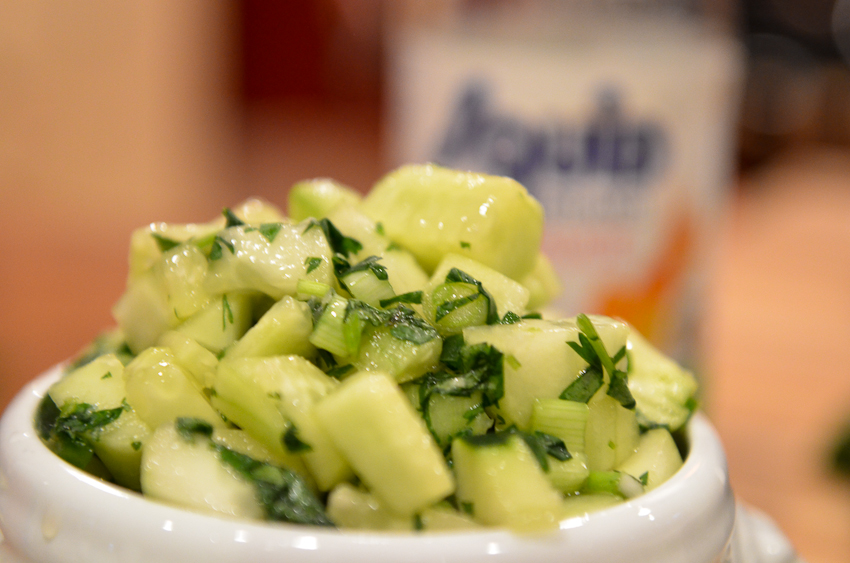
Thai Cucumber Salad

2 cucumbers, peeled and diced

1/4 cup mint, chopped

1/4 cup cilantro. chopped
4 green onions, white and light green parts chopped

2 tsp jalapeño, diced

Dressing

1/4 cup freshly squeezed lime juice
2 tbsp fish sauce, I prefer Squid brand
2 tbsp white sugar

Whisk lime juice, fish sauce and sugar together. Combine the cucumbers, onion, jalapeño, mint and cilantro in a bowl, add dressing and serve.

Thai Braised Pork

6 pounds of pork shoulder, trimmed and cut into 4 - 5 inch pieces

3 tbsp oil

2 yellow onions, rough chopped

2 red peppers, seeded and rough chopped

1 cup natural peanut butter

2/3 cup soy sauce

4 tbsp chile garlic sauce

3 tbsp ginger, minced

2 - 4 tbsp red curry paste (depending on how hot you want the sauce)

3 tbsp rice vinegar

5 garlic cloves, minced

1/2 cup brown sugar

3 tbsp fish sauce

3 tbsp freshly squeezed lime juice

2 tbsp toasted sesame oil

6 tbsp water

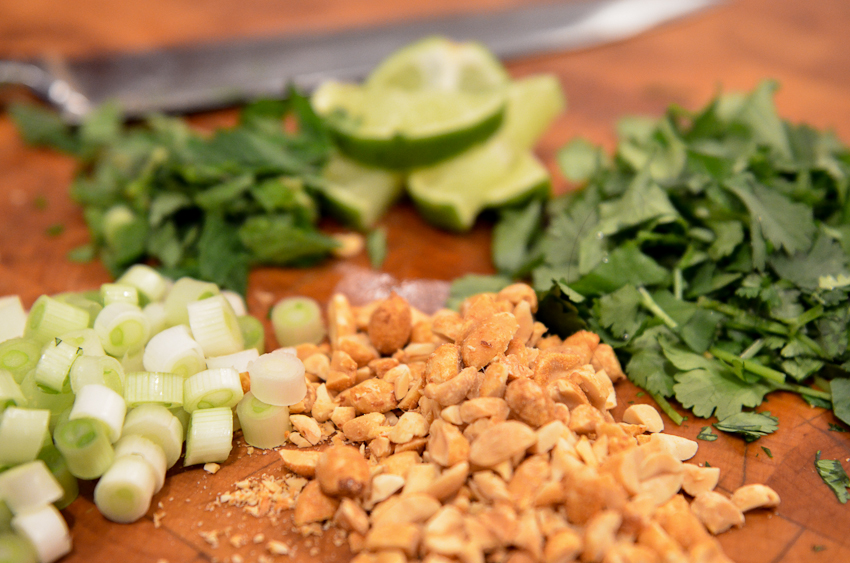
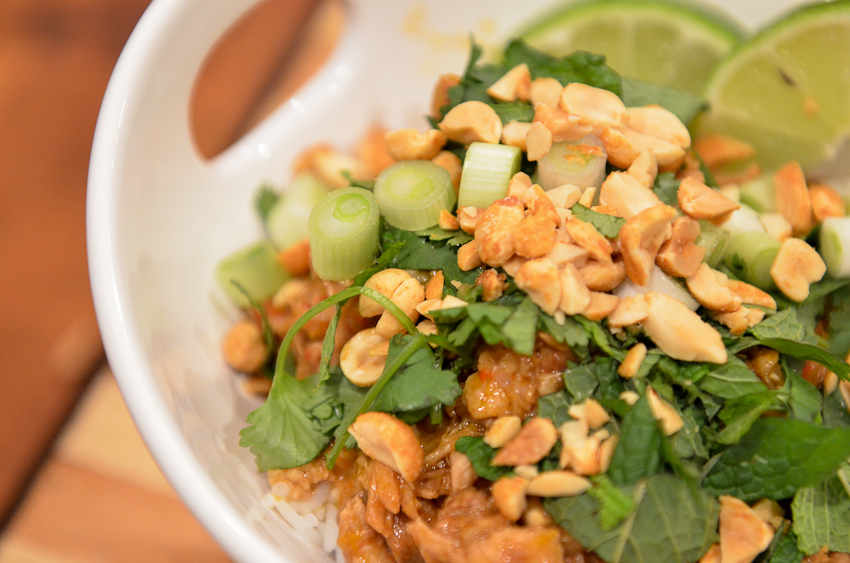
Season the pork with salt and pepper. Add oil to sauté pan and brown pork on all sides. Remove pork from sauté pan and add to crock pot, along with the onions and red peppers. Combine all other ingredients in a food processor and process until it is a thick paste (add more water if it is too thick). Pour over pork and vegetables in crock pot and cook on high for 6 hours or low for 8 hours. Serve over jasmine rice with minced cilantro and mint, chopped peanuts, lime and green onions.

Tuna Salad With A Twist

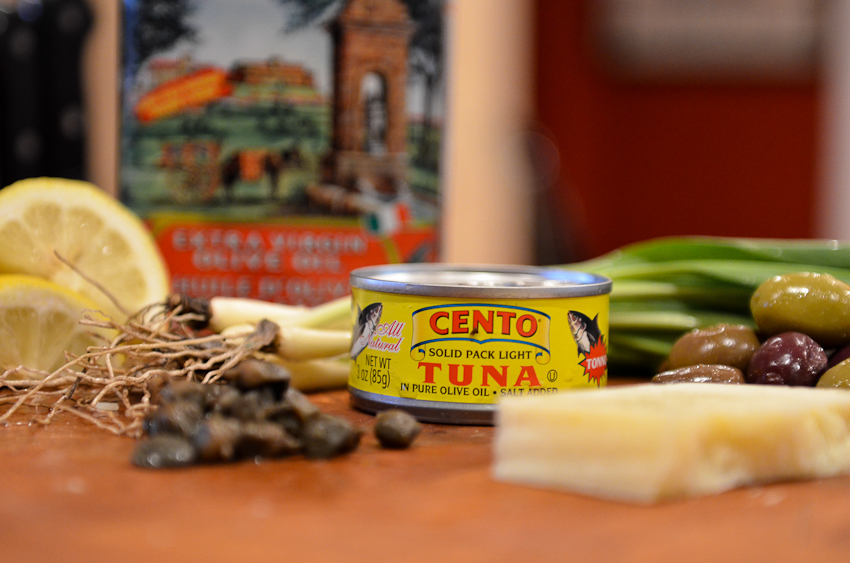
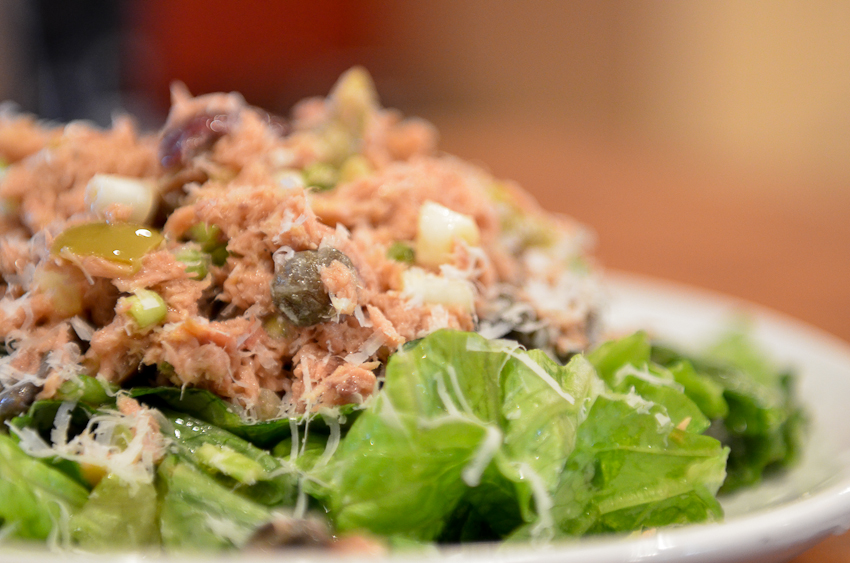
I prefer tuna in olive oil and my favorite is Cento tuna. They use good quality olive oil and it has a mild salty taste. I used a three ounce can of tuna (do not drain), a handful of capers, chopped olives, a couple squeezes of fresh lemon juice, pecorino cheese and the last of the ramps. Mix it all together, put it on a pile of greens lightly dressed with lemon juice and olive oil and voila— a lovely lunch.

Cookies From My Childhood

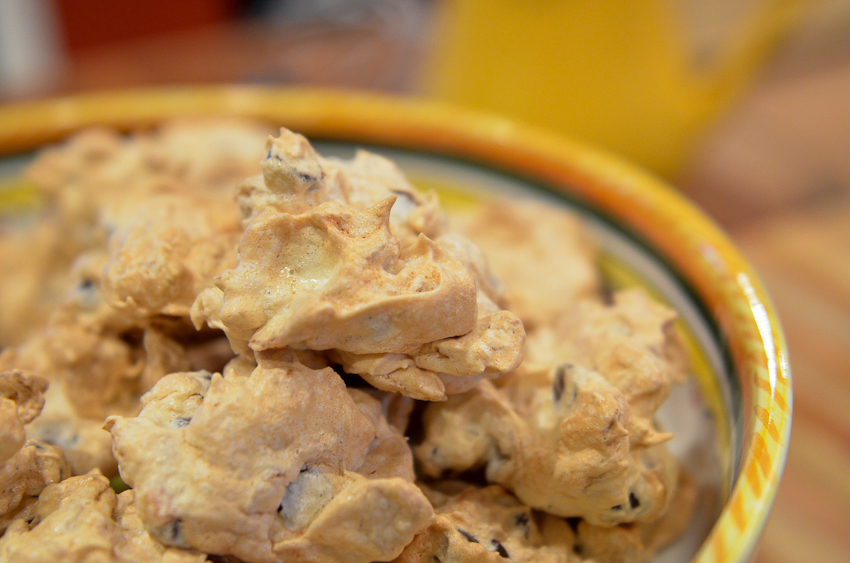
I used to spend a lot of time at my Grandma Duffy's and she loved meringue in all shapes and sizes— pies, cookies, individual pavlovas. These chocolate chip meringue cookies were my all time favorite, although the pavlovas with strawberries were a close second. We went to her house for nearly every Sunday dinner. There was always dessert and when I walked into her kitchen and saw the sheet tray with meringues on top of the dishwasher, I was one happy little girl. My parents and grandparents would have dessert in the dining room and my sister Bridget and I would go into the den, watch Mutual of Omaha's Wild Kingdom and eat our dessert on TV trays.

My Mom gave this recipe to Charlie last week. Considering how much I love these cookies, it is strange I have never made them. Meringue has always seemed way out of my league (I am not a good baker, remember?). I had egg whites sitting in the refrigerator (left over from the hollandaise) and this was my chance to have a little piece of Grandma Duffy in my kitchen. I just finished a book called The Kitchen Daughter by Jael McHenry and the main character,Ginny, is able to conjure spirits when she cooks from a recipe written in their hand. While Grandma Duffy did not appear, as I pulled the cookies out of the oven I was transported back to the her kitchen.

Chocolate Chip Meringue Cookies

4 egg whites 1/8 tsp cream of tartar 3/4 cup of white sugar 2 cups of corn flakes 1 cup of chocolate chips

Preheat oven to 350 degrees. Beat egg whites and cream of tartar until it forms soft peaks and gradually add sugar. Continue to beat until shiny and holds stiff peaks. Fold in corn flakes and chocolate chips. Put spoonfuls meringue on a parchment lined sheet tray and bake for 15 minutes. Let cool on sheet tray to set and then move to a wire rack to cool completely. Store in an airtight container.

A Gift Of Ramps

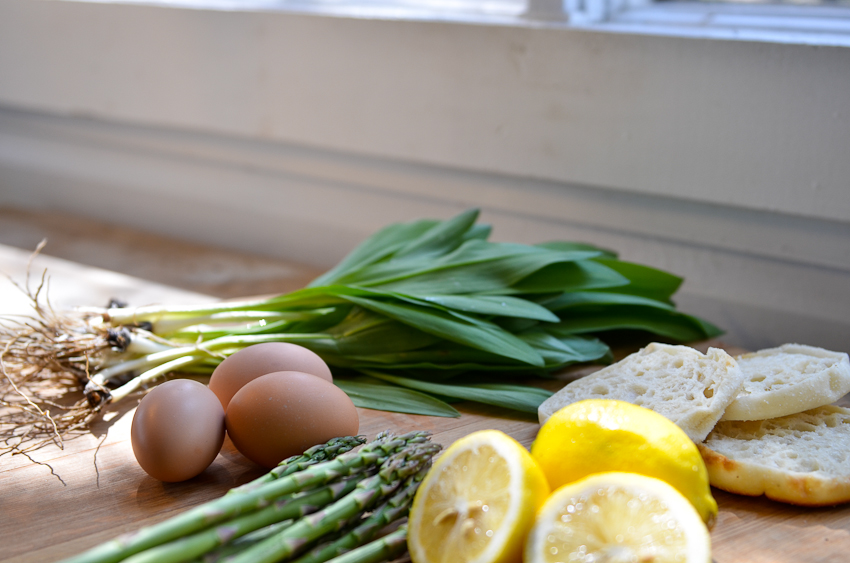
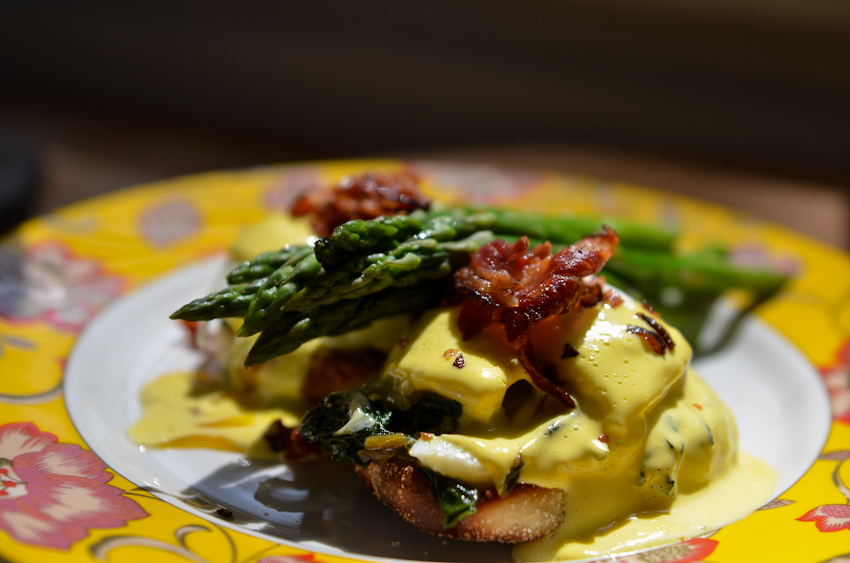
I had the most pleasant surprise a few days ago. My friend, Kathy, gave me a beautiful bunch of ramps fresh from her secret spot. I wanted to make something fantastic with them and what is more fantastic than eggs benedict with hollandaise? I sautéed spinach, ramps and shallots in olive oil (to compensate for the hollandaise), attempted to poach 2 eggs (6 eggs later, I had something that approximated poached eggs), sautéed pancetta and made the hollandaise. A lovely way to start the day.

Julia Child's Blender Hollandaise

3 egg yolks

1/4 teaspoon salt

Dash of cayenne pepper

1 stick butter, melted butter, heated until bubbling but not brown

1 - 2 tablespoons lemon juice

Place egg yolks, salt and cayenne in blender, blend for a few seconds at  high-speed until you have a smooth frothy mixture. Still at high-speed, start adding hot butter in a thin, steady stream, not too slowly. As you add butter,  the sauce should thicken. When half the butter has been added, add lemon juice. Continue blending until all butter is used.


Porchetta For A Pagan Dinner

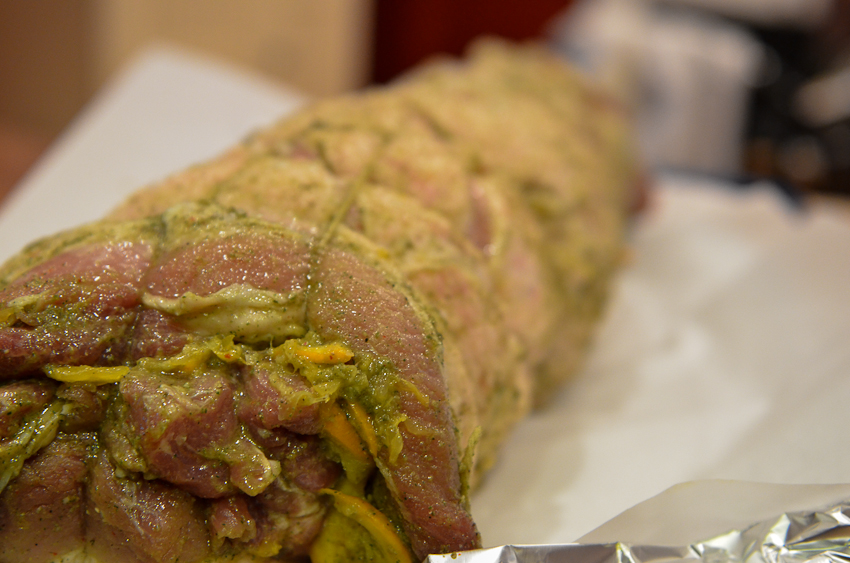
The last Wednesday of every month is PDC (Pagan Dinner Club). I am game for anything that involves food, wine and conversation around a table. Plus, I have always felt a little pagan. Last November, I opened my issue of Bon Appetit and saw the sexiest piece of meat I have ever seen— Porchetta (take a look at the recipe and picture here).  For the past six months, that lovely piece of pork loin wrapped in pork belly would start calling my name but I never pulled the trigger. Until last Wednesday. It was my turn to host dinner and I knew exactly what to make, the porchetta of my dreams.  I followed the recipe to the letter except I used a full loin and pork belly and adjusted the spices and garlic accordingly. It was an extraordinary piece of meat— tender, flavorful and sexy.

What else does one serve with a massive amount of pork wrapped in luscious pork belly? Why, fingerling potatoes and sweet onions roasted in duck fat with pancetta and a Caesar salad (I forgot the anchovies) with croutons sautéed in olive oil and the drippings from the porchetta. Those croutons were a stroke of genius, one I intend to repeat over and over. I tossed the potatoes in duck fat and roasted them at 400 degrees for about 30 - 35 minutes on parchment paper. I laid pancetta on top about 10 minutes before they were done and crumbled it after I pulled them out of the oven. Duck fat is magic, the potatoes had the most delectable crust— amazing.

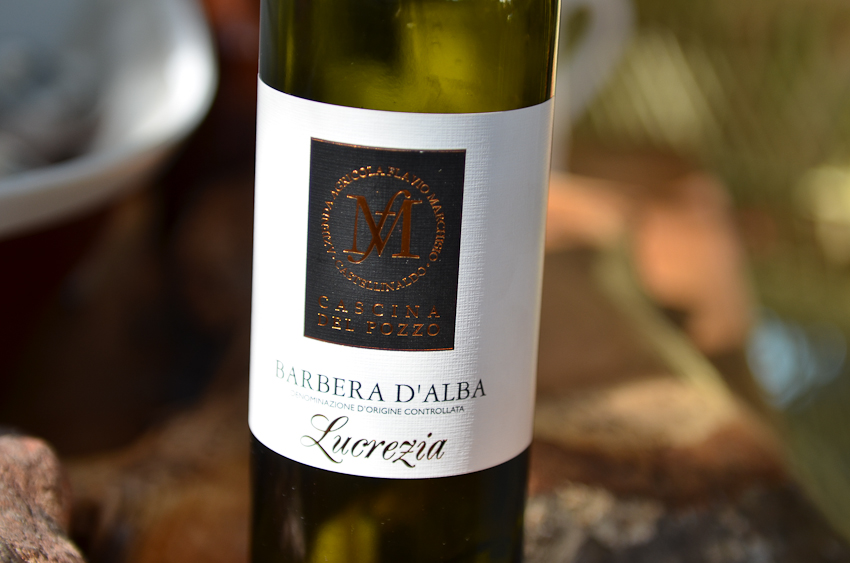
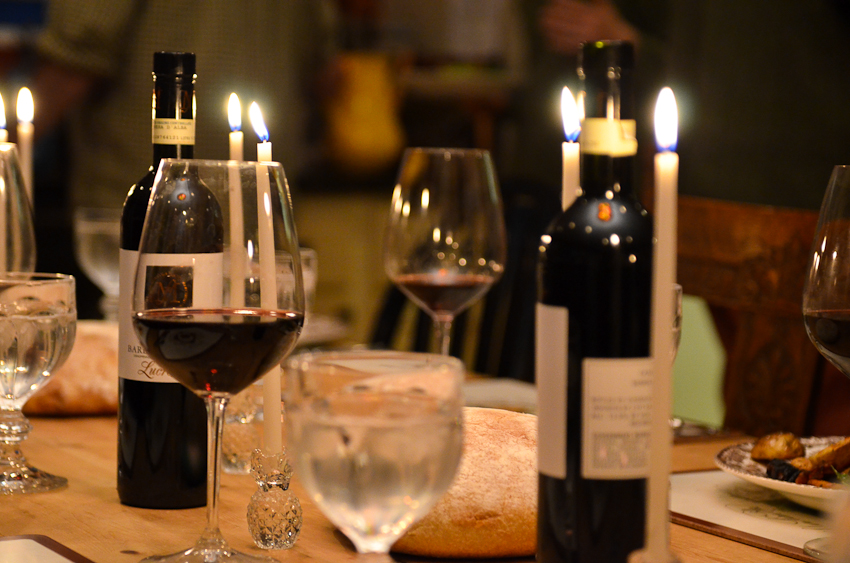
We drank a wine from the Piedmont, Cascina del Pozzo Lucrezia Barbera d'Alba. It was perfect with the pork— dry and elegant with subtle fruit notes. It was a little richer in body than other Barberas I have tasted and I really enjoyed it.

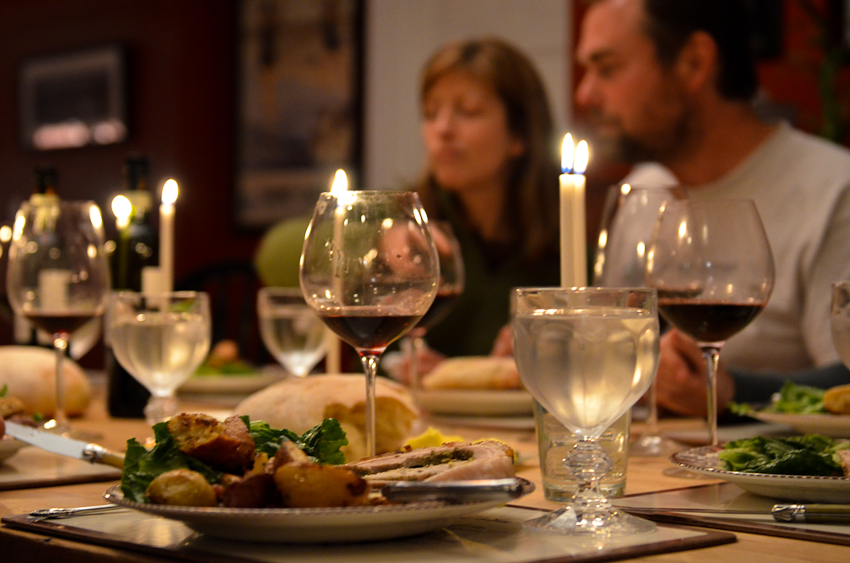
There are a few meals I have put together that stand out and this is definitely one of them. Not only was it a good meal, it was an even better evening filled with people I have come to adore. Jim Henson said, 'there's not a word yet, for old friends who've just met'. Ted and I are still new-comers to Bayfield, we have only been here for five years. As I looked around the table, I had a strong feeling that my fellow pagan dinner companions are indeed old friends we have just met.  I have been blessed many times over in my life with beautiful memories of children, family and friends around my table— it is no small thing to share a meal with those you love. I believe it creates a sacred space in our lives which is truly nourishing.

Sunday Photo Safari & Souffle

Sunday photo safari is becoming a regular thing. We grab our cameras, hop in the car and head out to parts unknown. Last week, we went down Star Route, took a right on a logging road and kept our eyes peeled for a place to stop. Adventures are a good way to stay connected— we talk about school, what pictures we want to take, if we should take George next time, where they want to go to college, what I am making for dinner. As they get older, I feel the quiet coming. I want to embrace the chaos, noise and beautiful mess with both arms while I still can. Photos give us instant access to moments in time and I am so thankful for these moments with my kids.

We were looking for an abandoned house or barn but settled for a bunch of rusty stuff in a field. We didn't run into any wild animals, snakes or hornet's nests— success as far as I am concerned.

When I told the kids I was making blue cheese souffle for dinner, I heard crickets. They had quesadillas and Ted and I ate souffle, it worked out well. It is the perfect dinner with a green salad, a baguette and good butter.

Ina Garten's Blue Cheese Souffle

3 tablespoons unsalted butter, plus extra for greasing the dish

1/4 cup finely grated Parmesan, plus extra for sprinkling

3 tablespoons all-purpose flour

1 cup scalded milk

Kosher salt and freshly ground black pepper

Pinch cayenne pepper

Pinch nutmeg

4 extra-large egg yolks, at room temperature

3 ounces good blue cheese, chopped

5 extra-large egg whites, at room temperature

1/8 teaspoon cream of tartar

Preheat the oven to 400 degrees F.

Butter the inside of an 8-cup souffle dish (7 1/2 inches in diameter and 3 1/4 inches deep) and sprinkle evenly with parmesan.

Melt the butter in a small saucepan over low heat. With a wooden spoon, stir in the flour and cook, stirring constantly, for 2 minutes. Off the heat, whisk in the hot milk, 1/2 teaspoon salt, 1/4 teaspoon black pepper, the cayenne, and nutmeg. Cook over low heat, whisking constantly, for 1 minute, until smooth and thick.

Off the heat, while still hot, whisk in the egg yolks, one at a time. Stir in the blue cheese and the 1/4 cup of Parmesan and transfer to a large mixing bowl.

Put the egg whites, cream of tartar, and a pinch of salt in the bowl of an electric mixer fitted with the whisk attachment. Beat on low speed for 1 minute, on medium speed for 1 minute, then finally on high speed until they form firm, glossy peaks.

Whisk 1/4 of the egg whites into the cheese sauce to lighten and then fold in the rest. Pour into the souffle dish, then smooth the top. Draw a large circle on top with the spatula to help the souffle rise evenly, and place in the middle of the oven. Turn the temperature down to 375 degrees F. Bake for 30 to 35 minutes (don't peek!) until puffed and brown. Serve immediately.

Homemade Mustard

I am a condiment hoarder, everything from Thai fish sauce to horseradish. While I don't discriminate and embrace all condiments, mustard has a special place in my heart and refrigerator. A few weeks ago, I started to wonder about making my own mustard. It turns out, it is amazingly simple— buy mustard seeds (yellow and brown), add liquid, some herbs or other flavorings, let it sit for a few days, put it in the blender (a food processor does not work) and you have fresh mustard.

I was at my favorite grocery store in Duluth, Mount Royal, and spied a pile of fresh horseradish. I knew my initial foray into mustard making was imminent. I grabbed some fresh herbs and pâté (my preferred mustard delivery system) and headed back to Bayfield. I looked at a number of different recipes and realized the room for creativity was immense. I settled on two mustards: fresh herb and garlic and horseradish and Calvados. I learned one interesting fact during my research— you must use cold liquid to preserve the pungency of the mustard seeds. If the seeds are heated, the flavor will be muted and less spicy. Homemade mustard was a revelation— spicy, creamy and fresh. I am afraid this may have opened a whole new avenue for my condiment fascination.

Horseradish and Calvados Mustard

6 tablespoons yellow mustard seeds

2 tablespoons brown mustard seeds

4 tablespoons Calvados brandy

5 tablespoons fresh horseradish, grated with a Microplane grater

2/3 cup white wine vinegar

1/3 cup water, cold

1/8 cup light brown sugar

1 teaspoon salt

Put mustard seeds, water, Calvados, horseradish and vinegar in a bowl and stir to completely submerge seeds. Cover and let sit at room temperature 2 to 3 days.

Whirl mustard mixture in a blender with brown sugar and salt until smooth.

Make ahead: 2 weeks, covered and chilled.

Fresh Herb and Garlic Mustard

6 tablespoons yellow mustard seeds

2 tablespoon brown mustard seeds

2 teaspoons minced fresh thyme

2 teaspoons minced fresh rosemary

3 cloves of garlic, minced

2/3 cup apple cider vinegar

2/3 cup water

1 teaspoon light brown sugar

3/4 teaspoon salt

Stir together mustard seeds, thyme, rosemary, garlic, water, and the vinegar in a bowl until seeds are submerged. Let sit at room temperature, covered, 2 to 3 days.

Put mustard mixture in a blender along with brown sugar and salt and blend until mixture is thick but still coarse-textured.

Make ahead: 2 weeks, covered and chilled.

A Proper Chicken Caesar Salad

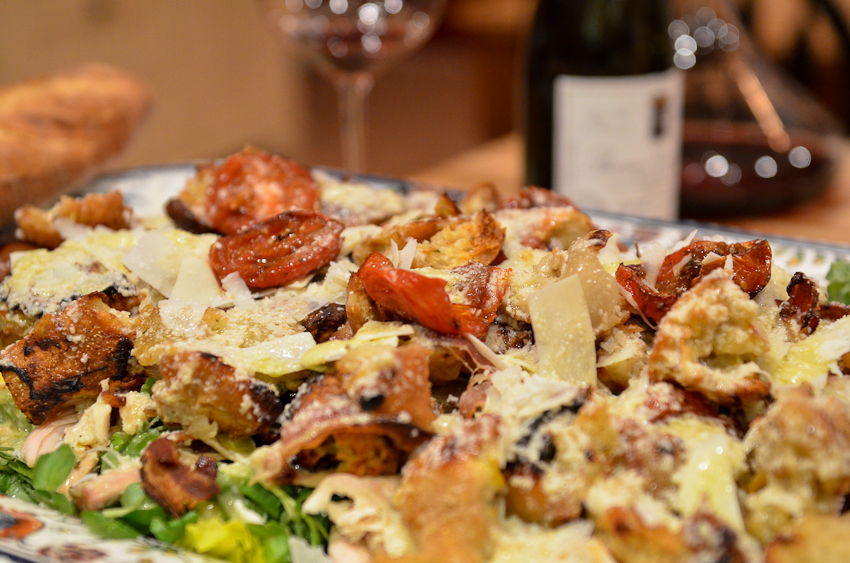
I was curious if there were other mavens out there, did a quick google search and ran across the Food Maven last week. I spent a little while exploring his maven-ness (he has two kitchens). He had a recipe for Chicken à la King (my quintessential childhood meal) and Jamie Oliver's recipe for a Proper Chicken Caesar Salad. I am a big fan of anything proper and I needed an idea for Saturday night dinner— sounded like a plan. One of my favorite roasted chicken recipes is Ina Garten's Lemon Chicken with Croutons and this recipe is the salad version. The croutons are addictive, full of roasted chicken flavor and lemon. I made a few additions to the original recipe: roasted Roma tomatoes, preserved lemons, onion and lots more garlic in the dressing. Ted said it was the best salad I have ever made.  

Proper Chicken Caesar Salad (adapted from Jamie Oliver)

8 - 10 Roma tomatoes, halved and roasted

6 whole chicken thighs, skin on

1 loaf ciabatta bread, torn into thumb-sized pieces

3 sprigs fresh rosemary, leaves picked and roughly chopped

1 whole preserved lemon, rinsed and chopped

1 whole sweet onion, chopped

Olive oil

Herb and garlic salt (recipe here) or sea salt and freshly ground black pepper

12 thin slices pancetta

Dressing

4 cloves peeled garlic

6 anchovy fillets in olive oil, drained

7 ounces freshly grated Parmesan, plus a few shavings to serve

3 heaped tablespoon crème fraîche

2 lemon, juiced

Extra-virgin olive oil

2 or 3 heads romaine lettuce, outer leaves discarded

Preheat the oven to 400 degrees F.

Cut the tomatoes in half, drizzle with olive oil and season with salt and pepper. Roast until brown and caramelized, about 30 - 45 minutes.

Place the torn up pieces of ciabatta, rosemary, preserved lemon and onion in a bowl. Drizzle with olive oil, salt and pepper and place in a roasting pan. Place the chicken thighs on top of the bread mixture and season with salt and pepper. This way, the bread will soak up all the lovely juices from the chicken, giving you the best croutons! Pop the pan into the preheated oven.

After about 45 minutes the chicken should be nicely cooked. Take the pan out of the oven, drape the pancetta over the chicken and croutons, and put back for another 15 to 20 minutes for everything to crisp up. The chicken legs are ready when you can pinch the meat off the bone easily. When they're cooked, remove the pan from the oven and set it aside for the chicken to cool down slightly. If the croutons are not crisp, put them back in the oven for an additional 10 - 15 minutes.

Place the garlic, anchovy fillets, Parmesan, crème fraîche and lemon juice in a food processor or blender and pulse to combine. With the machine running, add 3 times as much extra virgin olive oil as lemon juice in a steady stream and process until thick and smooth. Season dressing with salt and pepper.

Pull the chicken meat off the leg bones - you can use 2 forks to do this, or your hands if you're tough like me - and tear it up roughly with the croutons and the bacon. Wash, spin dry and separate the romaine, tear them up and toss with the chicken, croutons, bacon and dressing. Scatter with some Parmesan shavings and roasted tomatoes.

The 2010 Talbott Sleepy Hollow Chardonnay was the perfect wine for this salad. In my experience, California chardonnay can be a mouthful of buttery oak. This wine shattered that preconceived notion. It is a rich, lush chardonnay with a long bright finish. Makes me want to have a proper caesar salad again soon!

Cheesecake Nirvana

I am not much of a baker. I like recipes that are more of a suggestion with room for creativity. Baking requires paying attention to details and following directions— not my strongest suits. My Mom is a fantastic baker and excels at sugar cookies, cakes, cinnamon rolls and pies. If it involves flour, sugar and baking powder, she is the master. Clearly, baking skills are not genetic or they skip a generation. Either way, she is the baker in the family and I am the cooker. She sent up a couple dozen of peanut butter cookies a few weeks ago and we were so excited to have Nana's cookies in the house! George was pretty excited too, he ate all of them. I swear he has Special Ops skills when it comes to sourcing his own food.

I made my first cheesecake about 15 years ago for Easter dinner and I was scared. Scared of crevasses across the top and jiggling middles. I had experienced cheesecake nirvana at Cafe Latte many times before and was feeling a little uneasy with my skills. I settled on the recipe from the Joy Of Cooking and forged bravely ahead. Let's just say, at least it tasted good. I made a couple more attempts over the years but eventually decided to leave it to the professionals at Cafe Latte.

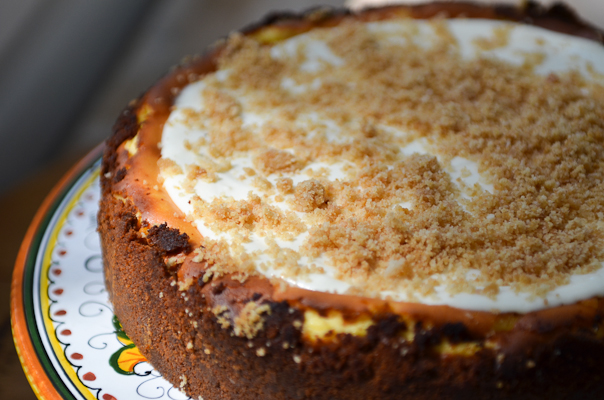
Fast forward 10 years, Cafe Latte is 250 miles from Bayfield, I had mascarpone in the refrigerator and I wanted cheesecake. I started my search from scratch for the perfect non-baker's cheesecake. Gourmet magazine had a recipe that fit the bill: vanilla wafer crust (no rolling-pin required), mascarpone and a sour cream topping to hide any and all crevasses. I made a few changes (I like to be creative) and voilà, cheesecake nirvana. I was distracted while baking the crust and it is a little darker than it should be. In the cooking world, we call that caramelized.

Crust 1 box of vanilla wafers, finely ground in a food processor 1 sticks  (8 tablespoons) unsalted butter, melted and cooled
Filling 3 packages of cream cheese, softened 8 oz mascarpone cheese at room temperature (about 1  cup) 3/4 cup sugar
3 large eggs
1 teaspoon vanilla extract
1 1/2 teaspoon fresh lemon juice
1 1/2 tsp grated lemon zest
1/4 teaspoon salt
Topping 1 cup sour cream
1/4 cup sugar
1 teaspoon vanilla extract
1/2 tsp lemon oil
1/8 teaspoon salt
Make crust
Put oven rack in middle position and preheat oven to 350°F. Butter bottom and  side of a 9-inch springform pan.

Stir together cookie crumbs and butter in a bowl. Reserve 1/4 cup crumb  mixture for sprinkling over cheesecake, then pat remainder onto bottom and 1 1/2  inches up side of springform pan (about 1 inch thick). Put pan in a shallow  baking pan and bake until golden, about 10 minutes. Cool completely on a rack,  about 25 minutes. Leave oven on.

Make filling while crust bakes

Beat cream cheese, mascarpone, and sugar in a large bowl with an electric  mixer at medium high speed until fluffy, 3 to 5 minutes. Add eggs 1 at a time,  beating well after each addition. Add vanilla, lemon juice, lemon zest and salt and mix at low speed until combined. Pour into cooled crust and bake until cake is set and  puffed around edge but still trembles slightly when pan is shaken gently, 30 to 40 minutes. Cool slightly in springform pan on rack, about 20 minutes.  (Cheesecake will continue to set as it cools.) Leave oven  on.

Make topping:

Stir together sour cream, sugar, vanilla extract, lemon oil, and salt in a small  bowl and spoon over cheesecake, spreading gently and evenly, leaving a 1/4-inch  border around edge.

Bake cheesecake until topping is set, about 10 minutes. Run a thin knife  around edge to help prevent cracking. Sprinkle top with reserved crumbs and cool  completely in pan on rack, then chill, loosely covered, at least 8  hours.


What's For Dinner During An April Storm?

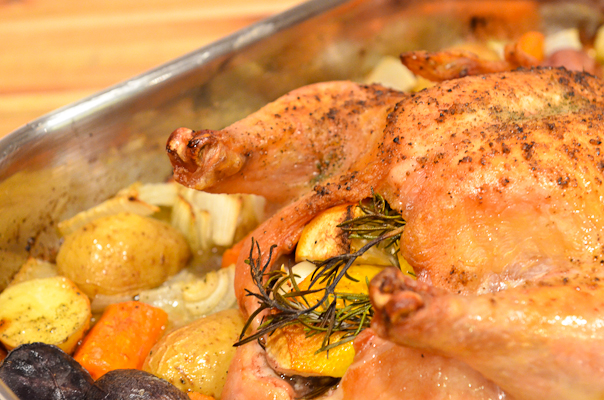
I have a problem. Most people, when they hear a storm is brewing, think about battening the hatches. I think about dinner. I have to admit, the impending snow storm wasn't too thrilling until I realized it meant I could make one more winter dinner. Roast chicken in the oven, fire in the wood stove and snow falling— perfection as far as I am concerned. There is not much to say about roasting a chicken except use good herb salt, butter the skin, stuff the cavity with lemon, garlic and fresh herbs and roast at 450 degrees on a bed of carrots, onion and potatoes.

I used to buy a lovely garlic herb salt at the Kitchen Window in Minneapolis. It was special because it was Italian and the fresh herbs and garlic were dried in the salt. Last year, I realized driving to Minneapolis for salt was excessive, Wisconsin is almost as cool as Italy and I had tons of fresh herbs from my garden. It is not much of a recipe, more of a suggested plan of attack. Put a couple of cups of coarse sea salt (not grey sea salt, too oily), a couple handfuls of fresh herbs (thyme, basil, rosemary, lemon thyme, sage, tarragon, whatever you have on hand), 1/4 cup fresh cracked black pepper and 5 or so cloves of fresh garlic in a food processor. Blend until the salt is finely ground and green. Spread the salt on a sheet tray and let dry overnight. Store in a covered container and use with wild abandon on anything and everything.

Gina's Gnocchi

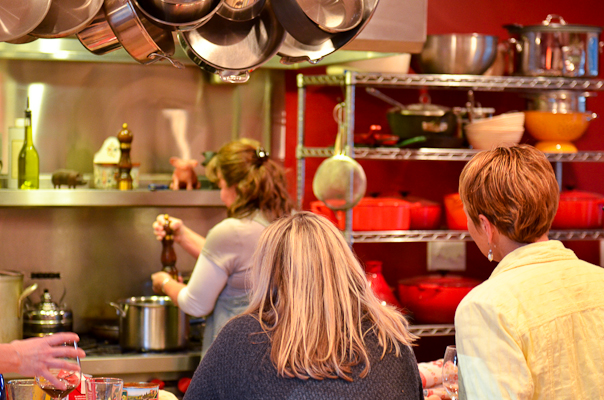
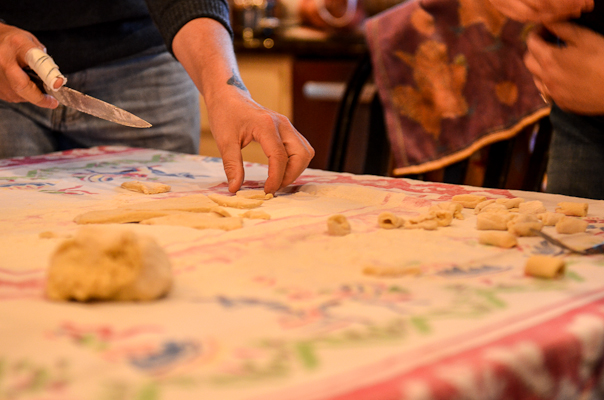
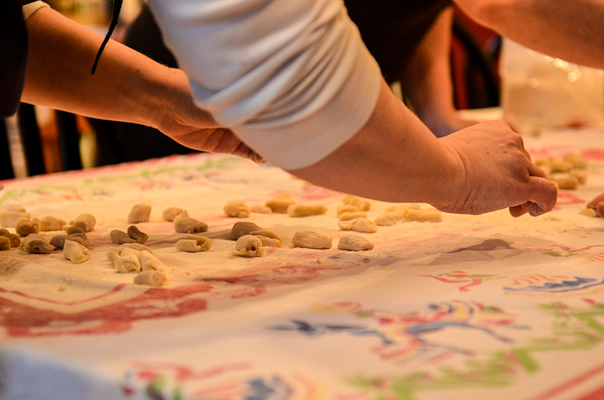
We renovated our kitchen a couple of years ago and it turns out— it the perfect space for gathering. It is full of friends, kids, dogs and endless piles of papers, jackets and shoes.  I met Ted when I was 18 years old. The beginning stage of any relationship involves a lot of questions and when Ted asked me where I saw myself twenty years on, I knew the answer straight away. I saw myself behind a center island in a kitchen filled with kids and dogs. It is humbling to realize my 18 year old self knew where I was headed long before I figured it out. The first time I stood in my kitchen with dogs at my feet and the kids bouncing off the walls , I realized that girl was right. I have had the good fortune to fall into the company of some extraordinary women who like to cook, eat and drink wine. When Julie asked me to host a cooking class for the Writer's Read Event at Stagenorth in February, I was game. It was a beautiful afternoon full of laughter and good food. I felt the ancient energy of a community prepared meal and I wanted to continue what Julie started. The best meals have a story and my friend, Gina, is a brilliant storyteller and gnocchi maker. She generously agreed to share the story of her Italian family from Pietra Colora, Italy and her recipe for potato gnocchi. We made gnocchi, tomato sauce, laughed, talked and shared a meal. It was a magical evening.

Gina's Gnocchi

3 cups riced dry baked potatoes

1 cup white flour

2 eggs

Add up to 1 cup of flour to the riced potatoes to achieve the proper consistency. The dough should hold together enough to roll out without cracking.

Roll to 1/2 inch thick on a tablecloth or pastry cloth. Roll up to keep from drying out. Cut into squares. Roll with fingers into tubes. Put into boiling water 5 to 10 minutes or until they float. Drain and serve immediately.


The Journey Began With Cheese

What would possess a woman with five kids, four dogs, a lot of impractical shoes and a relatively easy-going husband to move to a small town in Northern Wisconsin and buy a restaurant? Cheese. It all started with tortas- a cheese and chutney appetizer that Renee had made for years prior to meeting me. I remember sitting in the bar at the Wild Rice, planning our foray into the cheese business in Minneapolis a couple months after we met. I called the Uptown Kowalski's, delivered my 'elevator pitch' and scheduled a meeting with the head cheese specialist. As I walked out of Kowalski's on that sunny November afternoon, I had no idea how much my life would change.

Our little cheese company took off in a hurry. The tortas were in all the Kowalski's stores and selling well. We had a pretty good system worked out— Renee handled production and I was the delivery and 'demo' girl. Everything came to a screeching halt when her restaurant caught on fire and burned to the ground 3 months after our first delivery. We needed a kitchen to continue making our tortas and spent a couple of weeks exploring our options. We walked into an old yellow farm-house outside Washburn with an illustrious history as a speakeasy, brothel and restaurant and that was that. I found myself seriously considering buying a restaurant. Another three or four weeks passed, Renee had a partner,  I had a restaurant and Bayfield had 7 new residents. As Gabrielle Hamilton, author of Blood, Bones and Butter, said, 'And that, just like that, is how a whole life can start'.

Blue Cheese & Fig Chutney Torta

Fig Chutney

2 cups dried mission figs, chopped 3 garlic cloves. chopped 1 red onion, chopped 1/4 cup butter 2 cups red wine 2 tbsp candied ginger, minced 1/2 tsp red pepper flakes salt and pepper to taste

Blue Cheese Torta

2 packages of cream cheese, at room temperature 1 sticks of butter, at room temperature 1 garlic cloves 1/4 cup red onion, minced 1 tsp cayenne pepper, to taste 1/2 cup blue cheese (more if you prefer a stronger blue cheese taste) 1/4 cup Parmesan cheese salt and pepper to taste

Chutney: Melt the butter in a sauté pan and add the onion, sauté until softened. Add garlic, figs, red pepper flakes and candied ginger and saute for 5 to 7 minutes. Add the wine and simmer until liquid is nearly evaporated. Add salt and pepper to taste. Cool completely.

Cheese: Combine the butter and cream cheese in a food processor. Add remaining ingredients and process until smooth. Line ramekins or other containers with plastic wrap. Press chutney into mold and add the cheese mixture. Cover and refrigerate until set. These can be frozen and de-frosted before serving.


What Happens When You Run Out Of Oranges??

I have a pretty serious thing for cookbooks and nothing makes my heart go pitter-pat (other than dogs and good wine) like a gorgeous cookbook. David Tanis, a chef at Chez Panisse, has two cookbooks— A Platter of Figs and Heart of an Artichoke and they are drop dead gorgeous books with delicious recipes. It has been cloudy here and I grabbed the Heart of an Artichoke book for inspiration and color for my sensory deprived brain. We were having friends over for dinner and I needed something to get my creative juices flowing.

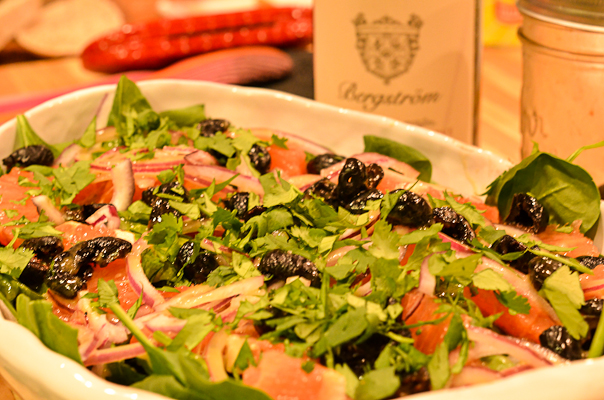
There is a Sicilian Salad in David's cookbook with oranges, fennel, spinach and radishes, it sounded like the perfect spring salad. I decided to introduce Sicily to Morocco and added some oil cured olives and cilantro. The fennel went in the oven to be roasted with the brussel sprouts (roasted fennel is one of my favorites) and I whipped up a vinaigrette. I am a firm believer in bright, acidic vinaigrettes and used raspberry and white wine vinegar as well as a healthy dollop of Dijon mustard. Dinner was looking better and better. I felt my brain fog start to lift. Everything was going along swimmingly until I opened the fridge to look for the orange, the shining star of my salad. I had grapefruits galore but not one orange. Grapefruit is round, grows on trees in Florida and is kind of orange-colored— a perfectly suitable substitute, right?? It turned out to be a fortuitous detour, the pink grapefruit was beautiful against the green spinach and it's acidity was well suited for the salad dressing and olives. The case of the missing oranges is still unsolved. I guess I should be happy the kids are eating fruit and not Doritos.

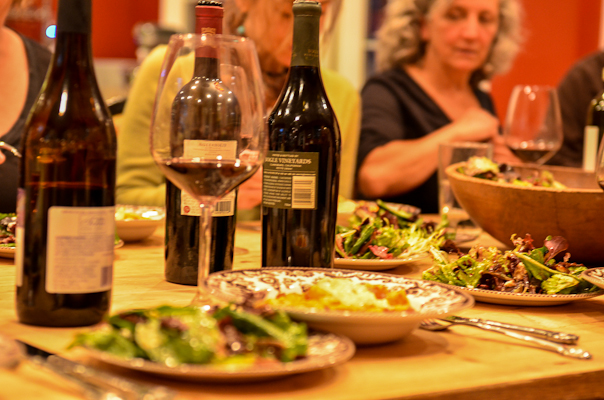
Of course, there was wine involved. Bob is one of my favorite dinner guests. He loves Pinot Noir as much as I do and always brings a couple good bottles to share. Bergstrom Pinot Noir is a typical Willamette Valley Pinot— cranberries, strawberries, spice and earth. A classic combination of strength and elegance that defines truly great Pinot Noir. It was a pleasure to drink and probably would have benefitted from a brief stay in the decanter but we were on a roll and popped and poured. We drank the Vietti Roero Arneis with dinner (we had roast chicken with lemons, herbs and kalamata olives). I am not the biggest white wine fan but I tend to like Italian white wines as a rule. This Vietti is a super food friendly wine with a lot of bright, fresh acidity with pears and green apple in your mouth and a nice floral nose. Plus, I love the label. The guy has such a beleaguered look on his face— winemaking must be hard work.

Moroccan Grapefruit Salad

Salad

A couple handfuls of baby spinach

2 grapefruits peeled, quartered and sliced

1 red onion sliced and placed in ice water for 10 - 15 minutes (removes the acidity from the onion)

1/4 cup pitted and chopped oil cured olives

1/4 cup cilantro, chopped

Vinaigrette

2 Tbsp raspberry vinegar

2 Tbsp  white wine vinegar

2 Tbsp Dijon mustard

2 Tbsp honey

1/2 cup good olive oil

Salt and pepper to taste

Assemble the spinach, grapefruit, red onion, olives and cilantro in a bowl. Combine all vinaigrette ingredients in a container and pour over the salad. I always salt my salad greens with Maldon Sea Salt before adding the dressing.


Lunch With A Gentleman Farmer, Goats and Quiche

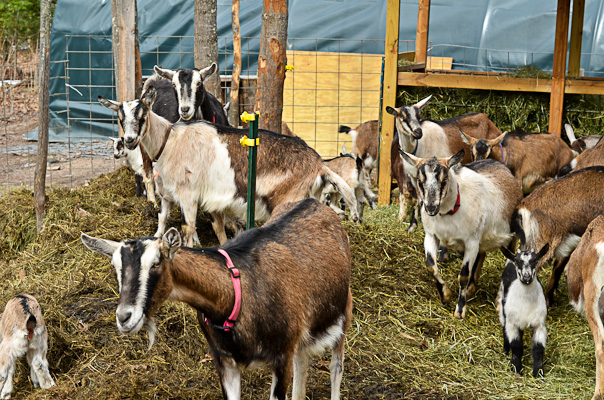
Creation is a messy business— whether it is pastry dough or birthing 63 baby goats. I had three kids in diapers at one point in my life and thought I would never emerge from the fog of feedings, Cheerios, juice boxes and chronic exhaustion. It was a cake walk compared to ushering 63 baby goats into the world in less than a month's time. My friend, Michael, is the lead goat herder, cheese maker and gentleman farmer at Sassy Nanny Farmstead Cheese. Last year, he invited us to his farm to see the babies. I made friends with a little guy named Andy and decided I had a goat in my future. As it turns out, a goat would have been the proverbial straw on the camel's back and I am goat less. However, I am still a goat admirer and was excited to meet this year's new additions to the herd.

During the summer, there is a great farmers market every Thursday in Cornucopia and that is where I tasted Michael's goat cheese for the first time about five years ago. Growing up in Minneapolis, my previous experience with cheese involved plastic wrap and a grocery store. Once I put Michael's cheese in my mouth, I realized I had been missing the boat. Local cheese, made by a man who genuinely cares for his goats was a revelation— it was fresh and creamy without any of the gaminess I typically associated with goat cheese. He makes a number of goat cheeses: Lake Effect, a fresh, spreadable goat cheese, Buttin' Heads, a sea salt brined feta, Cabra Fresco, an homage to quesco fresco and Winey Kid (my favorite), an aged raw milk cheese with a red wine washed rind. Food tastes better when it hasn't been on a trans-continental trip of planes, trains and automobiles and Michael's cheese is no exception. His cheese is as good as anything I have tasted and I know the goats (kind of). How cool is that??

Living your dream takes a tremendous amount of hard work— the stakes are high and success is hard to measure. Michael, like most of my friends up here, decided to take a leap of faith and chose the road less traveled. I am glad he did because as Frost said,, 'that has made all the difference'. It makes a difference to live the life you dreamed of, to be a good steward to your environment and animals, to live in the moment (especially when the moment is one you would rather fast forward) and have the courage to watch it all unfold and know it is as it should be. When I moved to Bayfield and opened the restaurant with Renee, I had no idea what the future held for me but I knew it had all the components for an epic adventure. That is the beauty of Sassy Nanny Cheese, Good Thyme Restaurant or any number of the other small businesses up here— it isn't always easy but there are bound to be some epic adventures shared around a table full of good food, wine and friends.

Dorie Greenspan's Gorgonzola and Apple Quiche

1 pastry crust, blind baked in a 9 to 10 inch tart pan

1 tbsp unsalted butter

1 medium onion, finely chopped

1 apple (Empire, Gala or Granny Smith), sliced 1/4 inch thick

4 ounces Gorgonzola cheese, crumbled

4 ounces Swiss cheese, shredded

2/3 cup heavy cream

1/3 cup milk

4 large eggs

salt and pepper

 Put a rack in the center of the oven and preheat to 400 deg F. Line a baking sheet with parchment paper. Melt butter in a small skillet over low heat. Add onion and saute until onion is soft but not colored, about 10-15 minutes, then remove from heat. Place the partially baked pastry shell on the baking sheet (this will catch any drips). Spread the onion evenly over the bottom of the crust. Scatter the apple pieces over the onion and top with the crumbled Gorgonzola and shredded Swiss cheese. Beat the eggs, milk, and cream together until well blended and season with salt and pepper. Pour the egg mixture into the tart pan. Place the baking sheet in the oven and bake for 40-45 minutes, until the filling is puffed all over (make sure the center is puffed), lightly browned, and set. Transfer the quiche to a cooling rack and allow it to cool for at least 5 minutes. Remove the sides of the tart pan and slide quiche onto a platter or cutting board. Serve warm or at room temperature. Leftovers keep well in the fridge for 2-3 days.